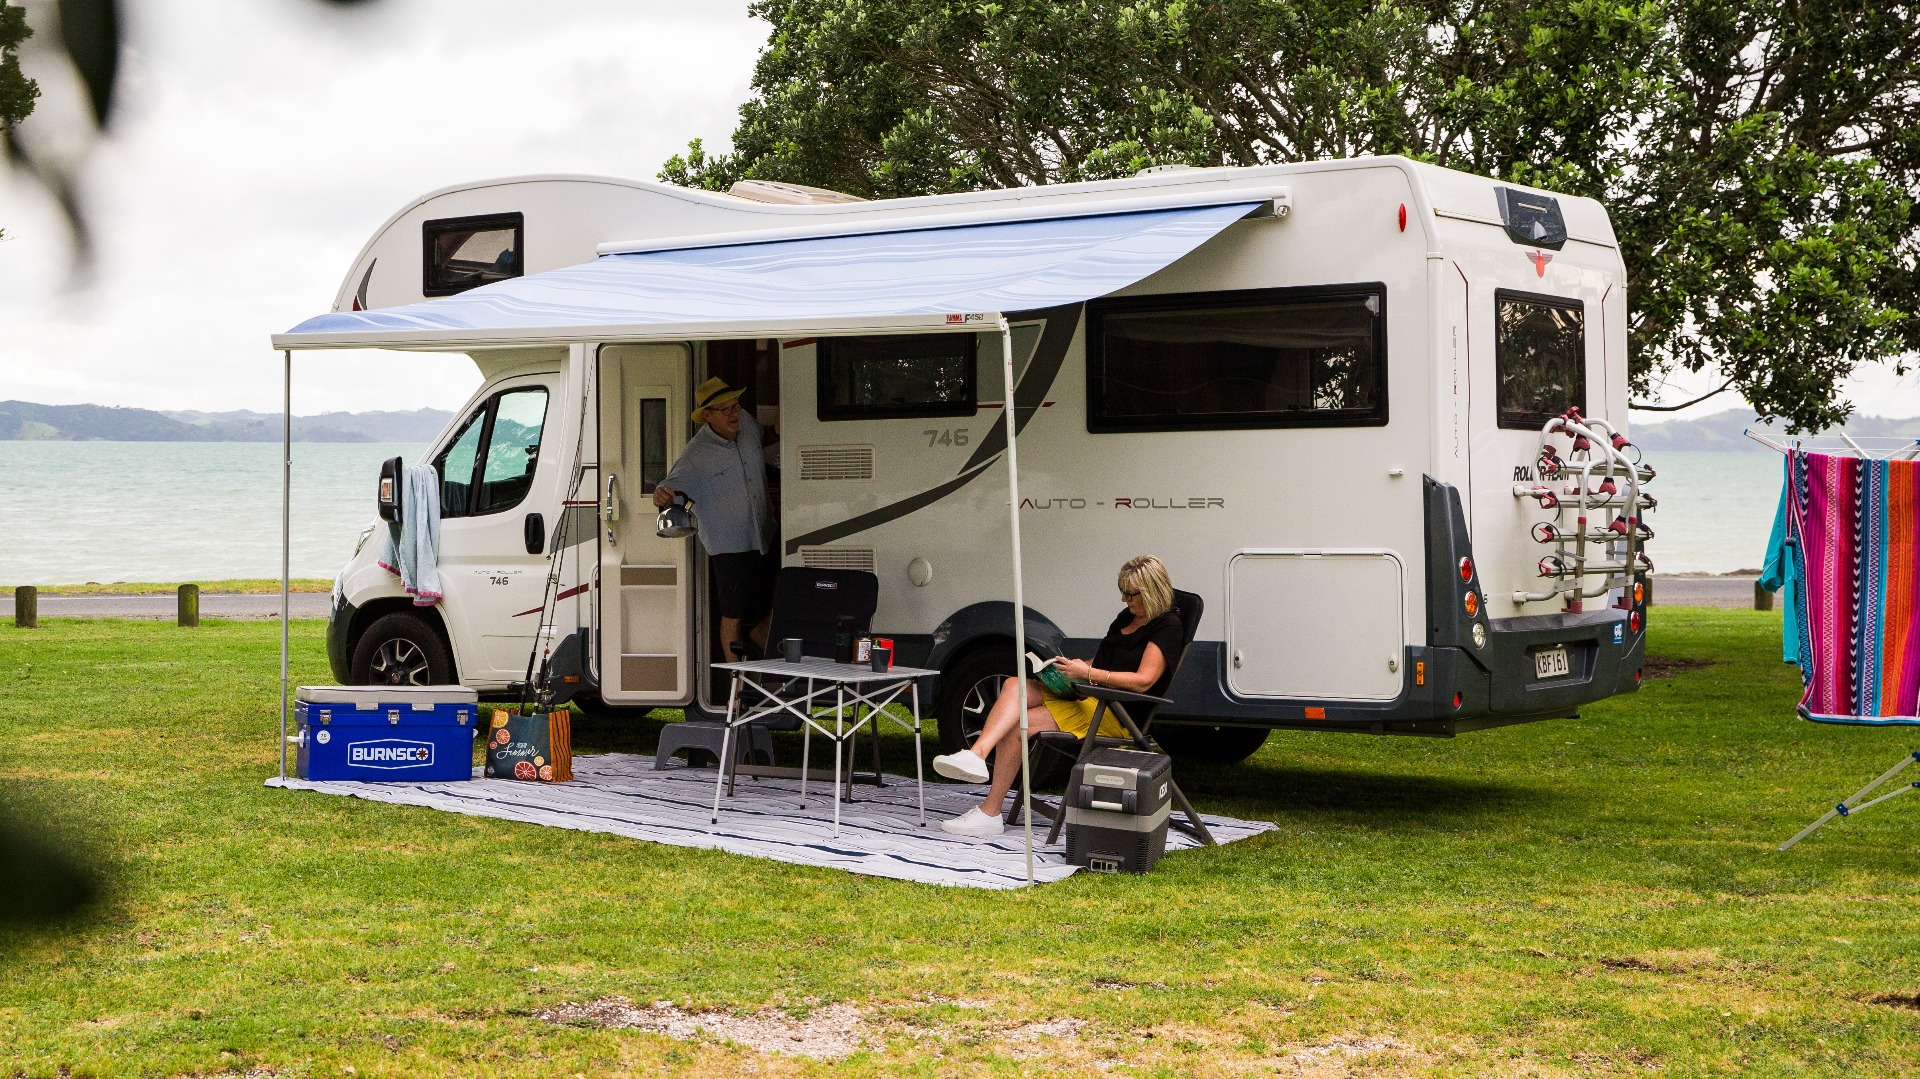
Having roof mounted vents or hatches in your motorhome is a must for comfortable living in such a confined space. They allow the release of hot air to keep internal temperatures down, they reduce condensation and in turn, reduce a lot of issues associated with moisture build up. In this article we’ll walk you through and show you how to install a roof vent in your campervan - All in 10 Easy Steps!
Have you read our Burnsco Beginner Guides - RV Ventilation write up yet?! Have a look there for the in’s and out’s of campervan ventilation.
Overview
It can be a bit nerve-racking whenever you play around on the roof of your mobile home, especially when cutting big holes that have the potential to completely ruin your pride and joy. Luckily we wholeheartedly believe that anyone is capable of tackling the job, and after following the below steps, can successfully and professionally install a RV rooftop vent.
You’re going to need
There’s not too much that goes into this project. You’ll need some basic tools, most of which any regular DIYer will already have stashed out in the shed. Here’s a quick list of what’s required so you can be prepared and start the job with everything you need!
● Roof Vent
● Tape Measure
● Marker
● Drill & assorted drill bits
● Screwdriver or Impact Driver
● Handsaw or Circular Saw
● Assorted screws
● Jigsaw or Angle Grinder
● Metal File
● Solvent or Degreaser
● Rag
● Metal primer
● Paint brush
● Timber for frame
● Clamps
● Sealant/Adhesive/Silicone as recommended
● Caulking gun
● Electrical wire (if installing a powered vent)
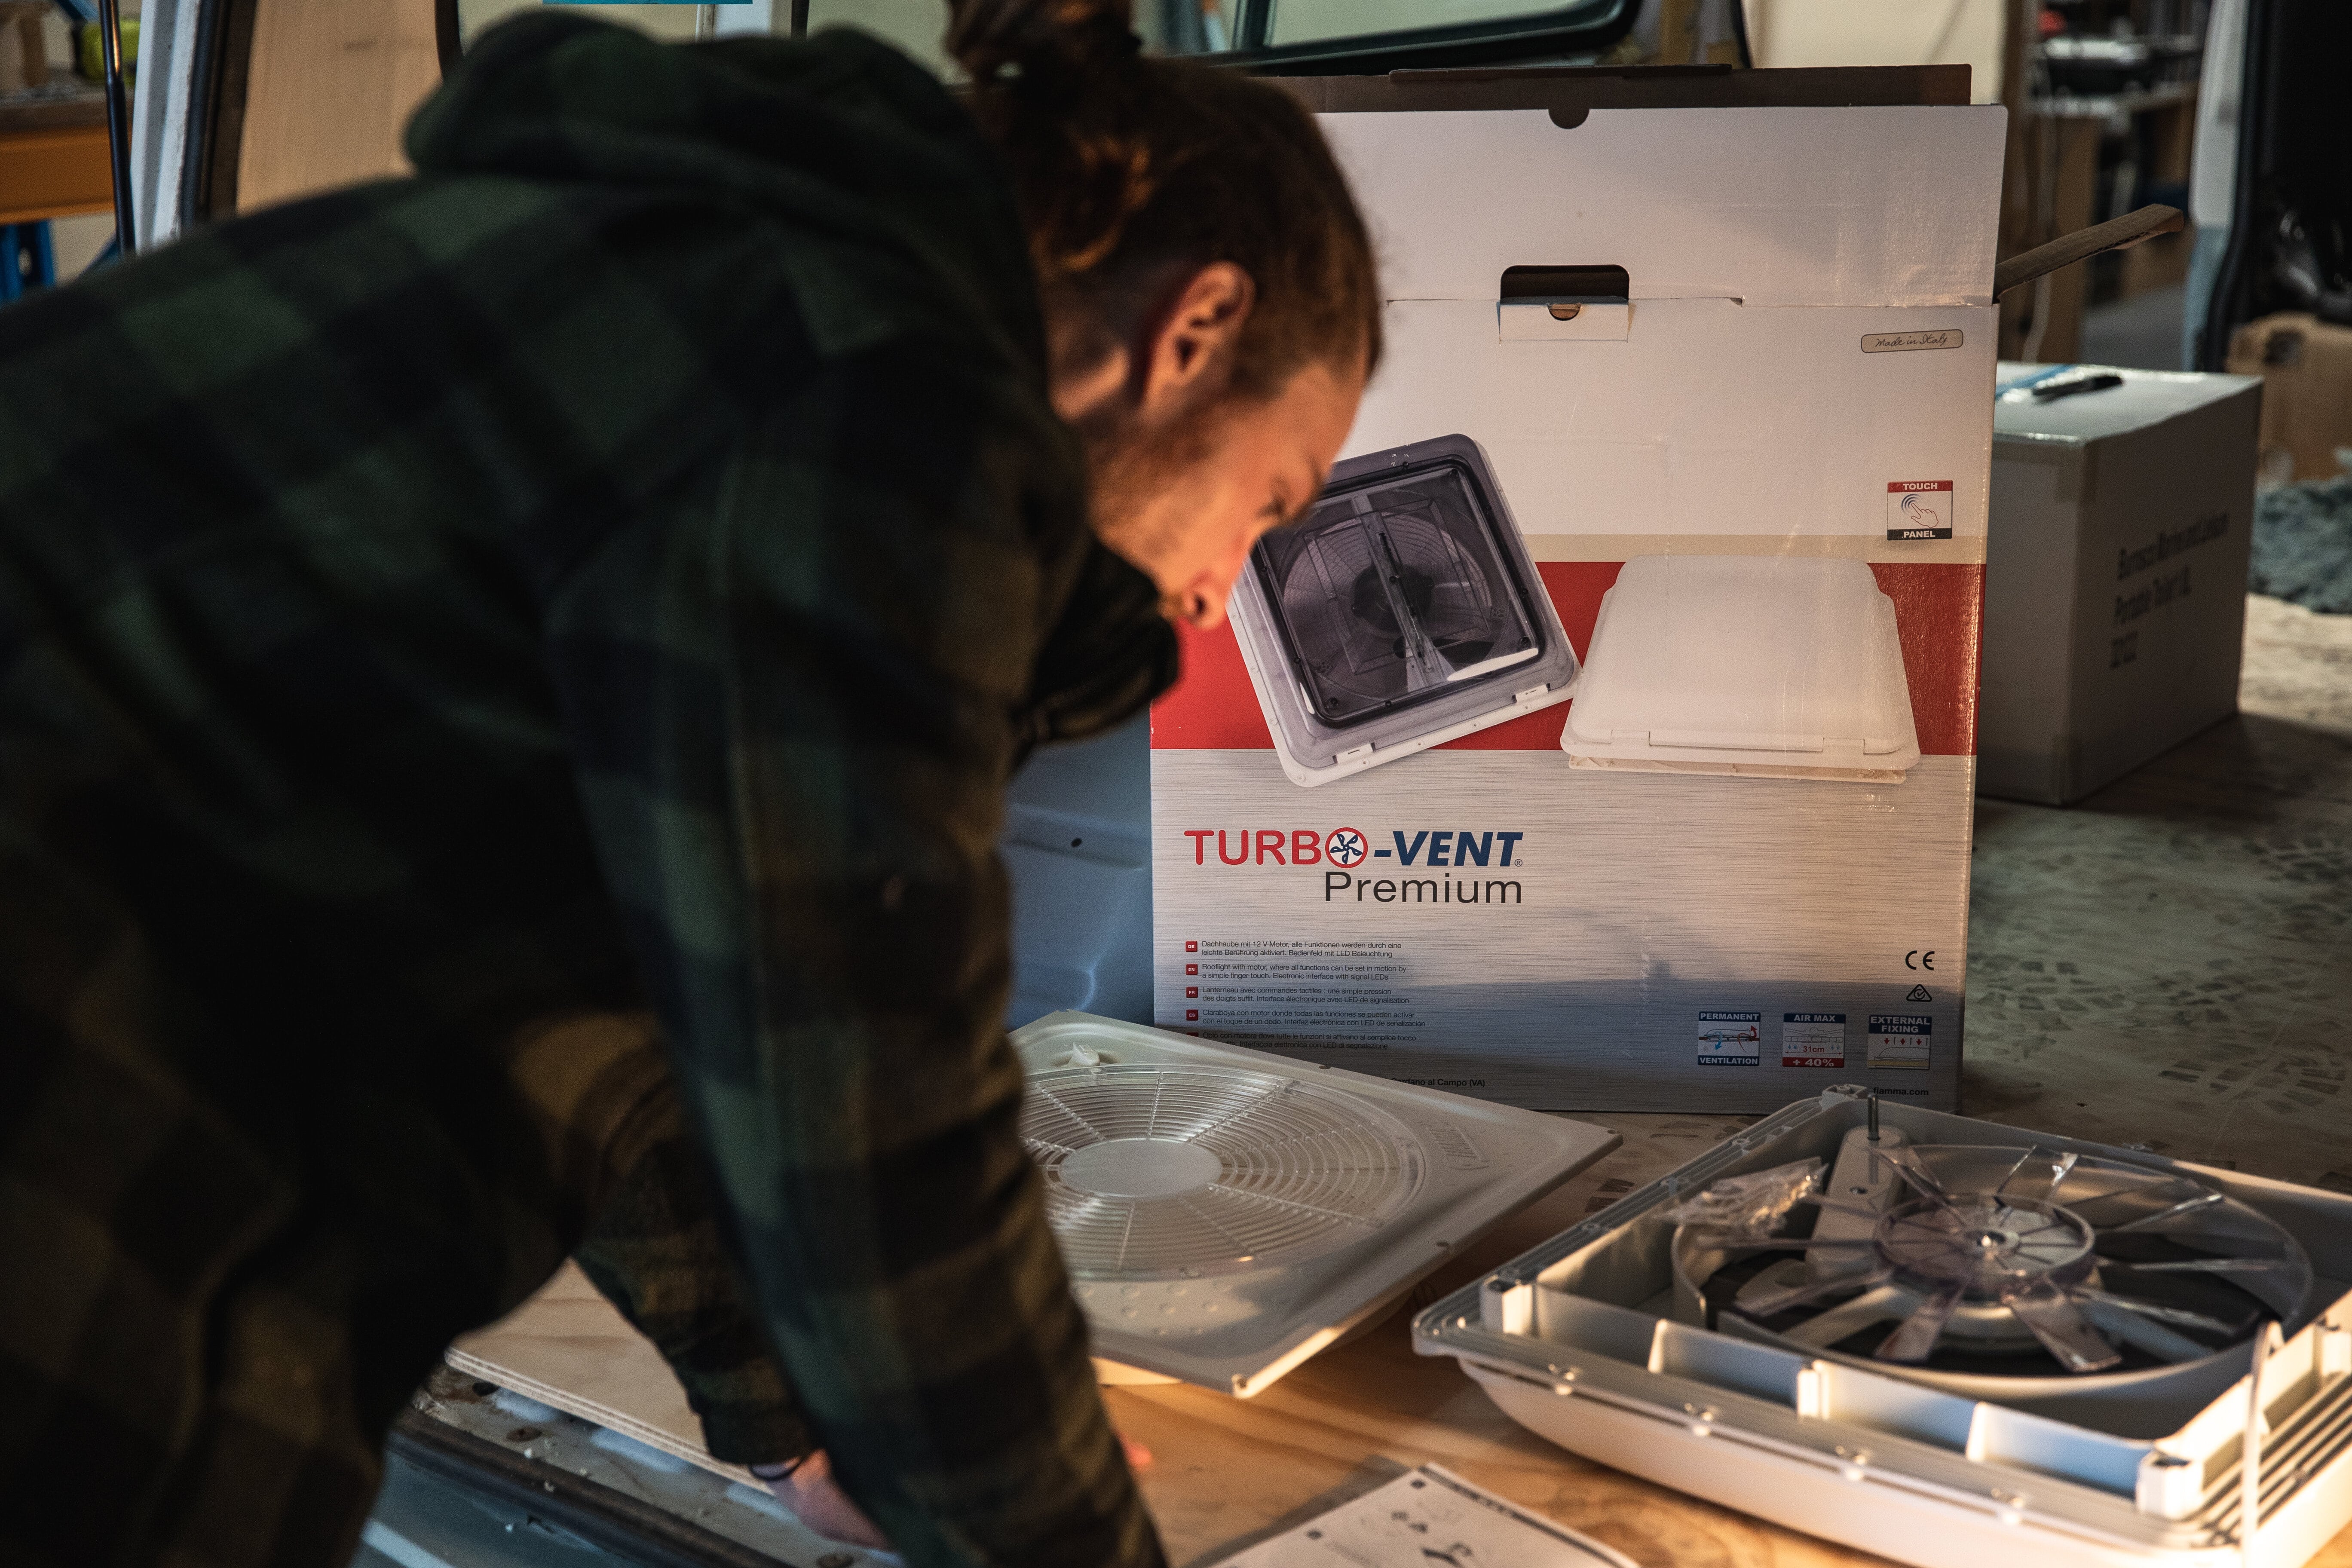
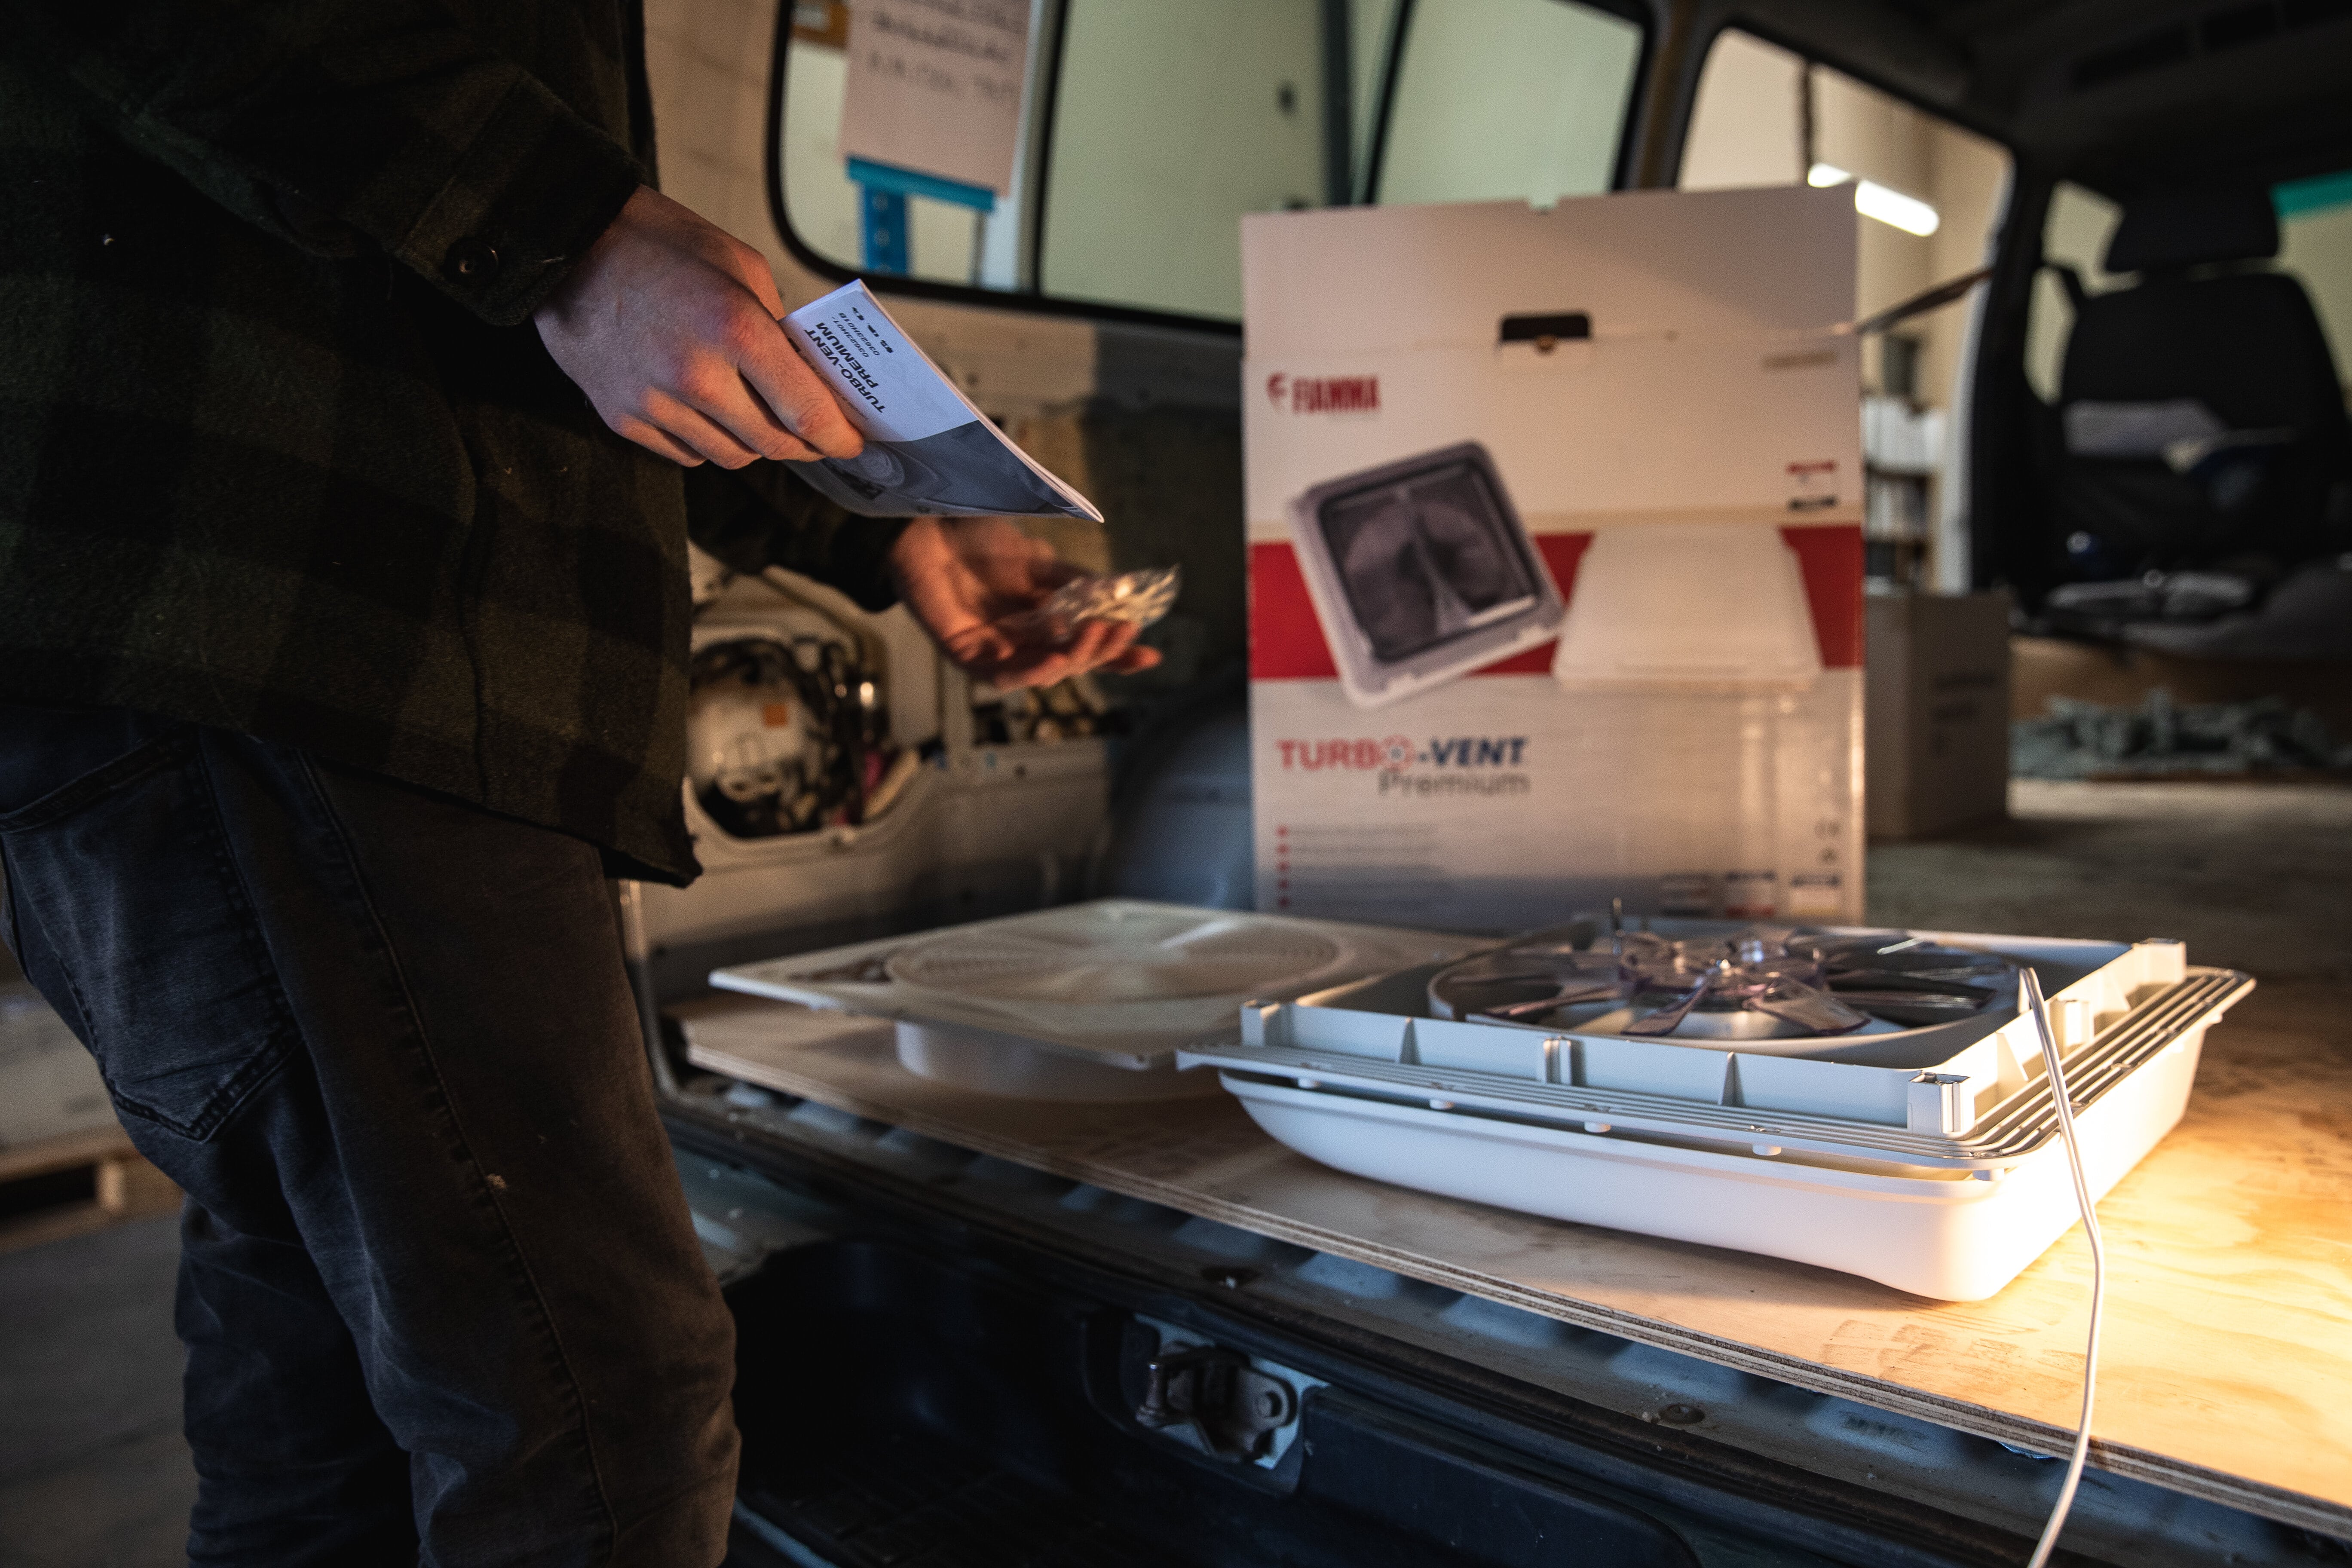
Note: The specific vent we’re installing in this guide is the FIAMMA TURBO VENT. While there may be differences in the installation method of each brand and type, the same basic principles should apply to all.
Step 1: Van Roof Vent Location
There are a few factors that go into determining exactly where you should put a roof vent on your camper. The first and most obvious place is to position it above the kitchen/cooking area as this is where a lot of heat, odour and moisture is generated. That may be a great idea, but what is the roof like above that area? Get up on the top of your camper and have a look at the surface of the roof. Ideally it would be nice and flat, but more than likely there are ribs or grooves that can make installing a roof vent that bit more tricky. What else is or will be up on your roof? Is there enough room for solar panels or roof racks? Are there any structural ribs/supports or wiring inside the ceiling that you should definitely not be slicing through? It pays to check all of these things out thoroughly before jumping in and cutting a hole!
Step 2: Making a Template and Marking the Hole
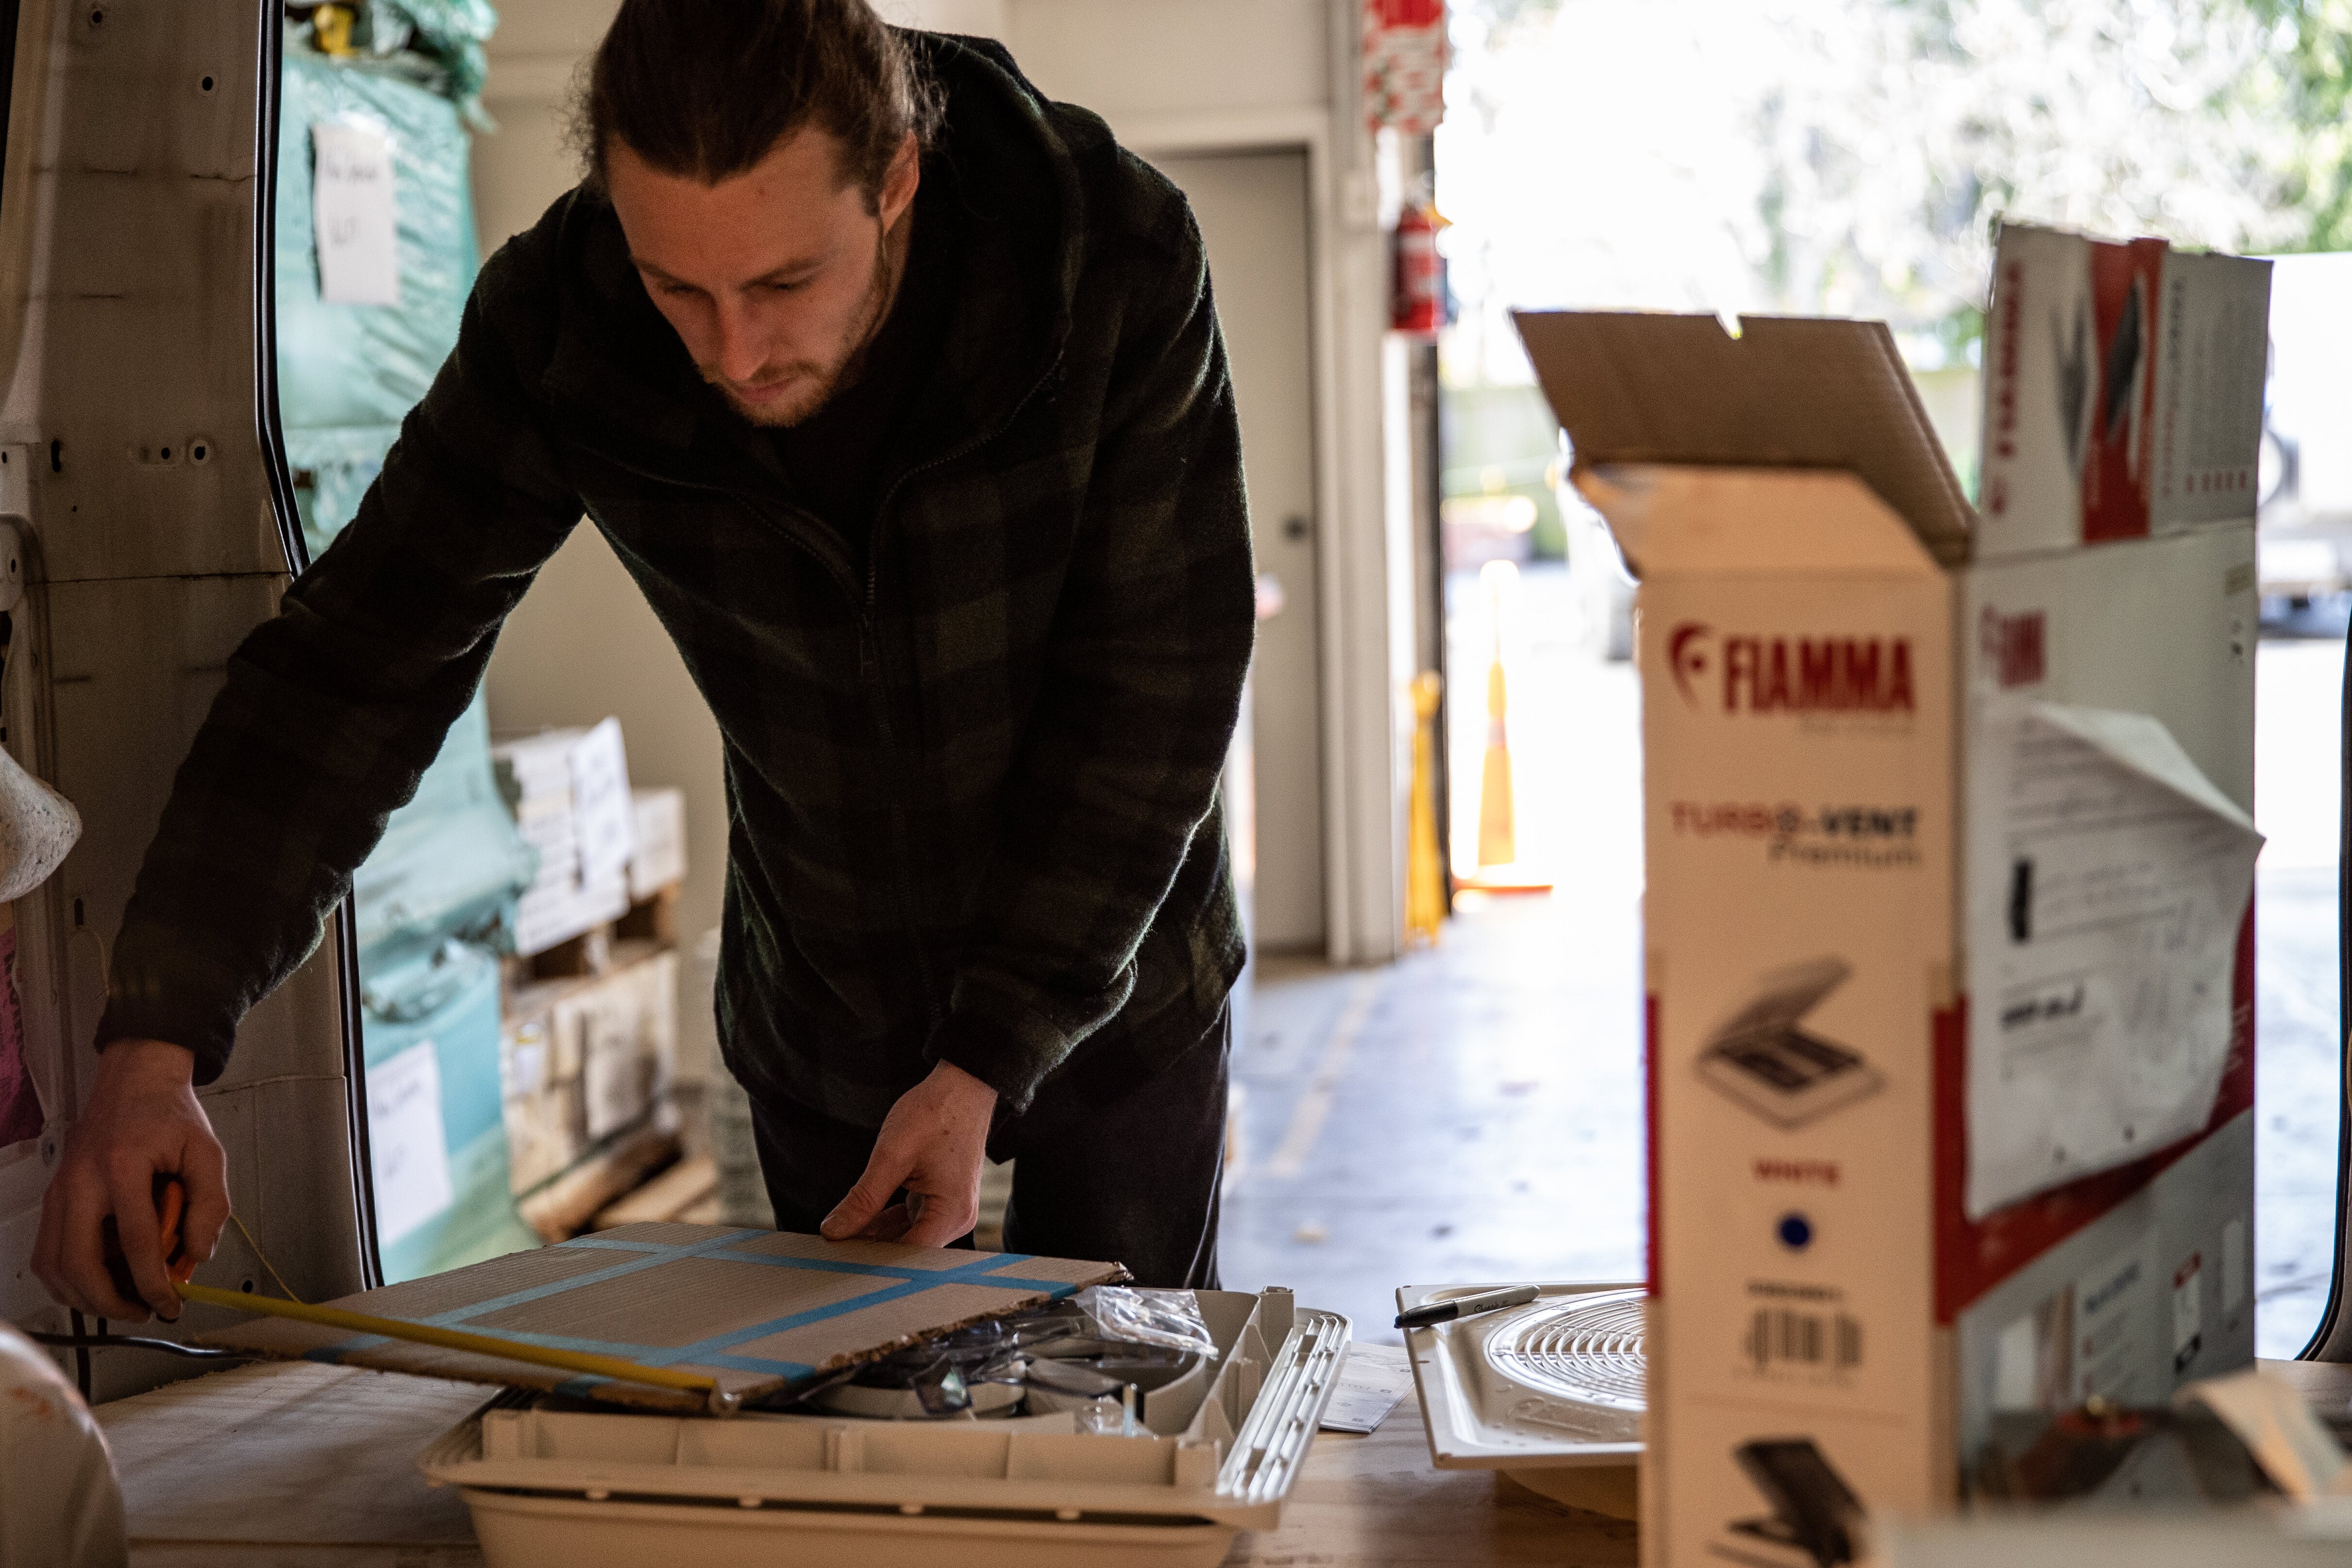
It’s extremely important that you get the hole cut out exactly where you want, and exactly the right size. You really do only get one shot (two if you’re bloody lucky!) to get it right, so we recommend using a template to mark the perfect cutout. Refer to the install manual to find the size needed and create a cardboard template to those dimensions - in this case it is 390x390mm. After double checking the size of the template against the actual unit, the cutout shape can be traced onto the ceiling.
Note: In our example we’re doing this process from the inside due to the roof deck mounted on the top of the van. It may very well be easier to do this process from the outside in your situation, provided you know what you’re cutting into underneath!
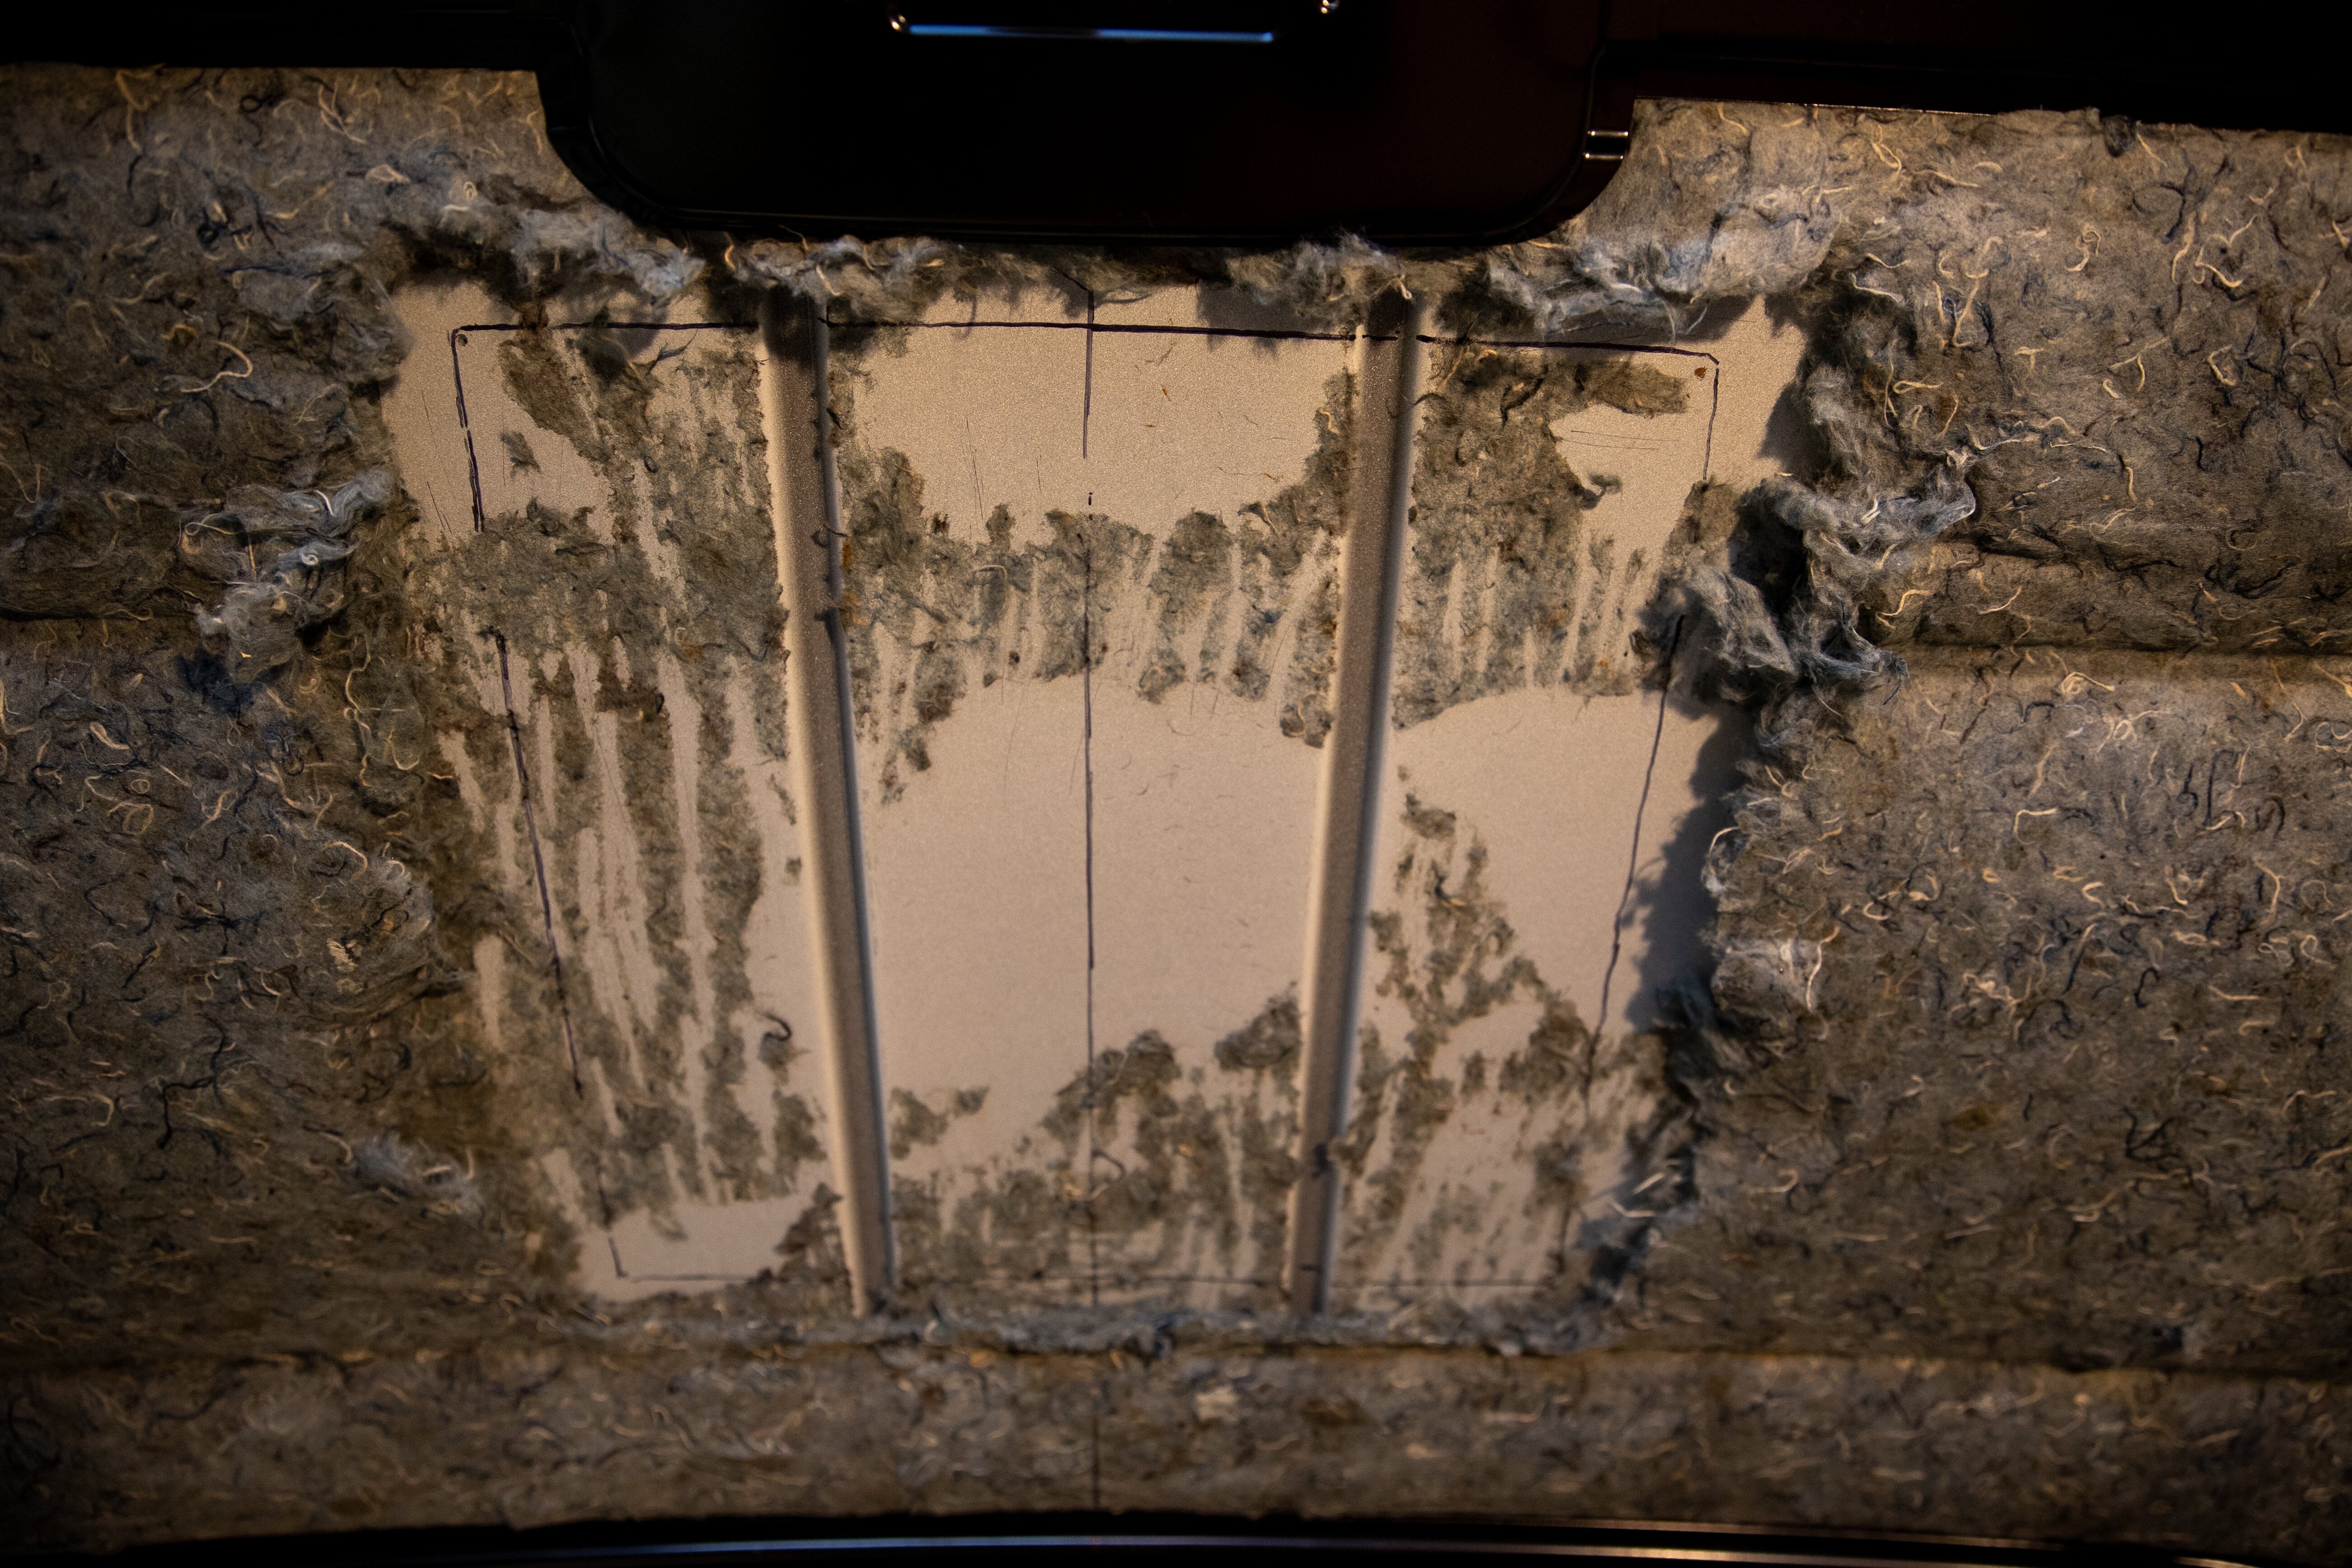
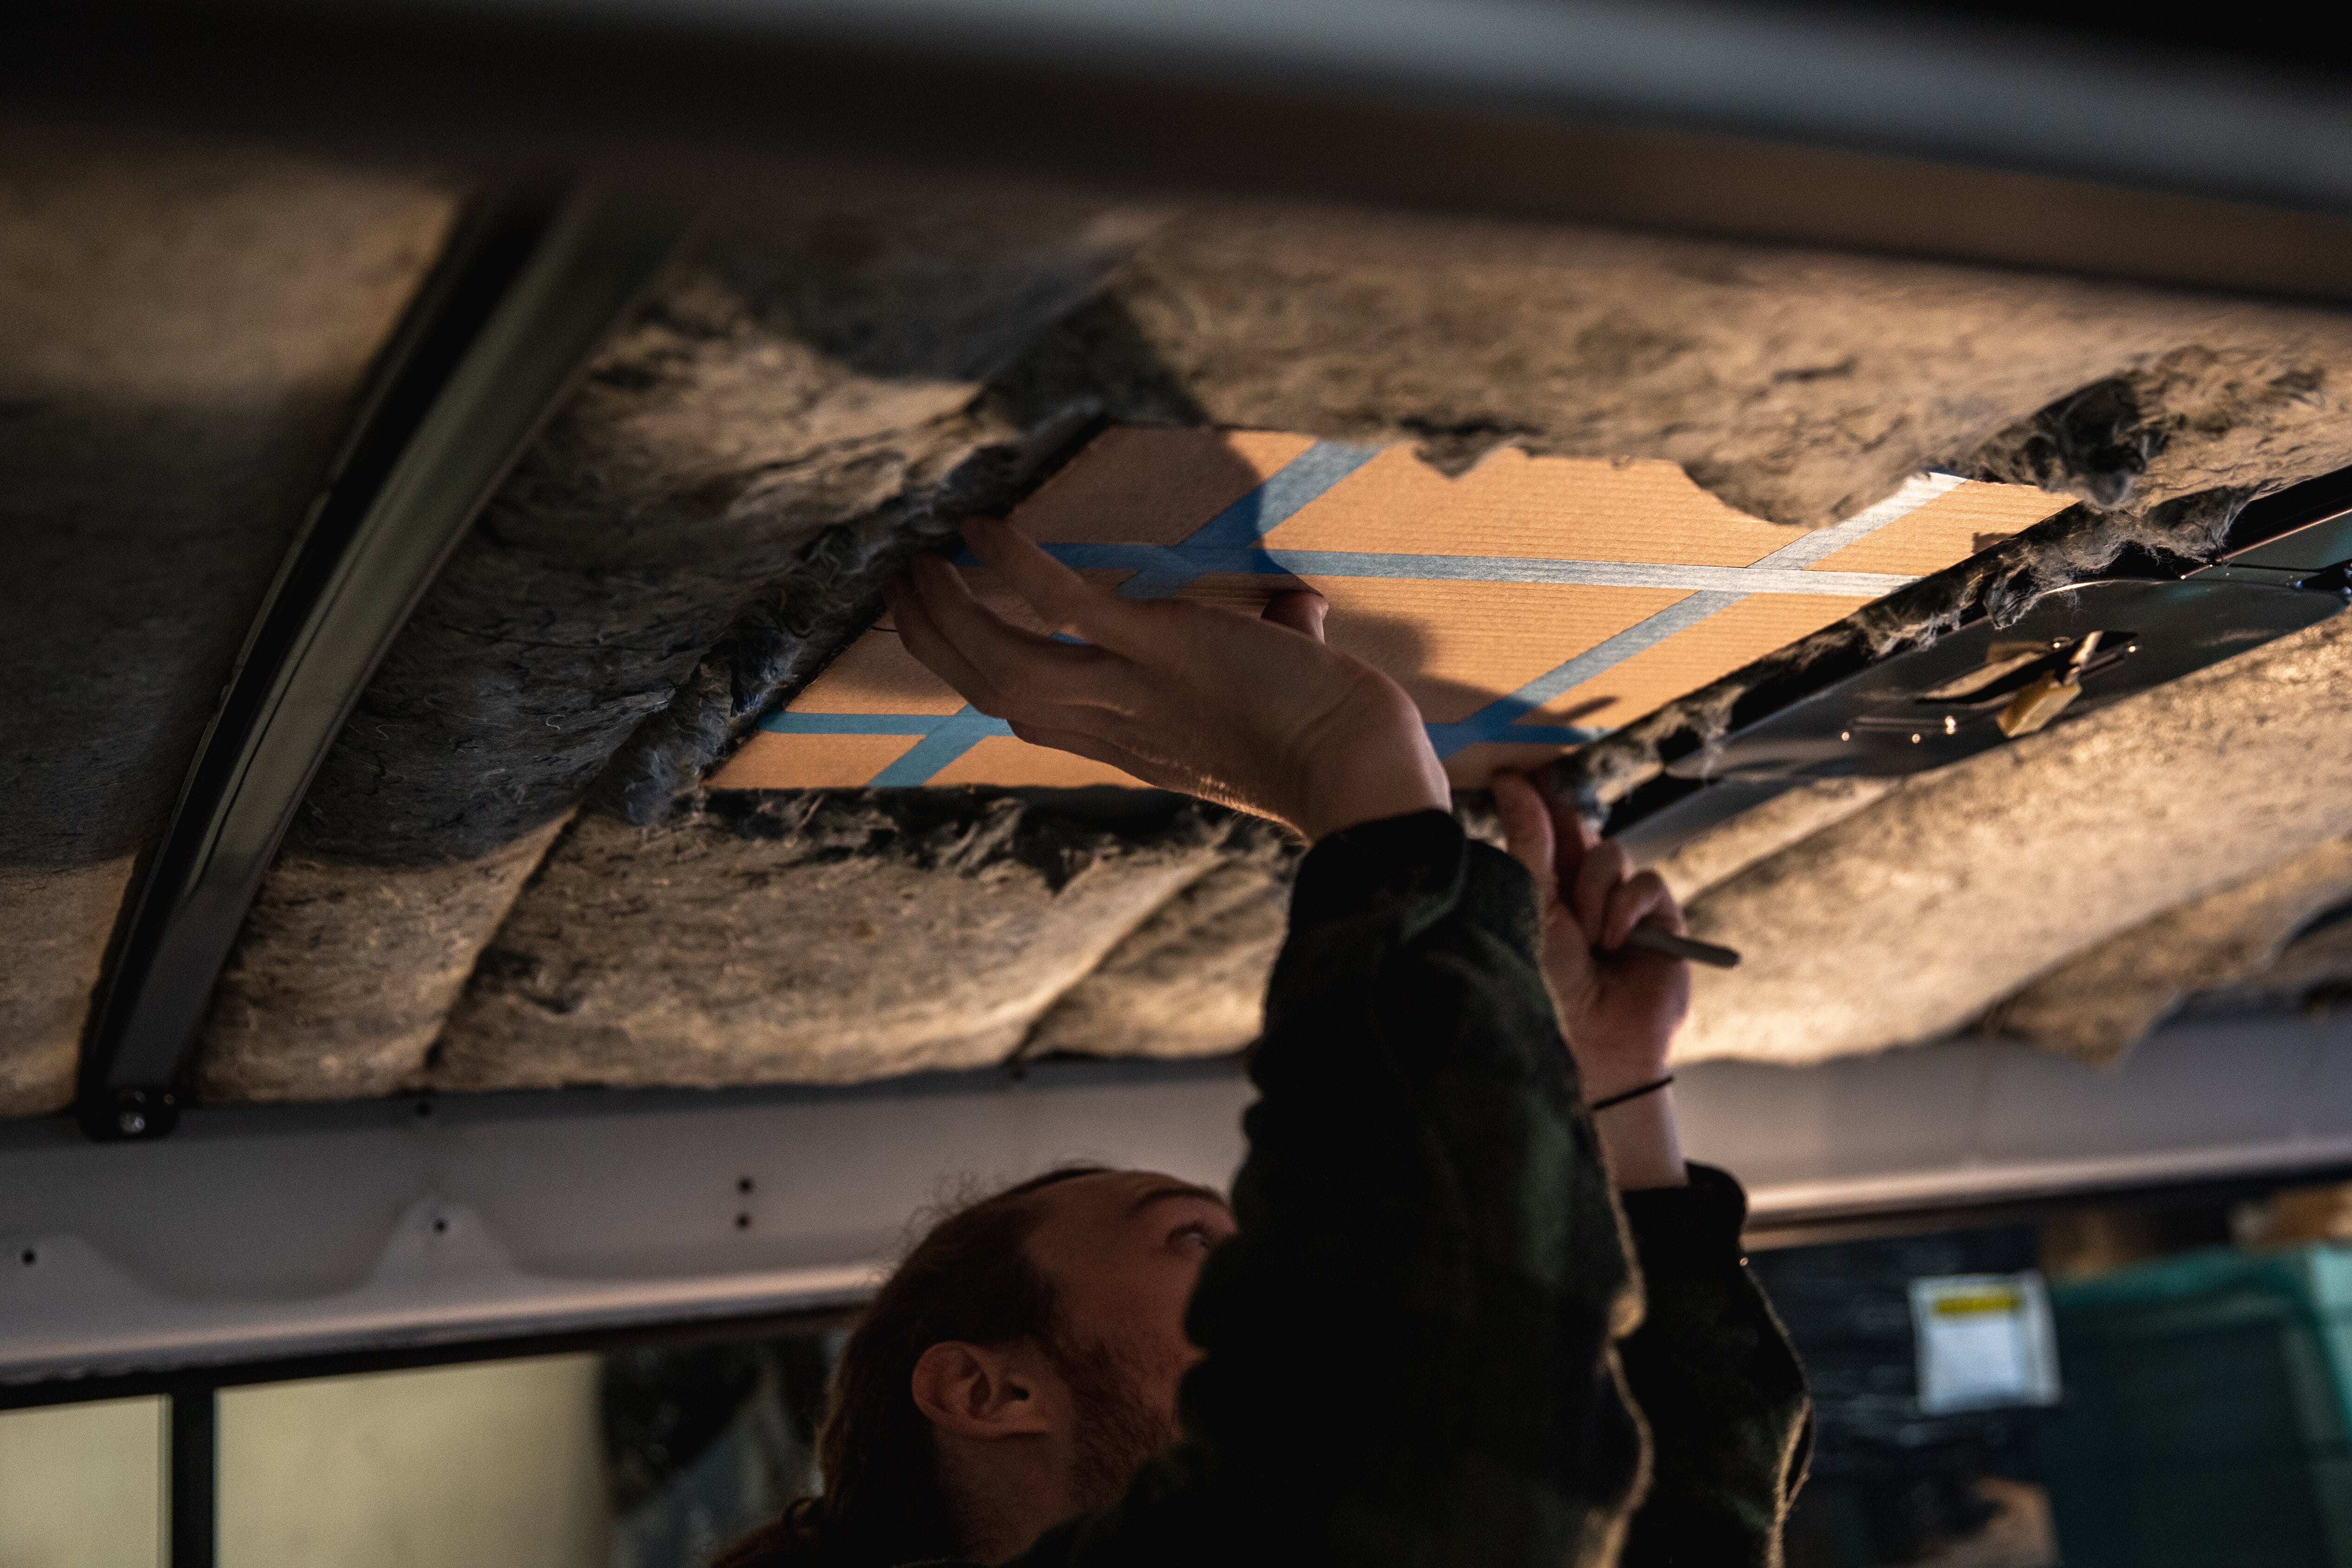
First clear a space in the roof lining - This stuff looks like it could ignite with the smallest spark so it’s best to keep it well clear of the cutting area. Mark the centreline of the van and the centre point on each edge of the template. This way you can line up the marks and get the vent somewhat square! It can be difficult to get it perfectly centred, so use straight edges or lines in the van as reference points to align the template with. Hold the template against the roof firmly and trace the outline with a marker.
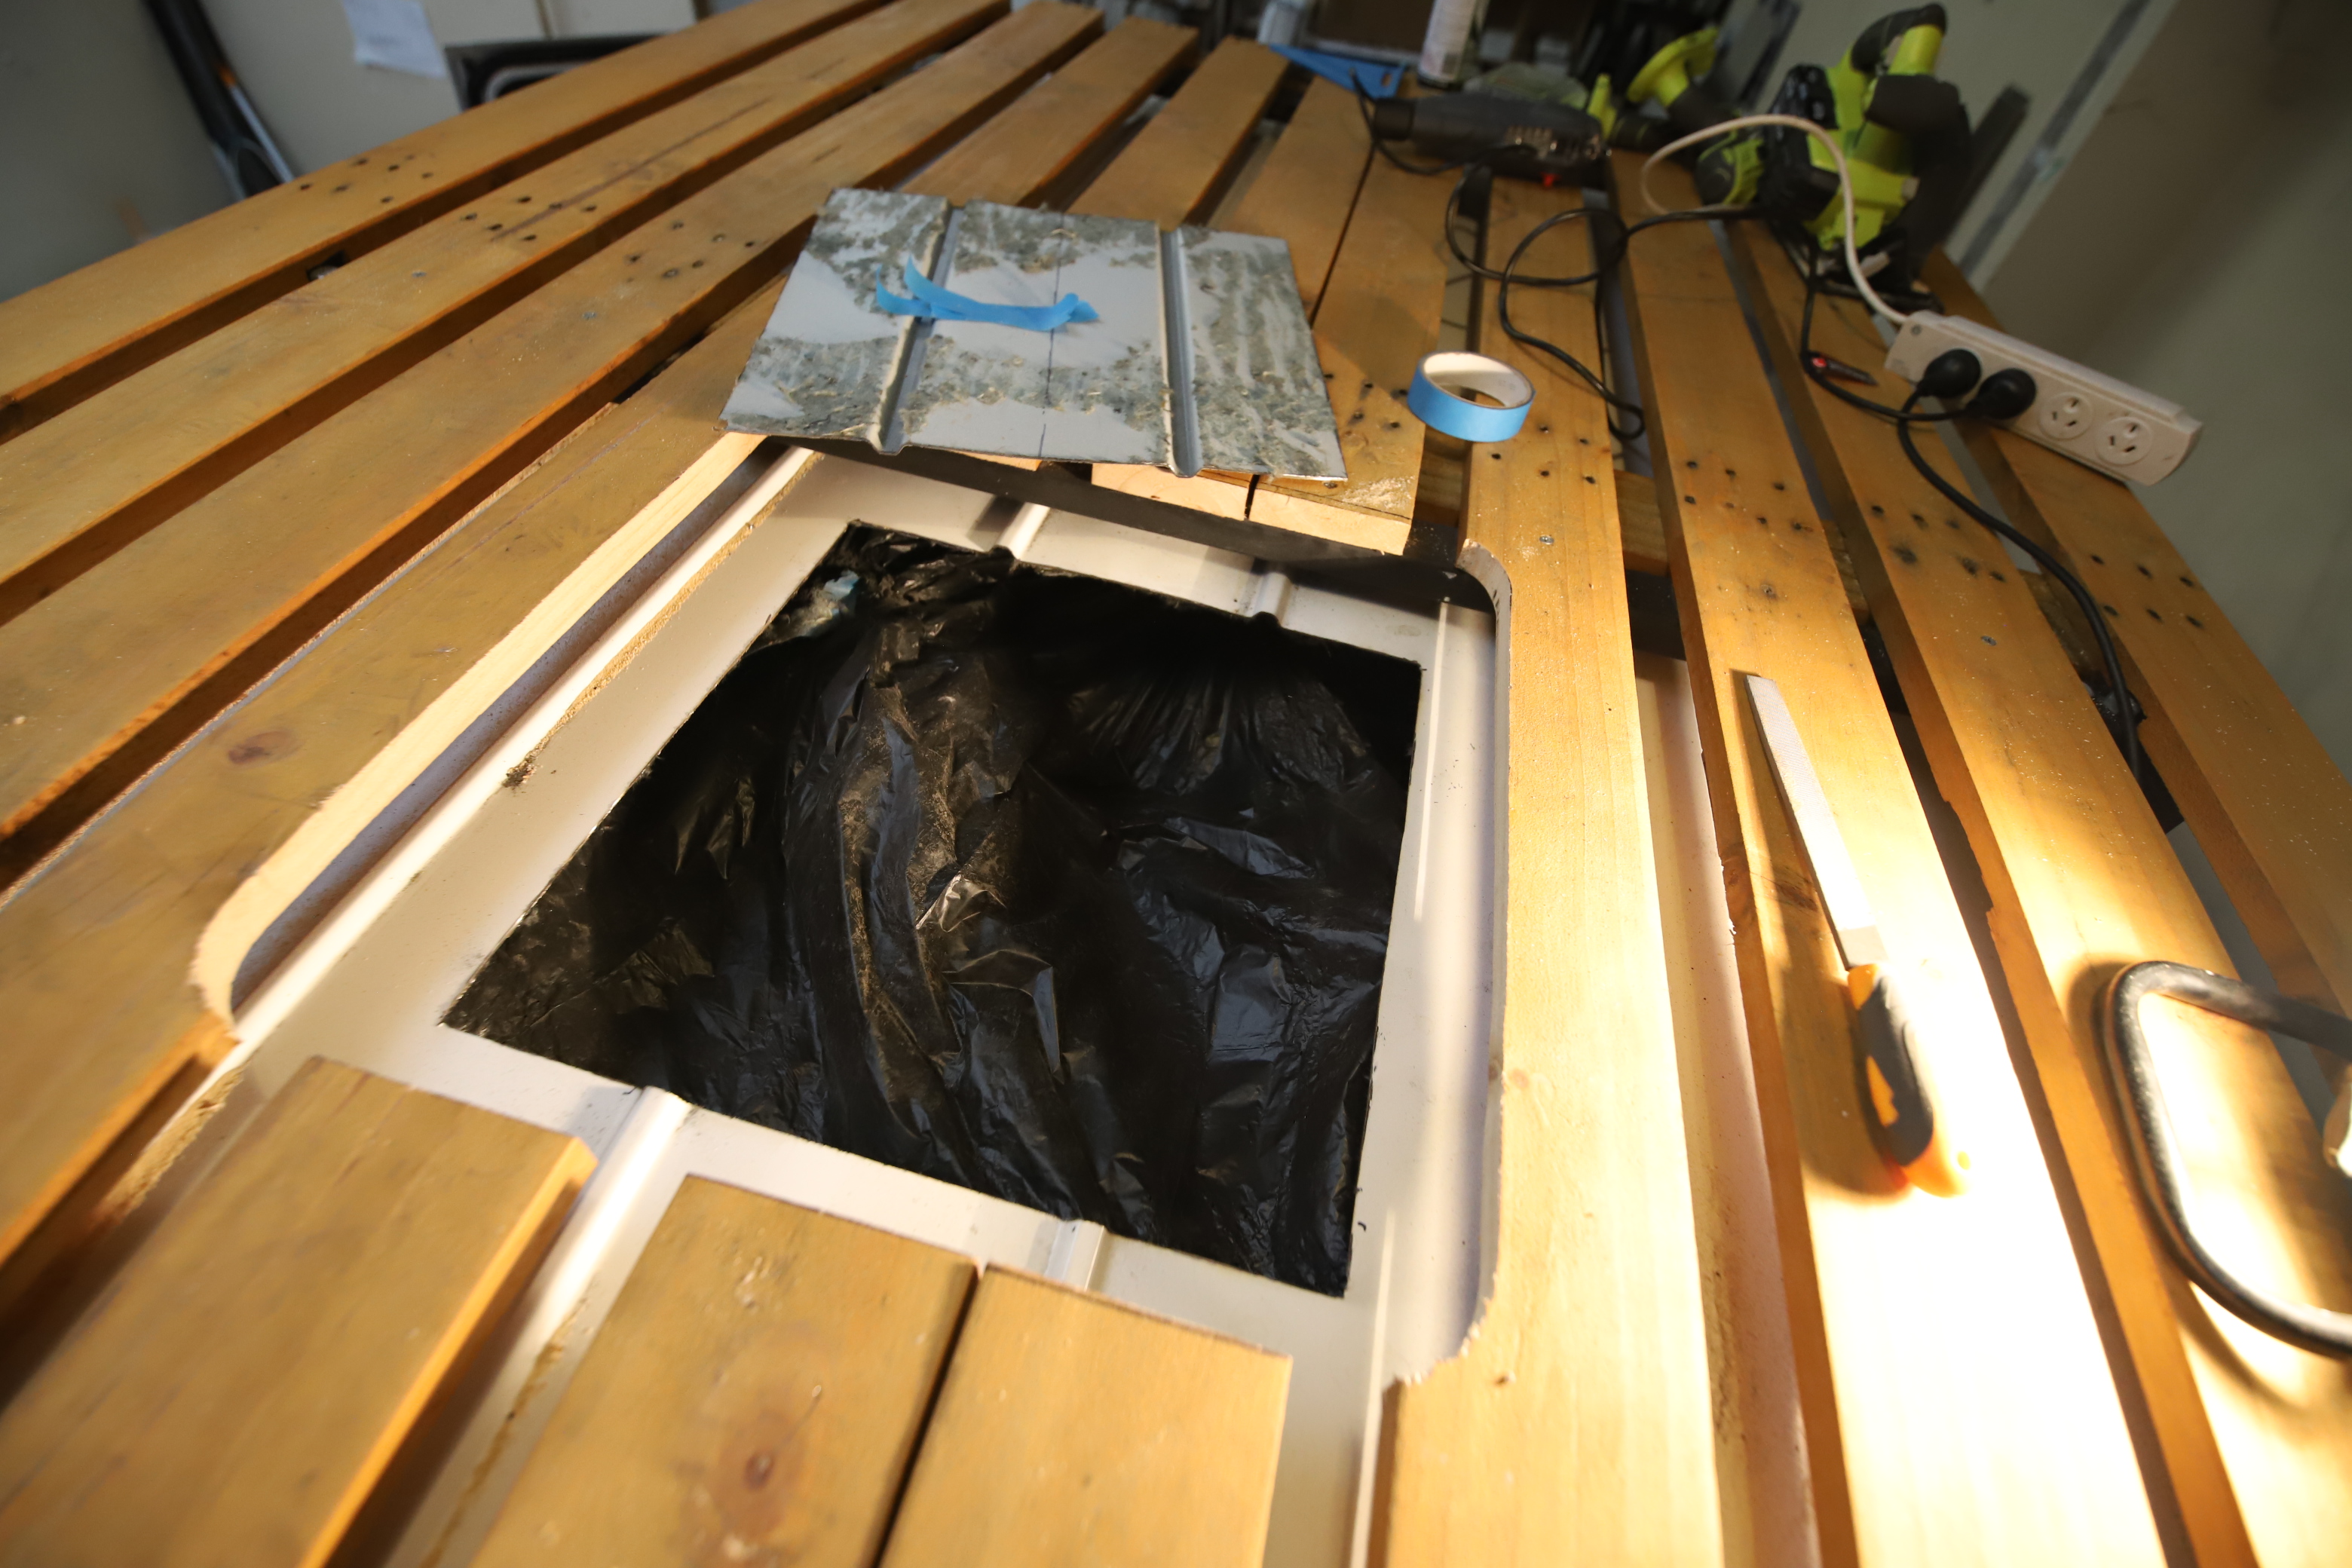
Step 3: Cutting the Ceiling
Here comes the terrifyingly fun part! If you haven’t already, it pays to do that one last check before you commit to the cut! Start by drilling a small pilot hole in each corner, then using a drill-bit just larger than your jigsaw blade, drill a larger hole in each corner. For our particular application this now gave the exact location of the cutout from up on the roof, so the roofdeck could be trimmed in the right spot, and the dots could be joined to perfectly outline where our cut needs to be.
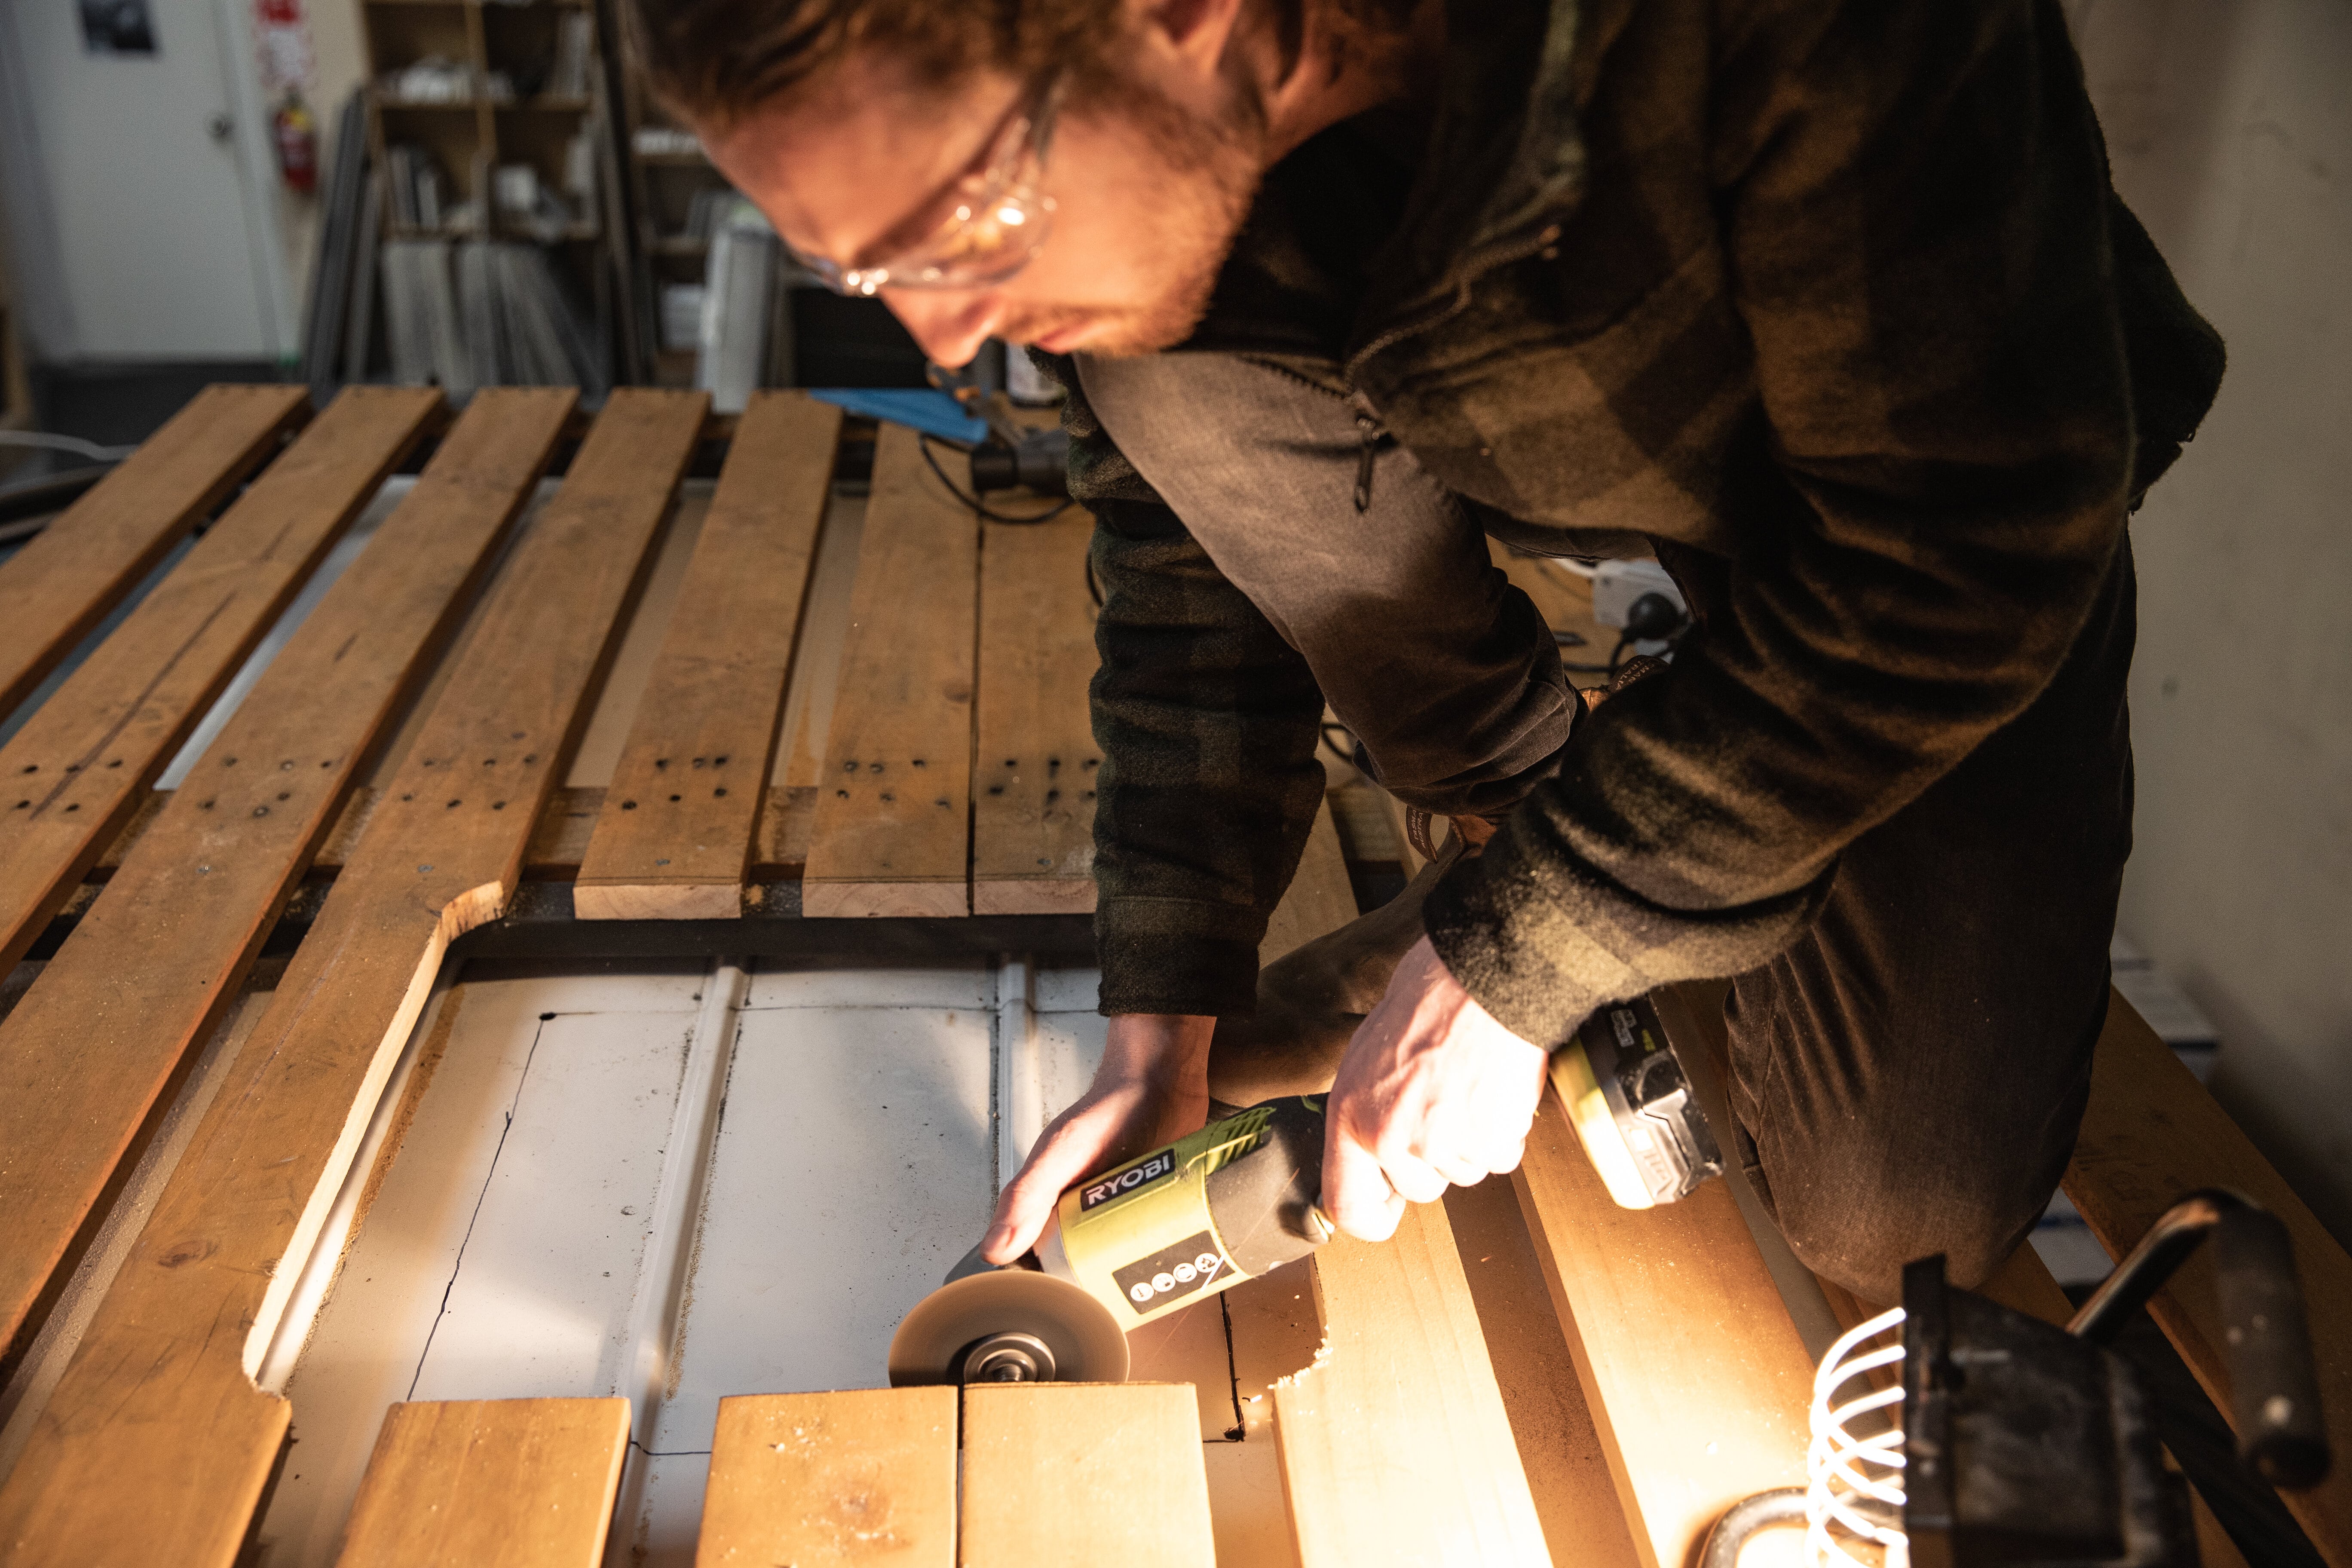
Now we mentioned before about drilling holes to fit a jigsaw blade, and this is the tool that’s normally used to make the cut. In our particular situation having the roof deck meant that only an angle grinder would fit in and cut the metal roof. Regardless of the tool you're using, take your time and be careful!
Tip: Tape up a rubbish bag to the inside of the camper to catch all the metal filings.
Step 4: Cleaning and Painting the Bare Metal
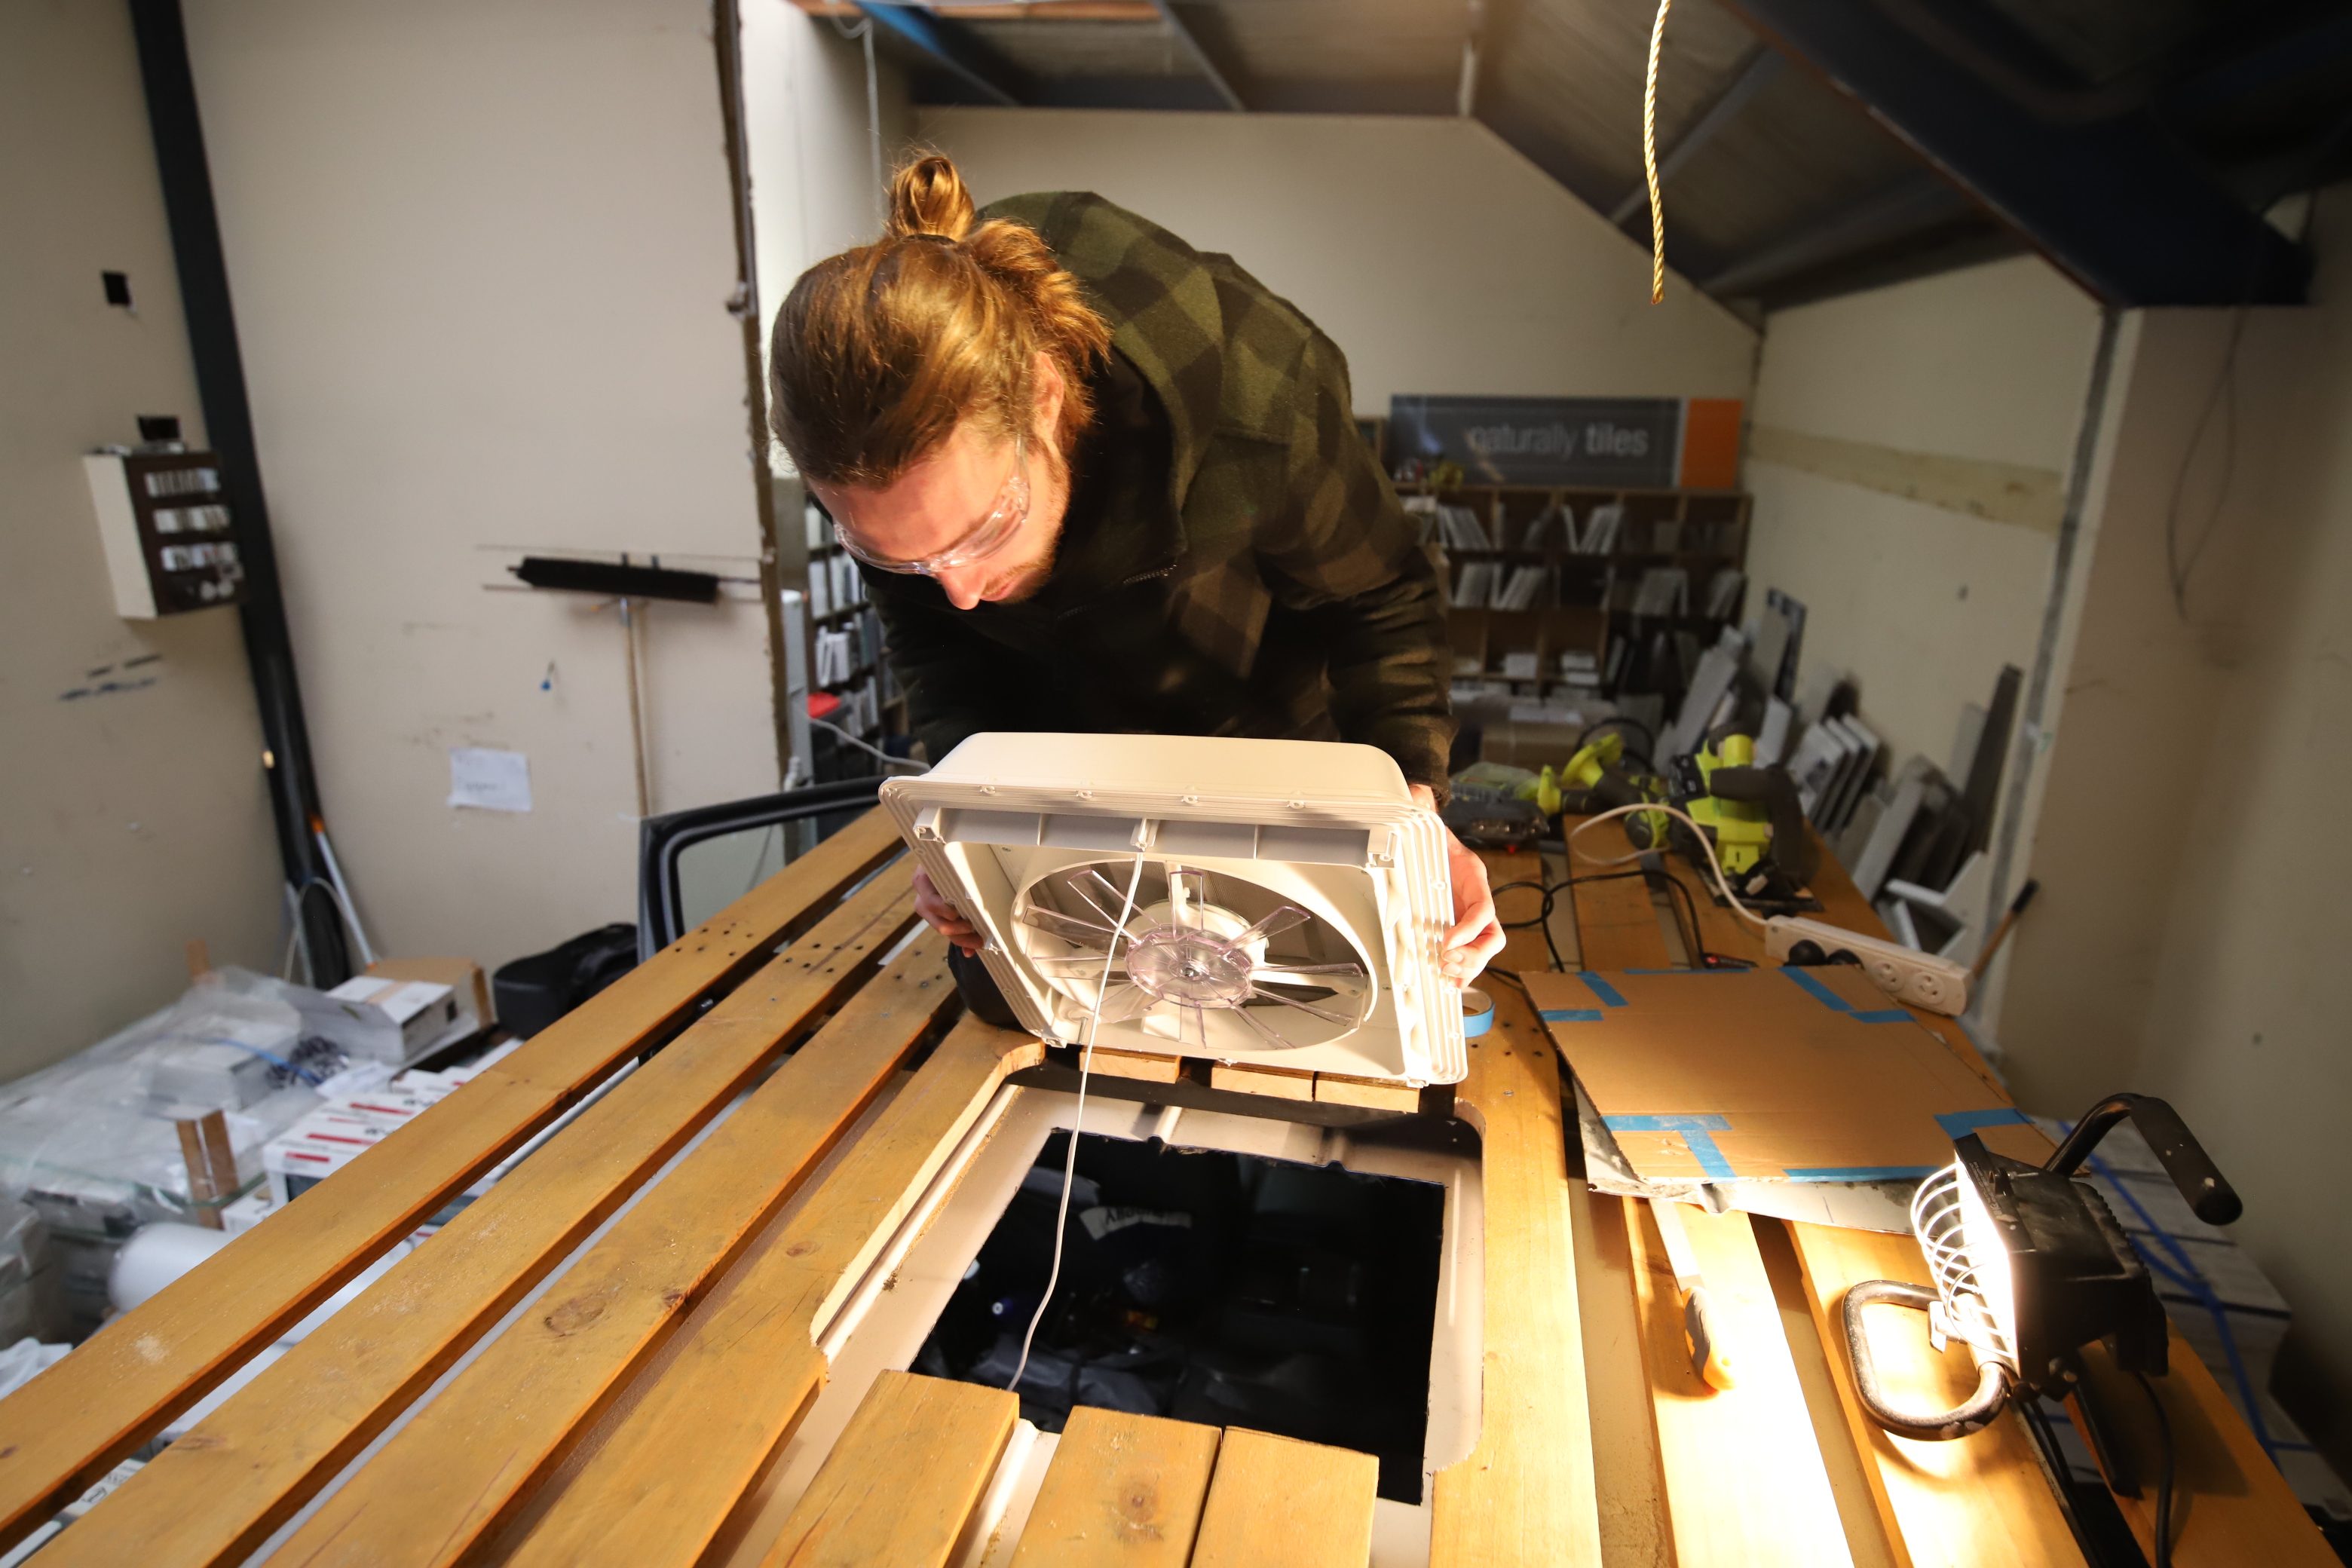
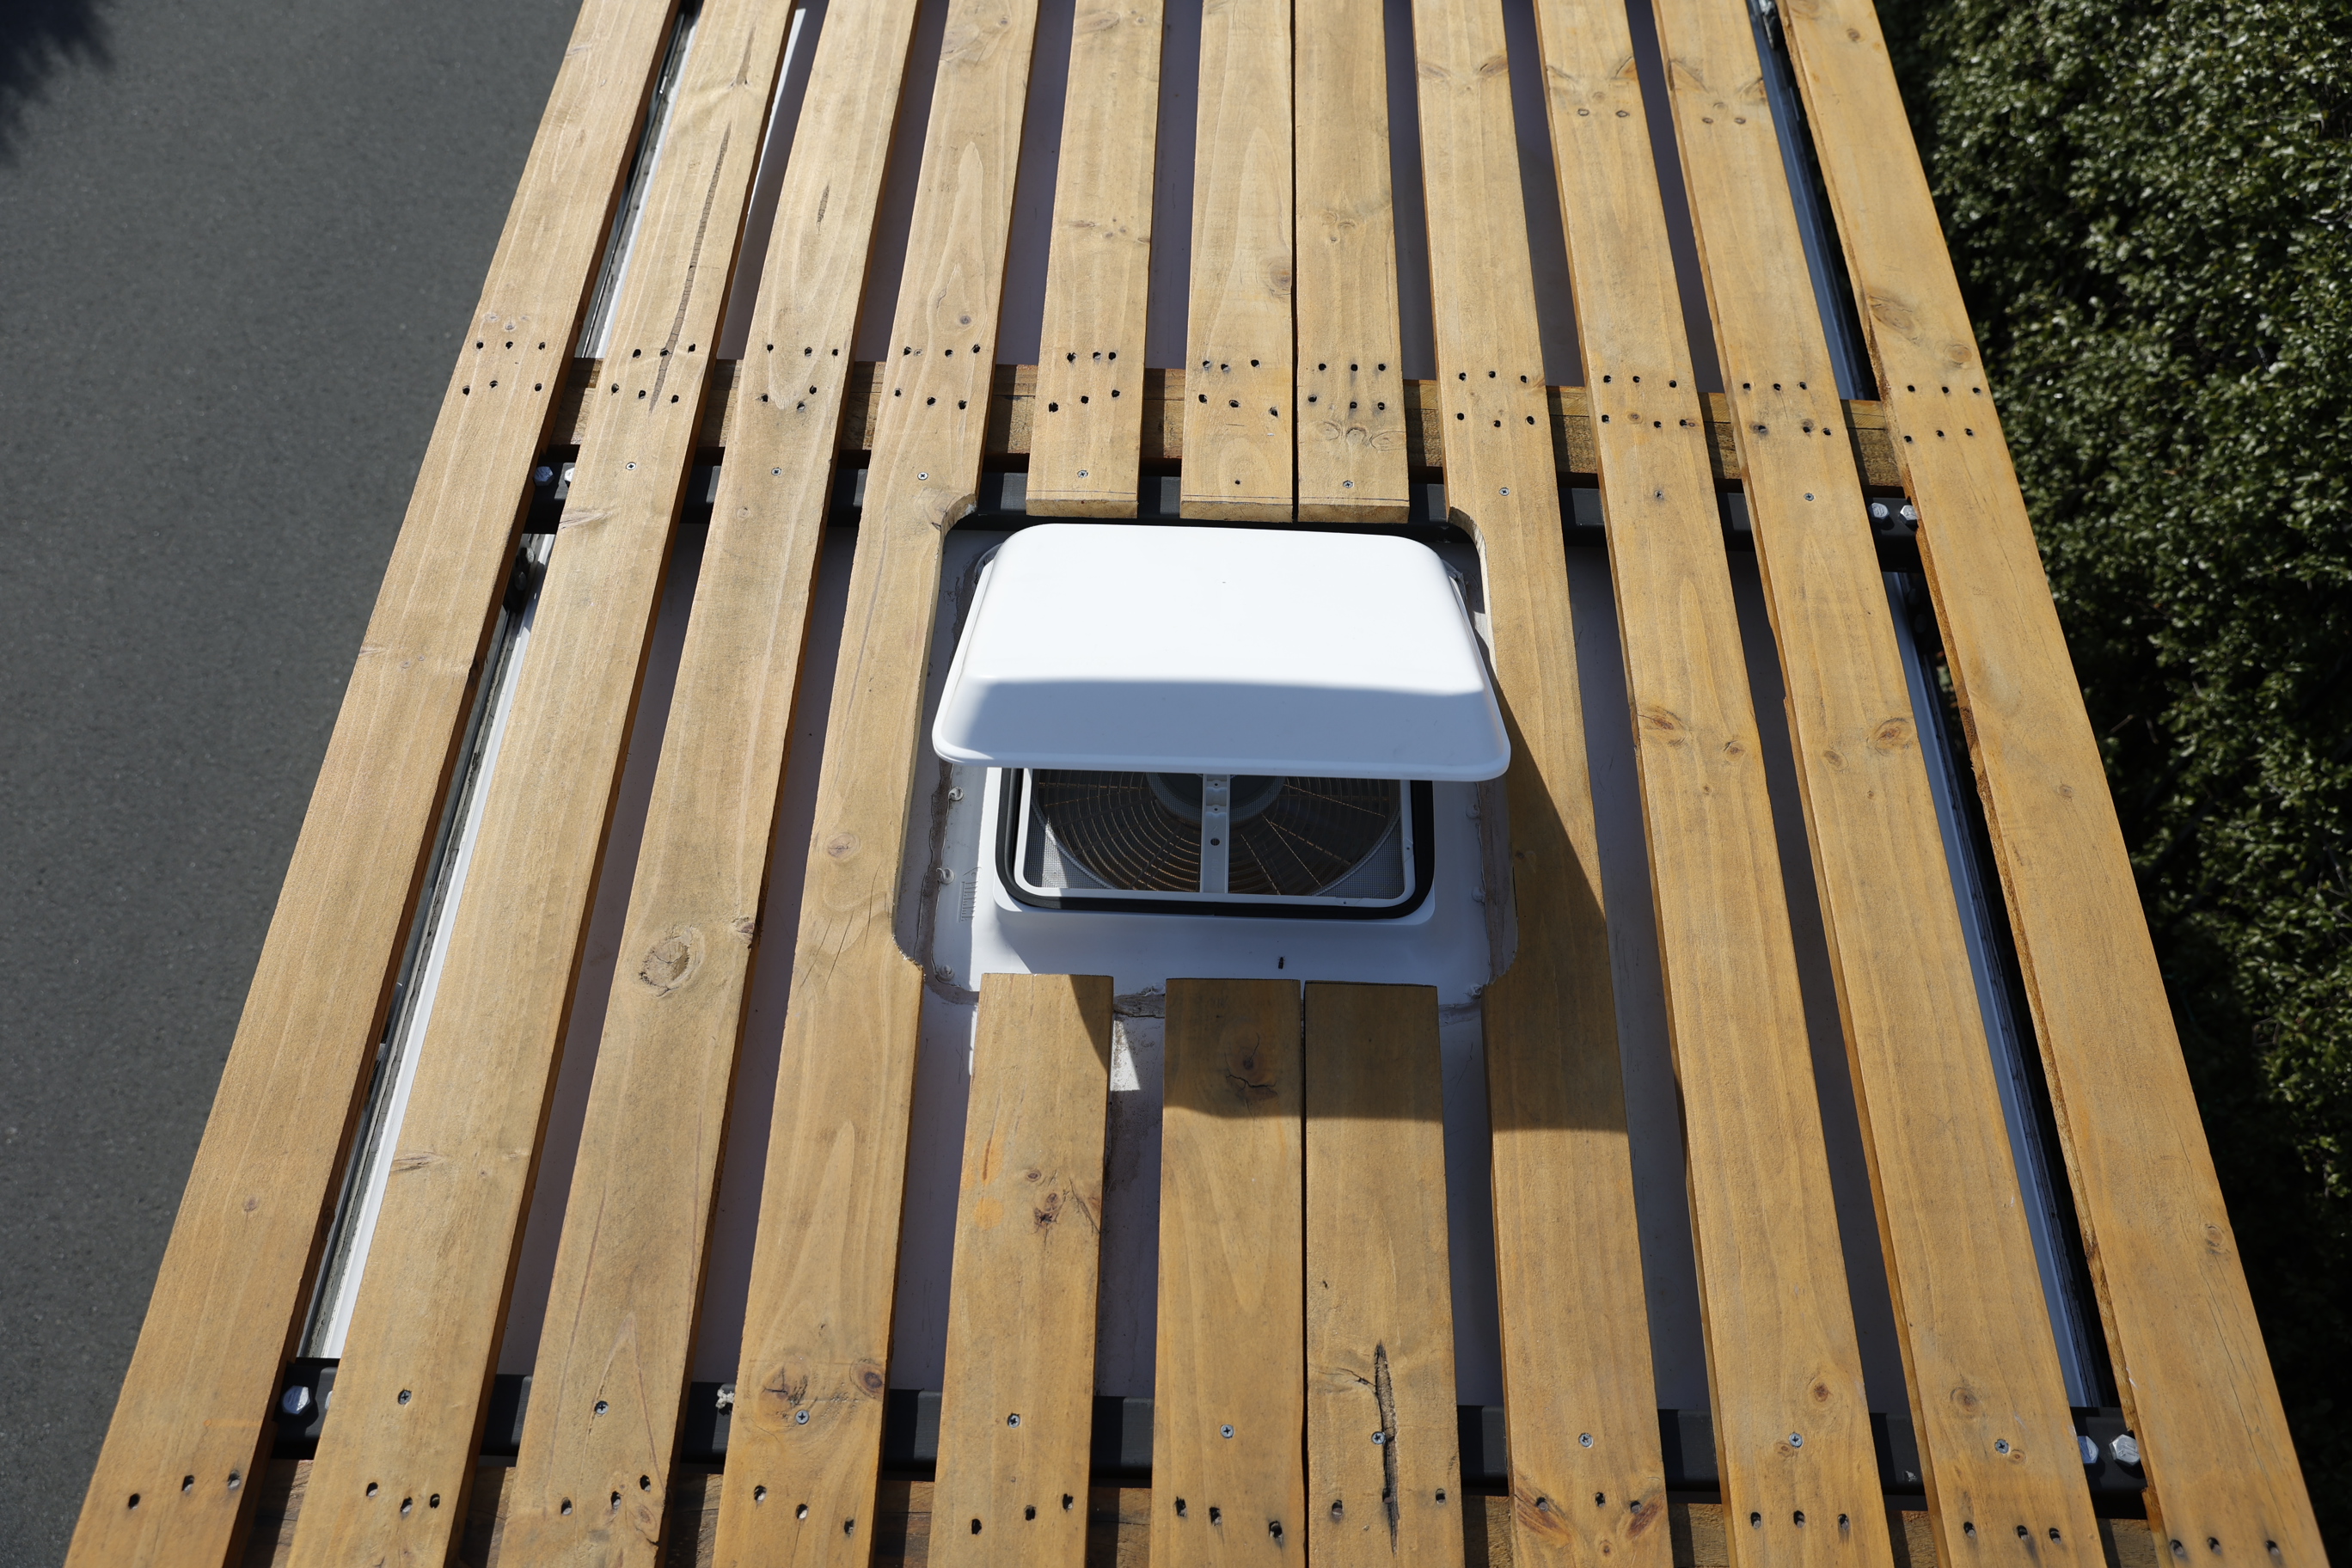
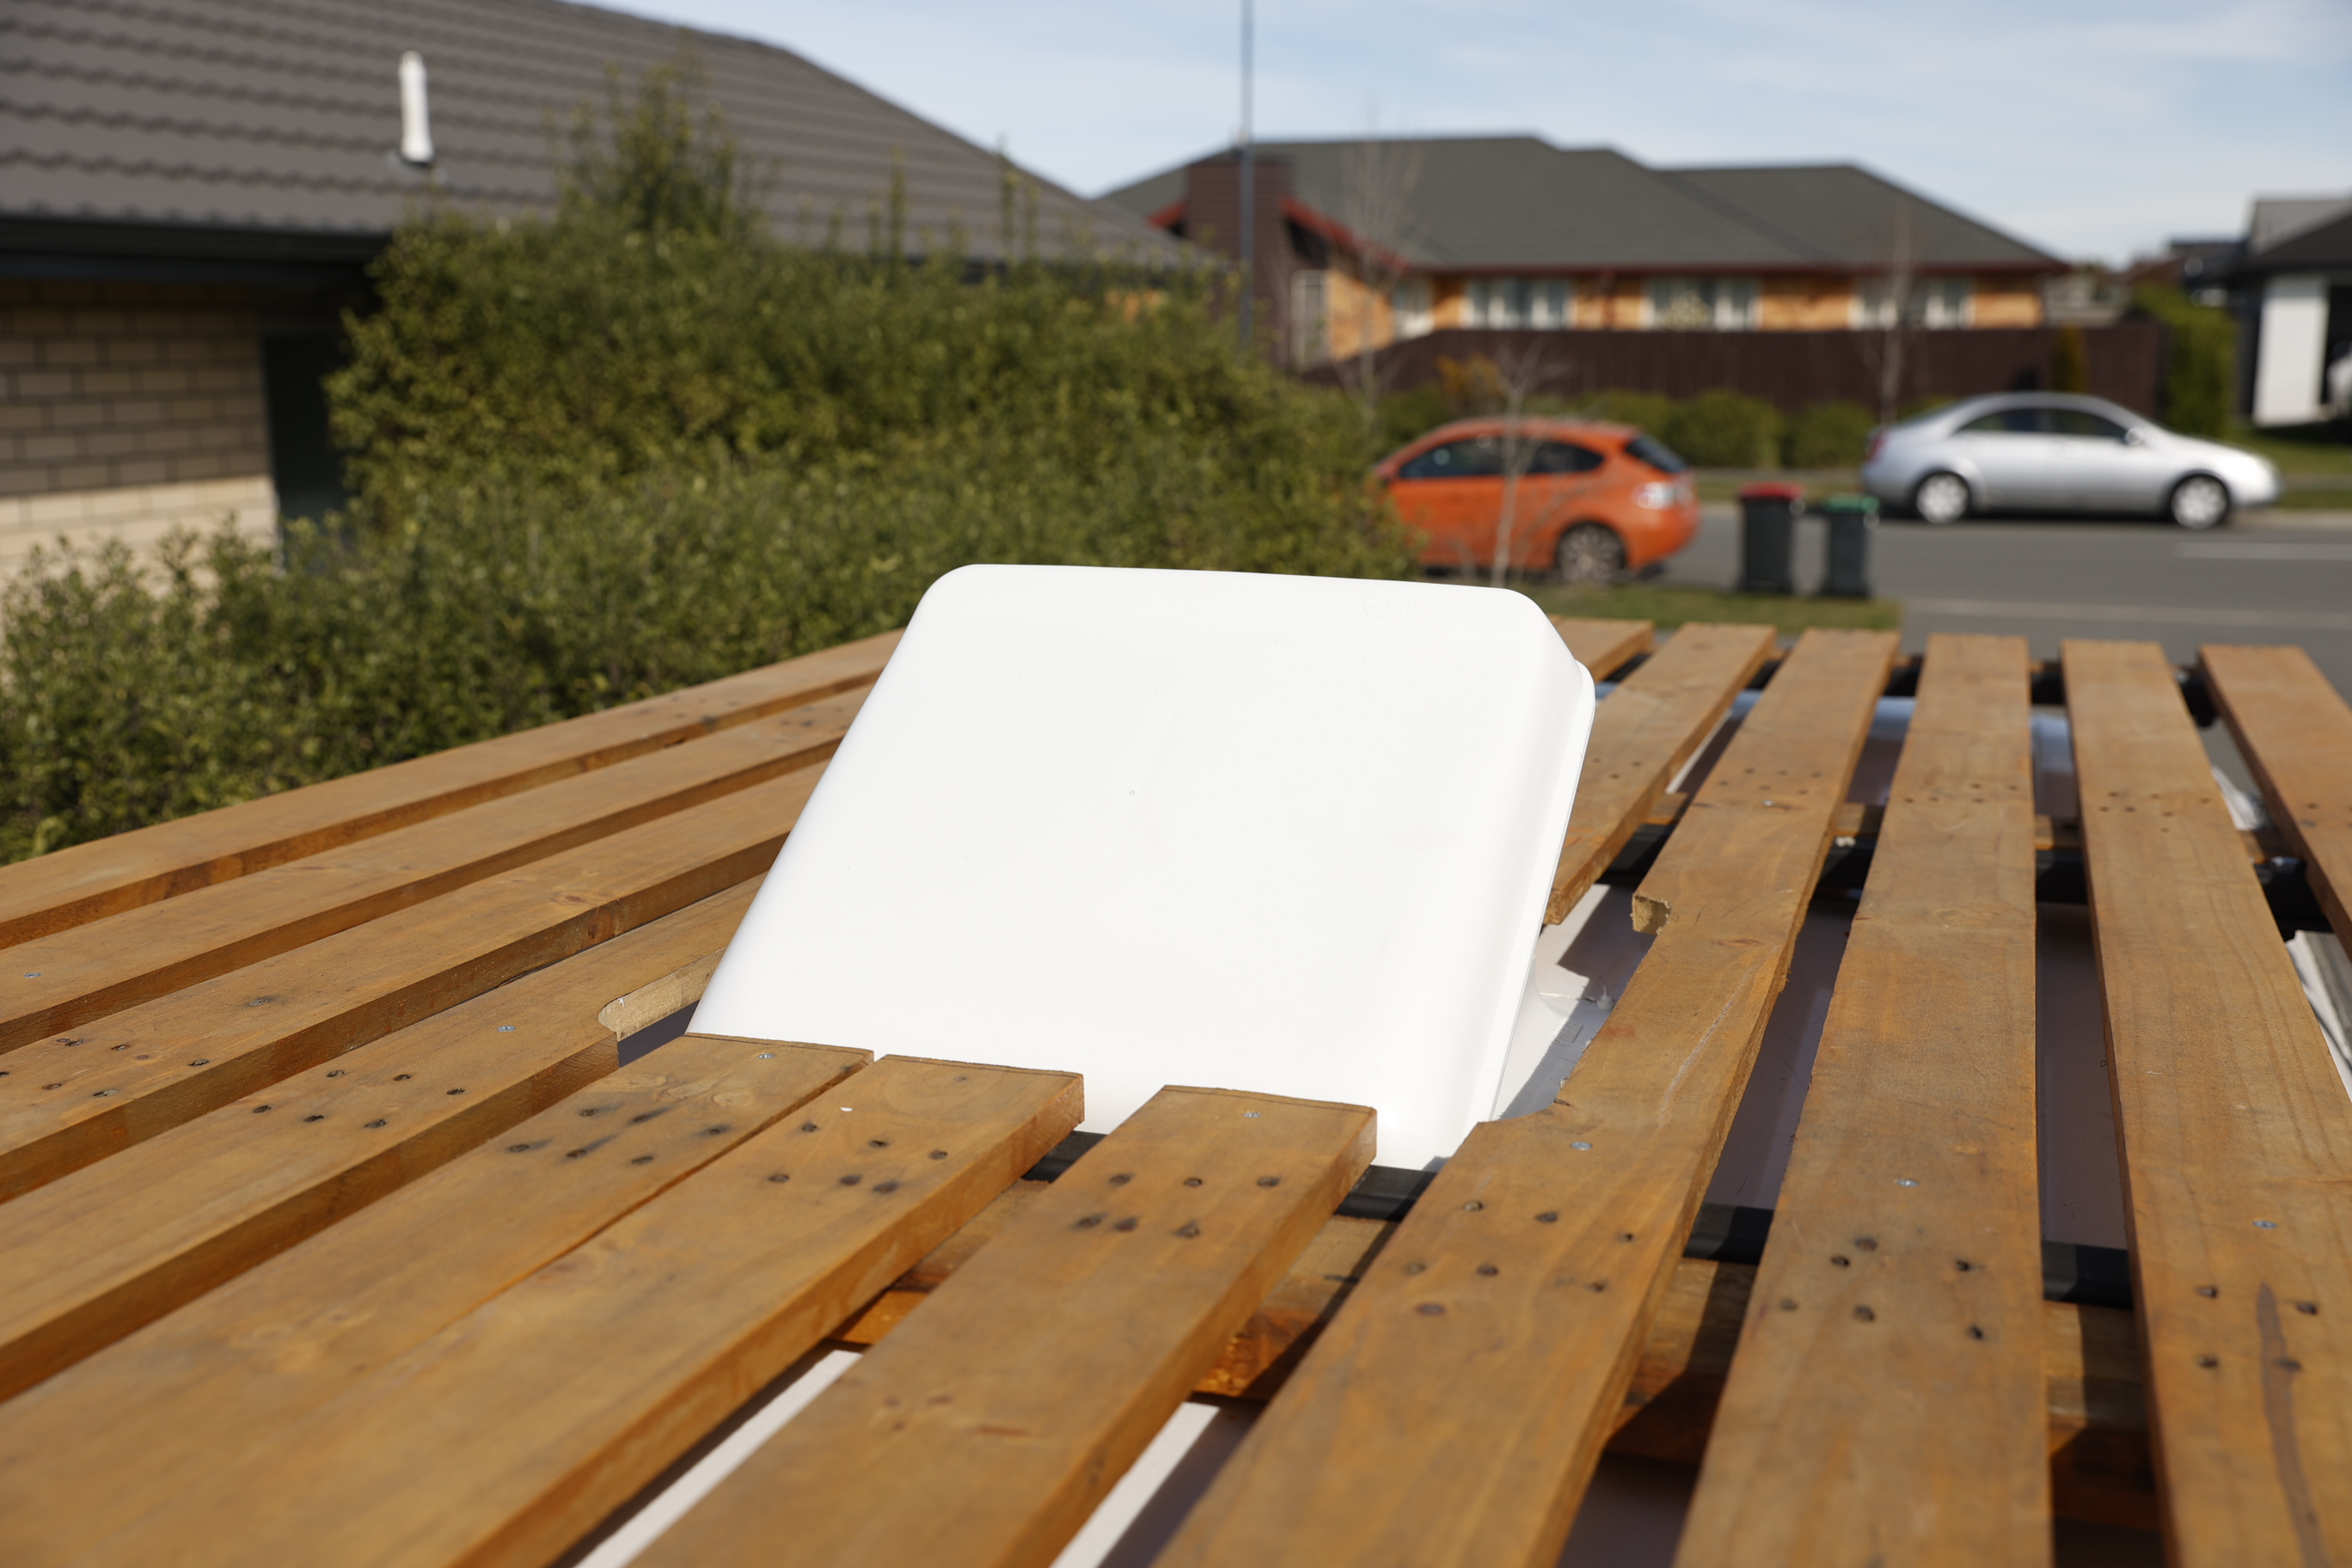
With a hole cut in your roof and no going back now, place the rooftop part of the vent in the hole and check the fit. It should sit snugly in the hole and even have a little wiggle room so you can align it perfectly. With the vent still sitting in place, it’s also a good time to mark the screw holes.
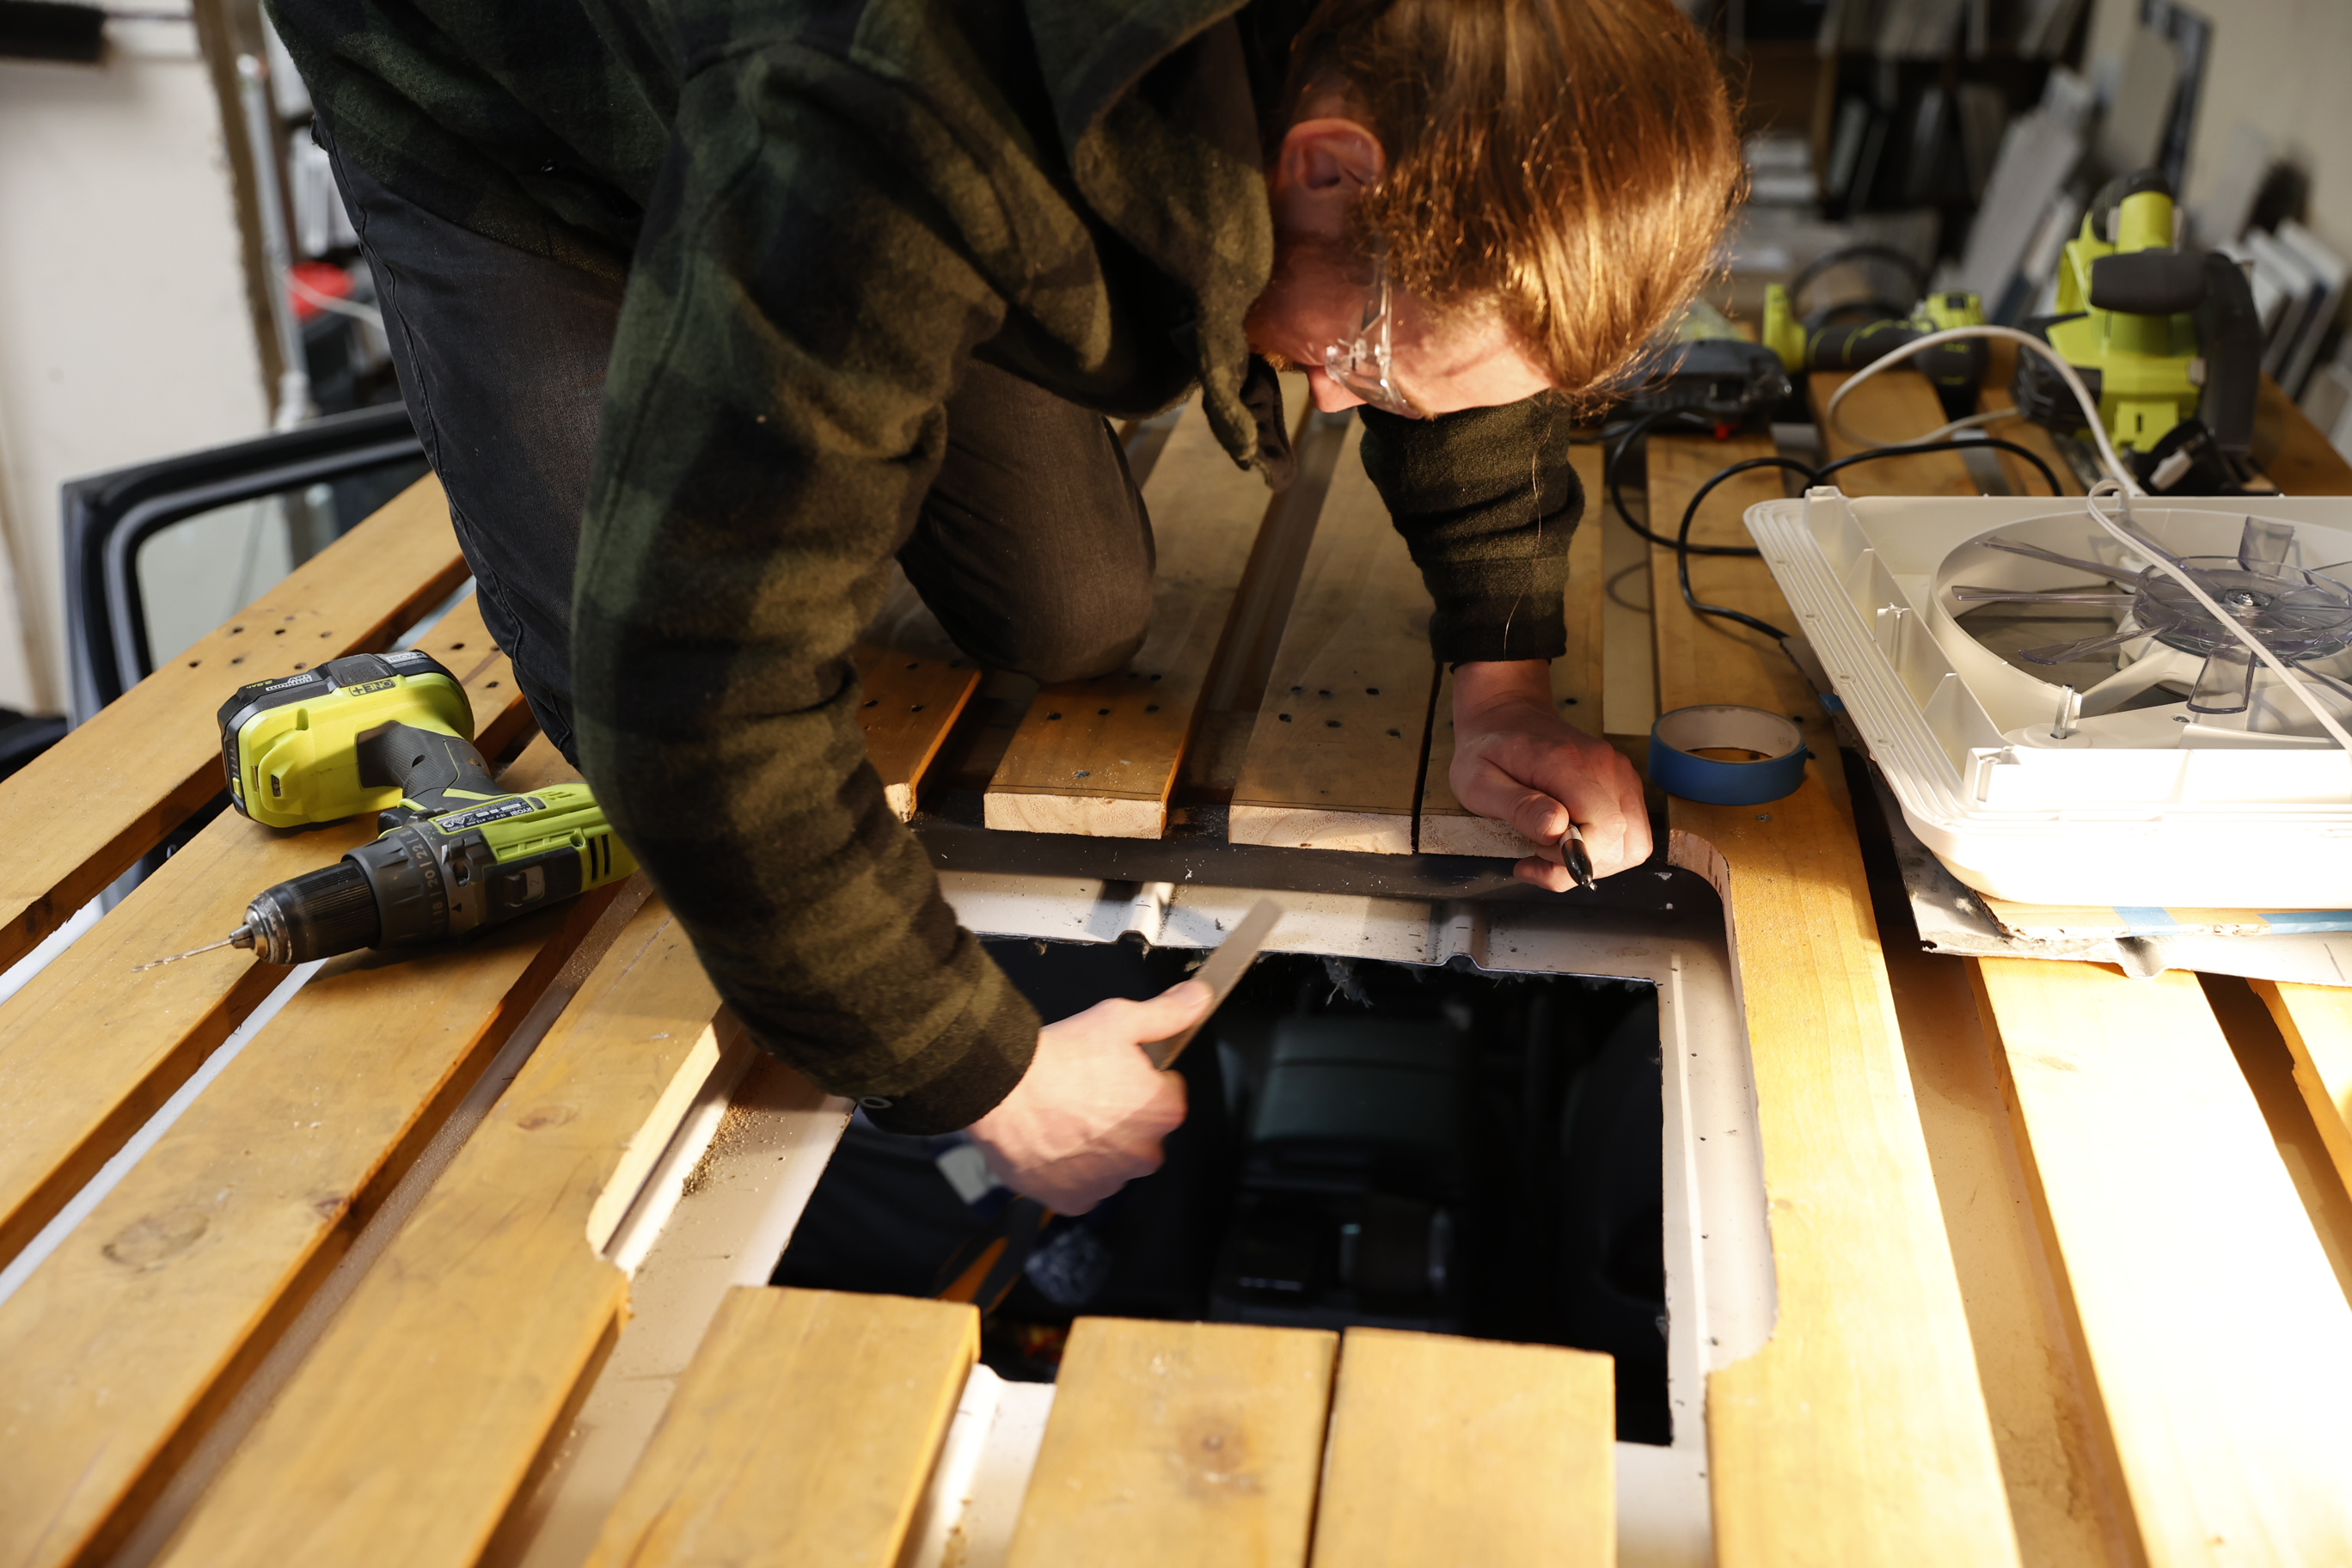
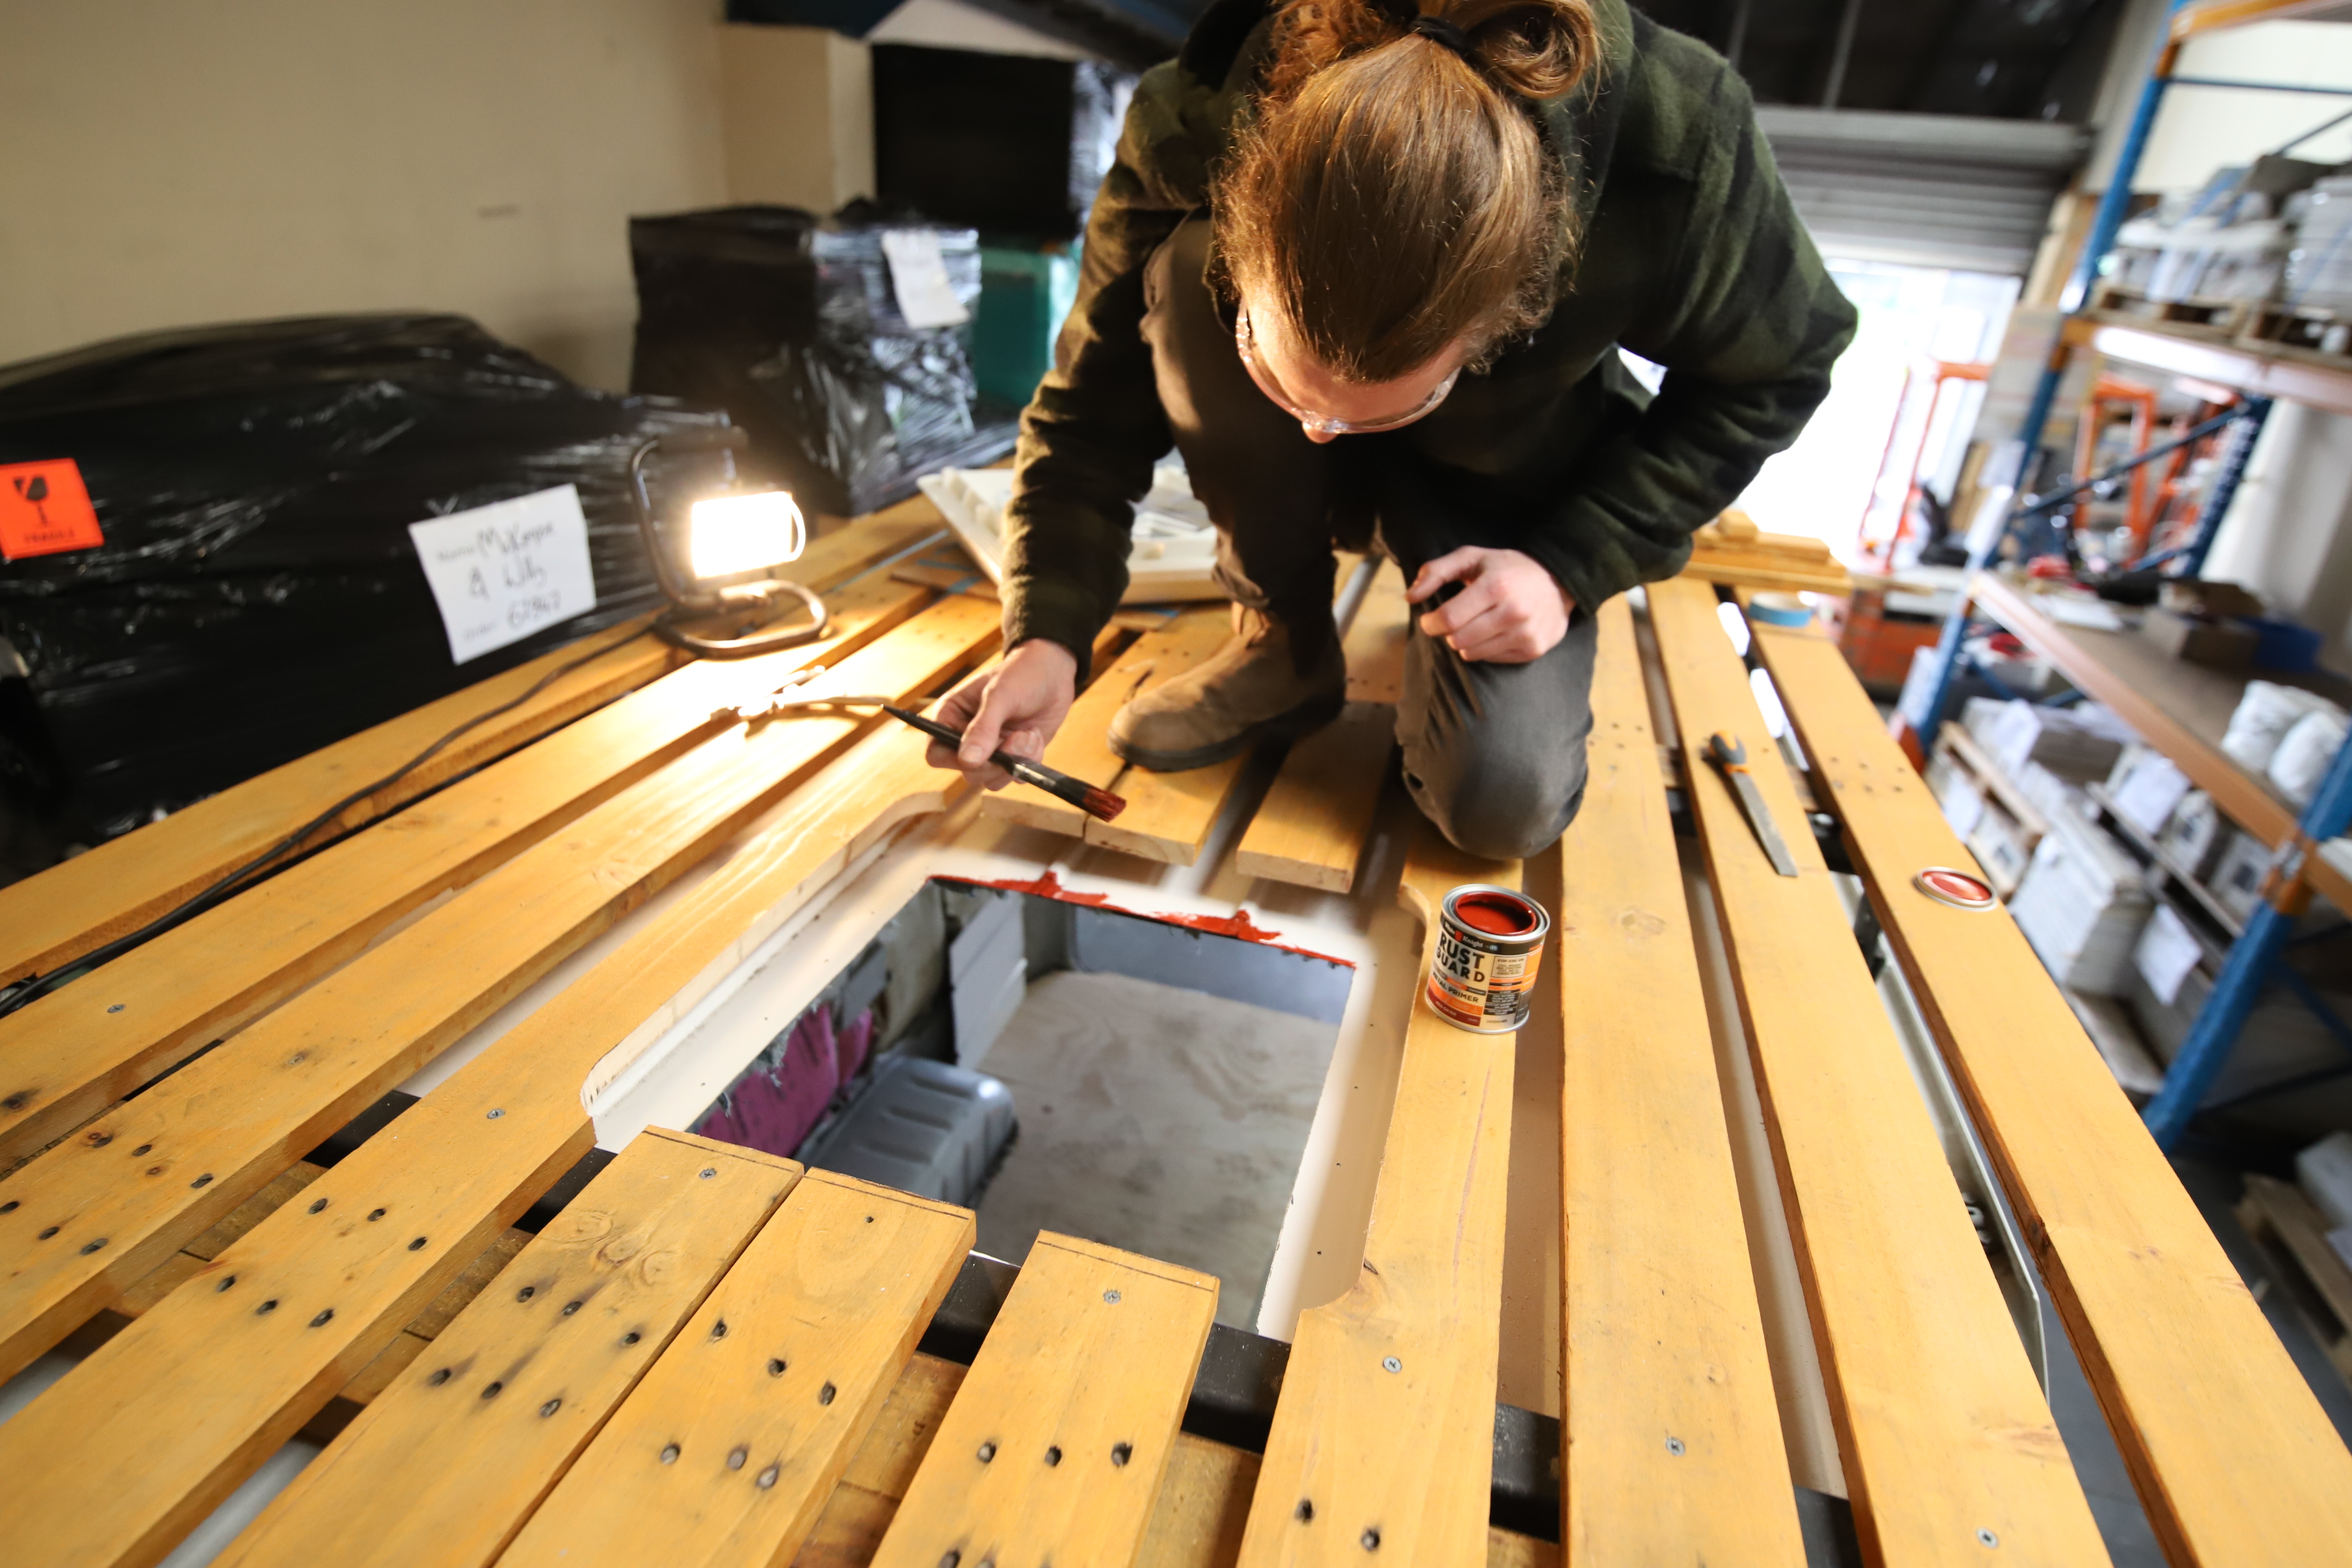
You can now remove the vent, pre-drill the screw holes, and then use a file on the exposed edges to remove any sharp or loose bits of metal. It’s very important now to clean up any metal shavings that are sitting on the top of the vehicle. These will rust up in the first rain and you’ll be left with freckles all over the camper! You now need to protect the bare metal with a coating to prevent rust. Firstly wipe down the edges and the screw holes with a good solvent (wax & grease remover/turpentine etc), then use a metal primer and paint any shiny bare metal.
Step 5: Making the Frame/Support
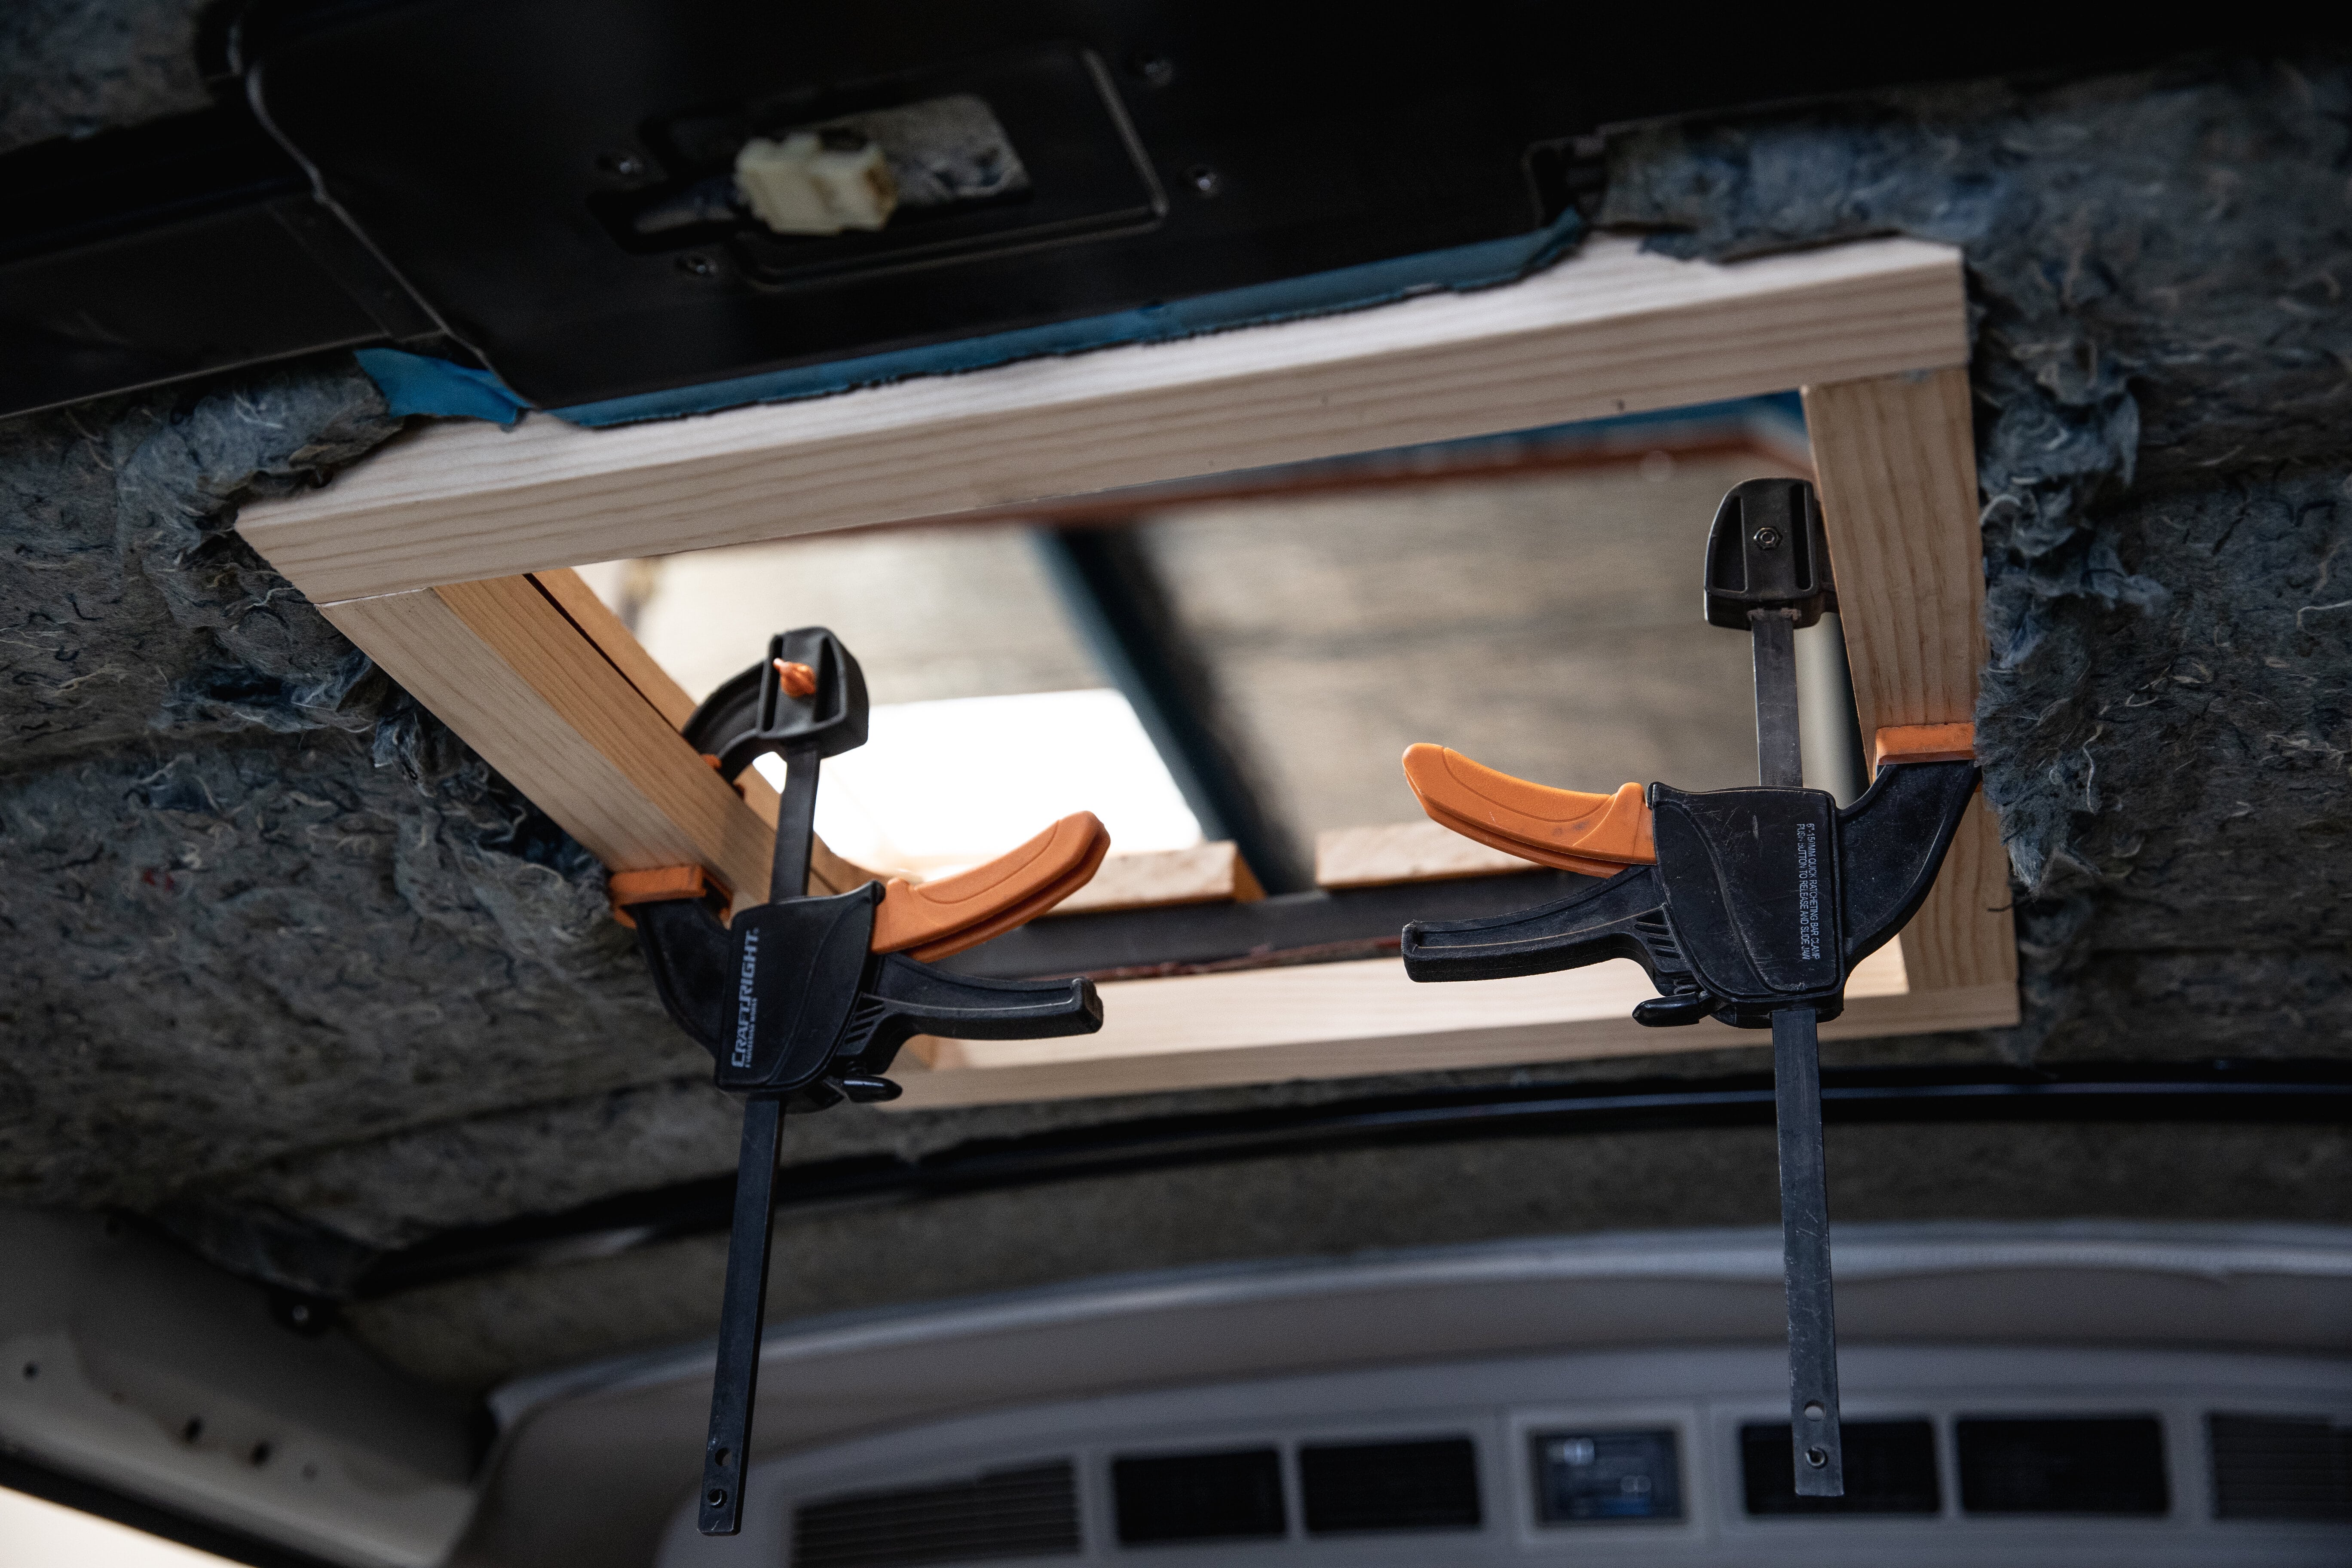
While the paint is drying, it’s the perfect time to whip up a frame to help support the roof vent and give the screws something solid to bite into. The Fiamma Turbo Vent needs a minimum roof thickness of 30mm, so 32x32mm pine will do the job nicely. Cut the timber to length and create a square frame with centre matching the dimensions of the cutout. Once the metal primer has dried, you can then apply some adhesive to the frame and clamp it in place in the roof. Allow the glue to cure enough so that the frame will stay in place while drilling and screwing in the hatch.
Step 6: Preparing for Install
This step is simple but extremely important. Anytime you’re dealing with sealant and need something to be completely watertight for years to come, you must prepare the surface correctly to ensure a perfect long lasting seal. This simply involves giving the roof surface another good wipe down with a solvent/cleaner, as well as the surface of the vent where the sealant will make contact. It’s important to clean the vent as well, as the manufacturing process of the plastic can leave a residue that will cause the sealant to not adhere properly.
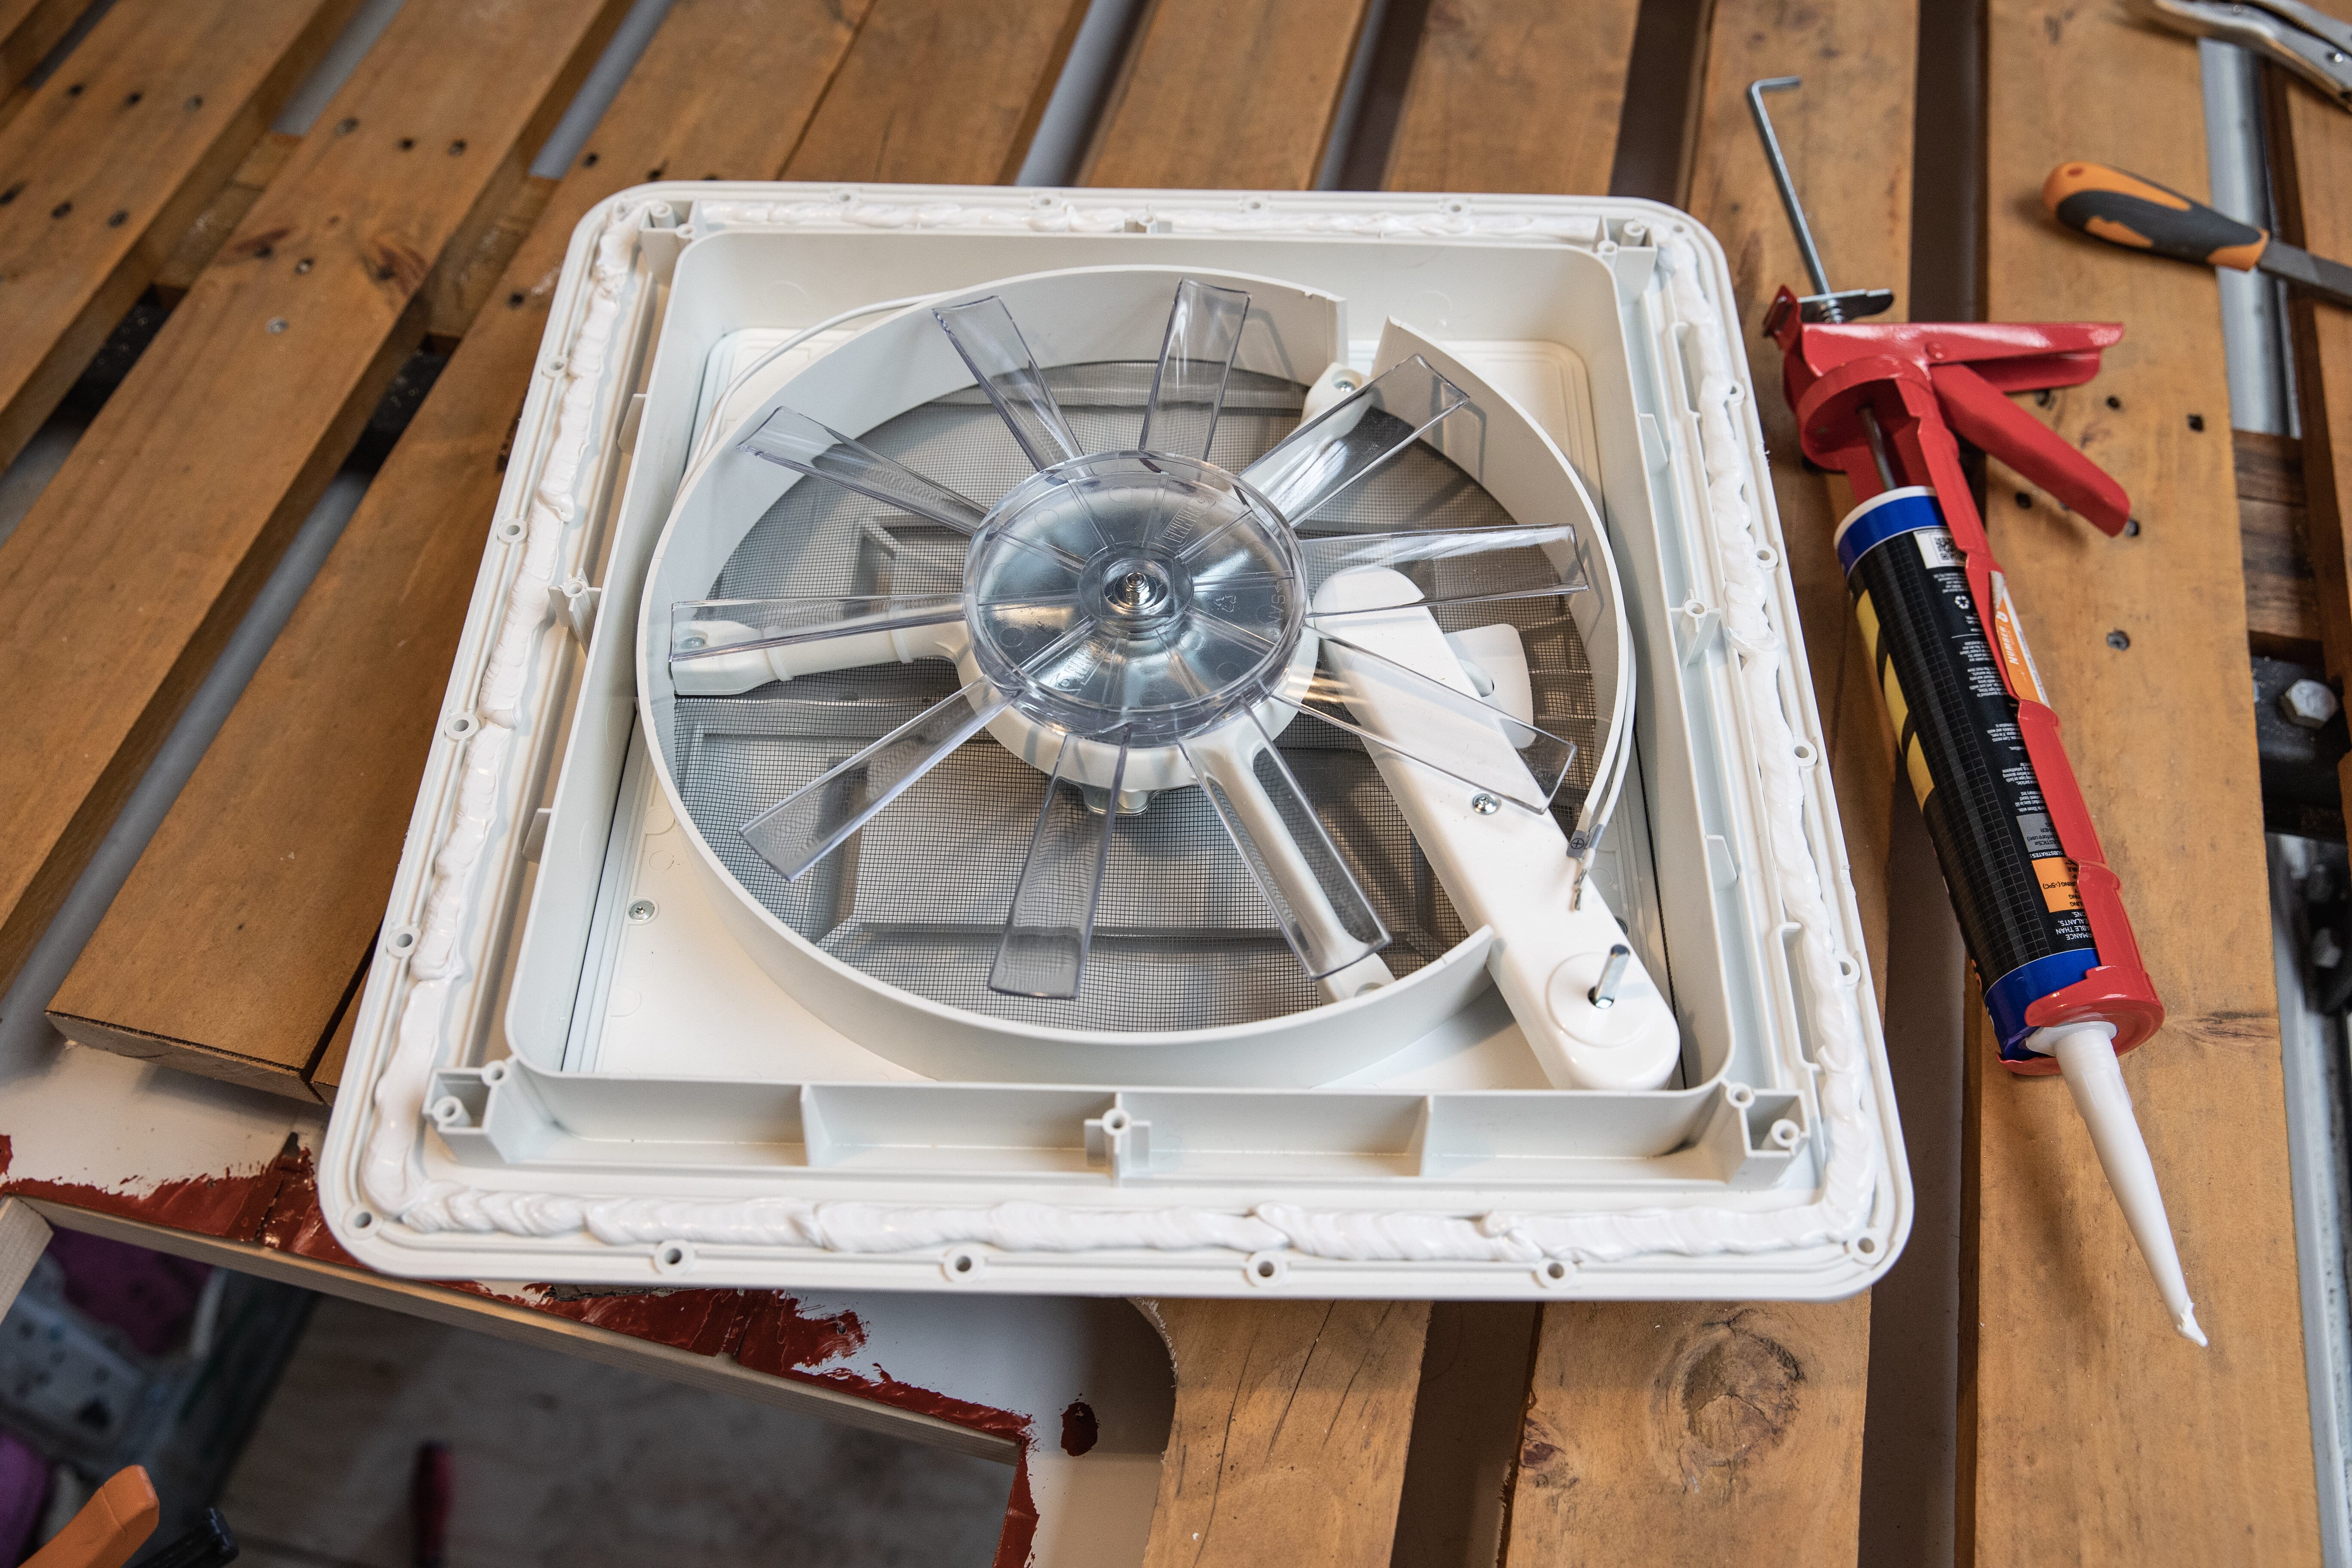
Step 7: Installing the Rooftop Vent
With the surface now clean, the sealant can be applied to the vent and it can be gently sat in place on the roof. Note: Make sure it’s facing the right way! There are many types of sealants/adhesives/tapes that can be used to provide a watertight seal, check the manufacturers recommendations in the manual. Screw the vent down into the timber frame to secure it to the roof.
Tip: Start fixing the screws at opposite corners and work your way around the vent. This will disperse and compact the sealant evenly and reduce the chance of air gaps.
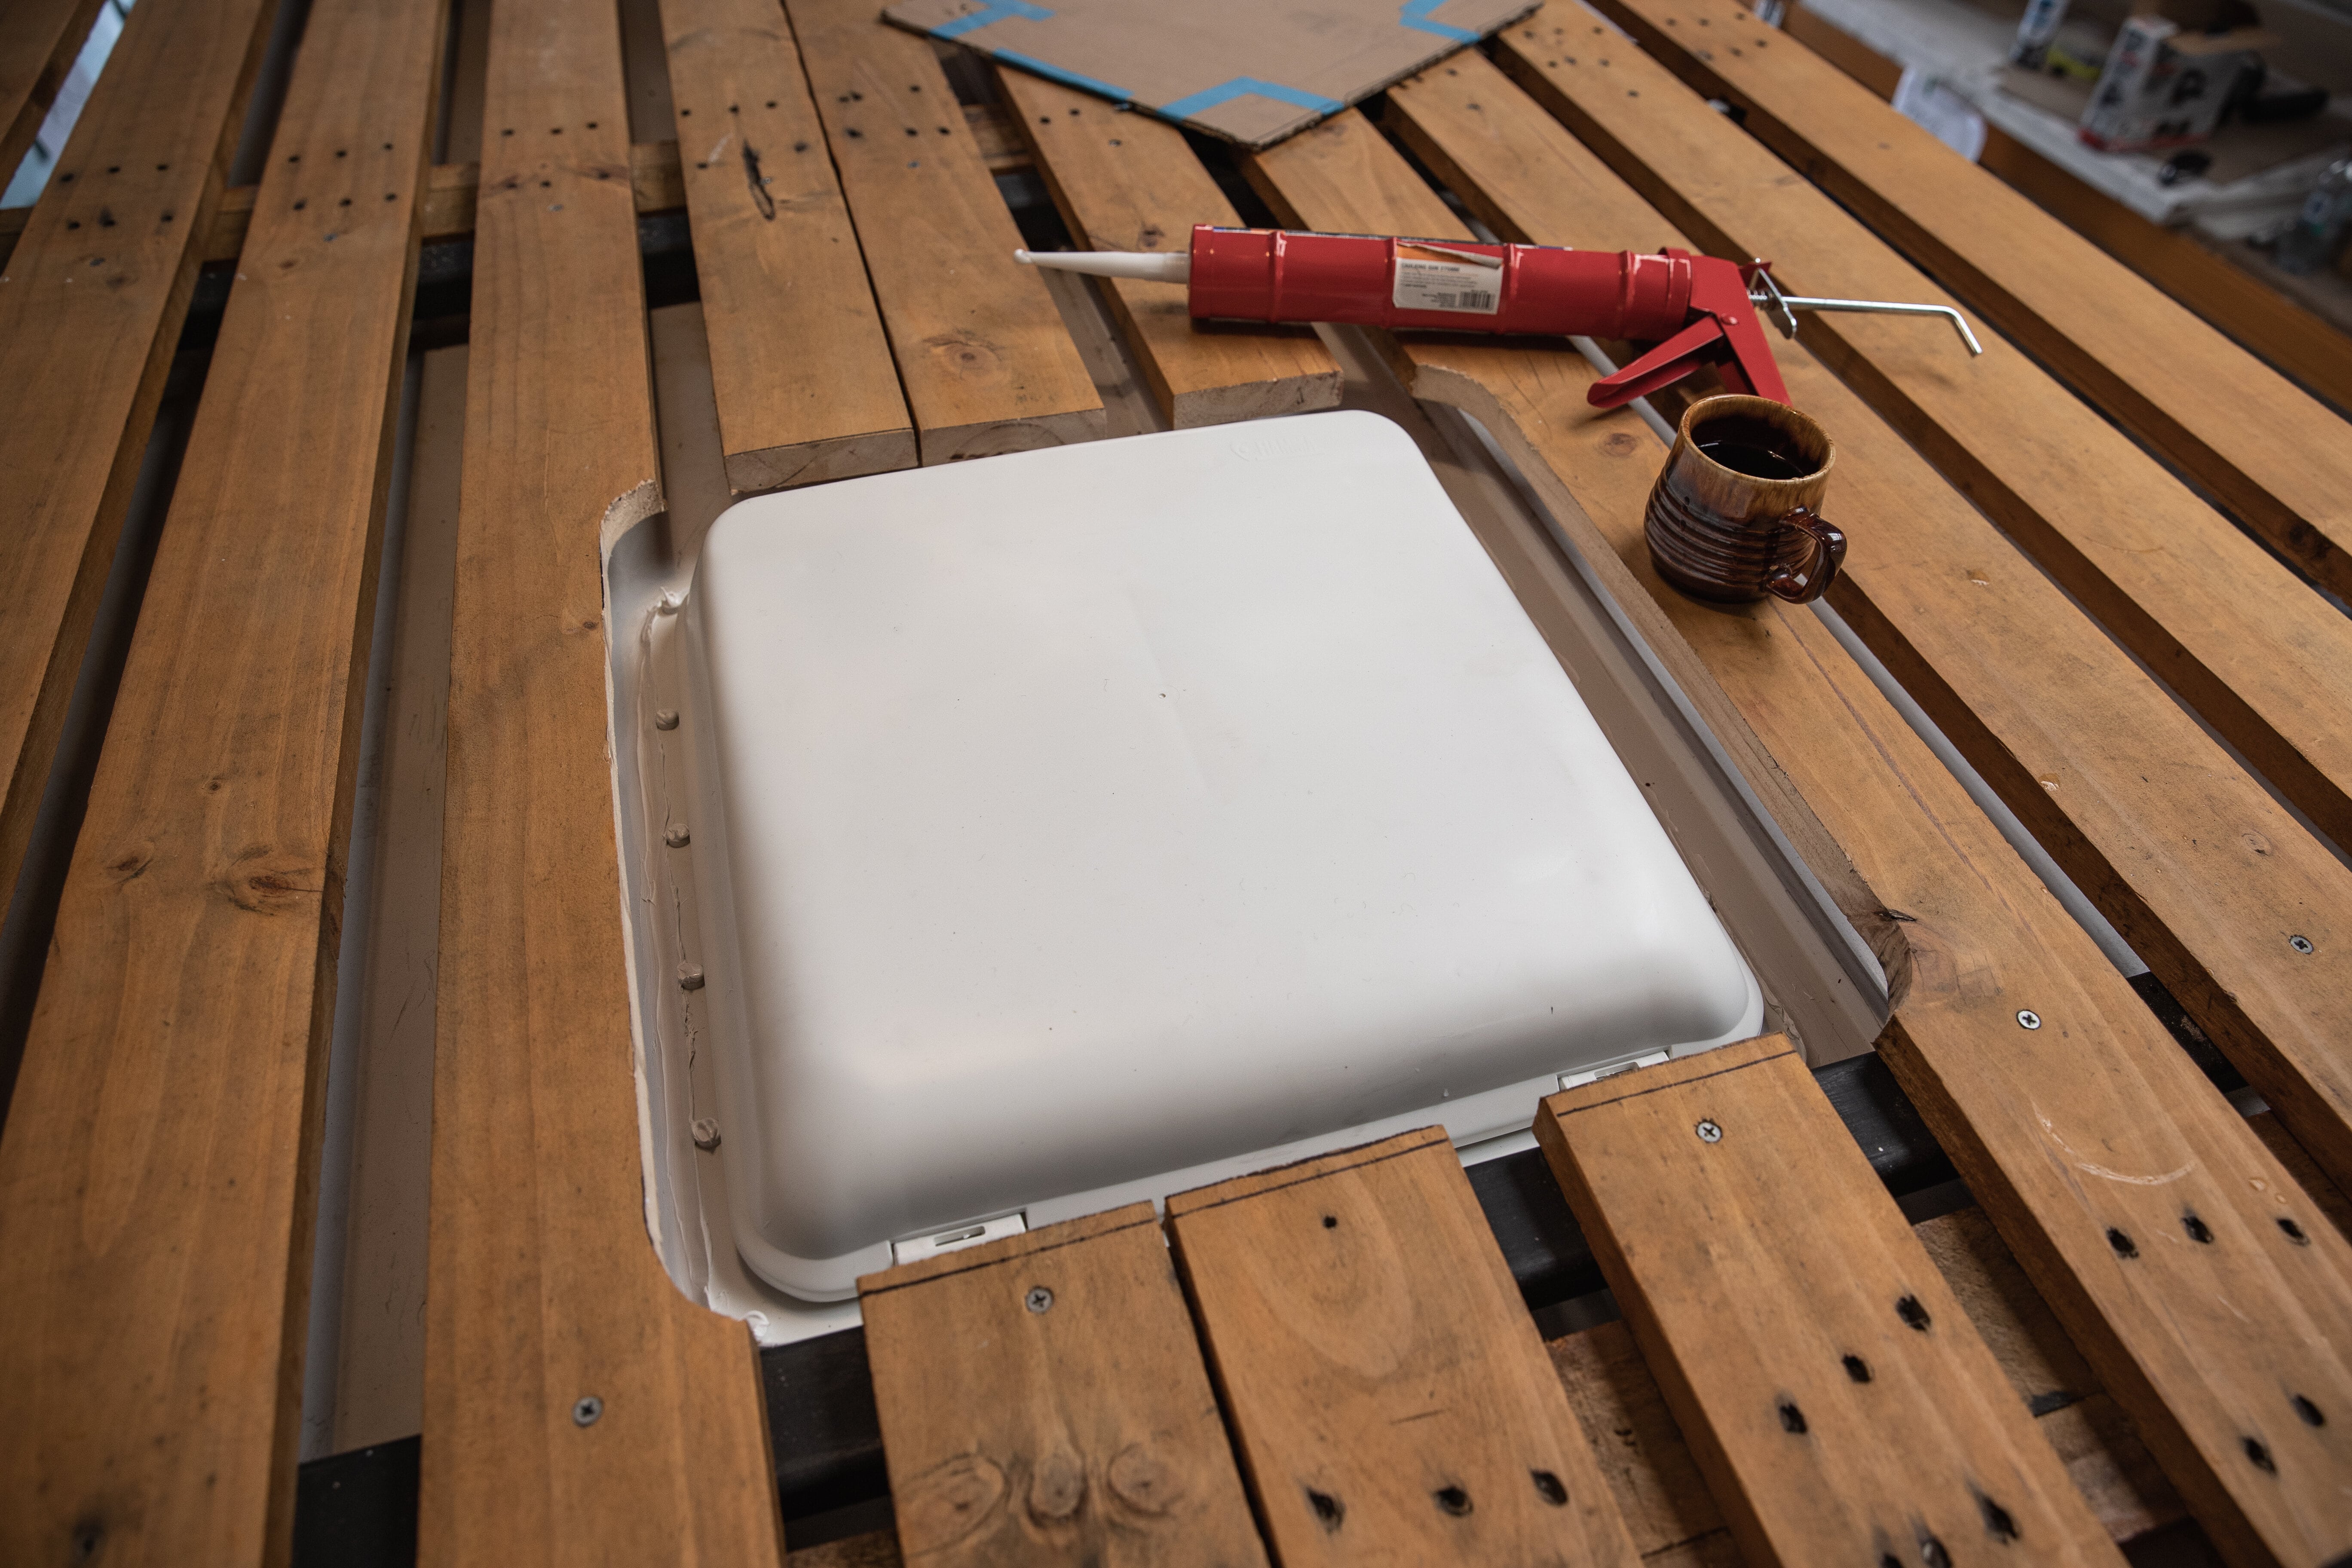
Step 8: Sealing the Edges and Screws
The vent should be securely in place now and ready for the final roof top job. Apply a second bead of sealant around the outer edge of the vent to provide an extra layer of protection. If you’re a pro with the caulking gun you can leave it there, otherwise using a wet finger or silicone scraper, tidy up the edge and ensure you have a complete seal. It’s also a good idea to apply sealant to the screw heads - water can pool here and slowly run down the screw and into the frame.
Step 9: Give It A Leak Test!
Time to test your handy work and pray to the gods that your care and attention to detail has paid off! Allow the sealant to cure according to the time specified on the product, then roll the vehicle out and grab the garden hose. Make sure to not just shove the hose right up to the vent as it could force water up under the hatch, instead hold the hose up and allow the water to fall on and around the roof vent. With fingers crossed, check inside the vehicle for any leaks!
Step 10: Connecting Wires and Installing Faceplate
Congratulations, you’re on the home stretch! This particular roof vent requires 12v power to run it’s built-in fan. Run some twin core wire from the vehicle’s DC fuse panel up into the ceiling. This simply gets inserted into the screw terminals on the vent's internal faceplate. The roof top section of the vent also has a positive and negative wire that connects to the relative terminals on the back of the faceplate as well.
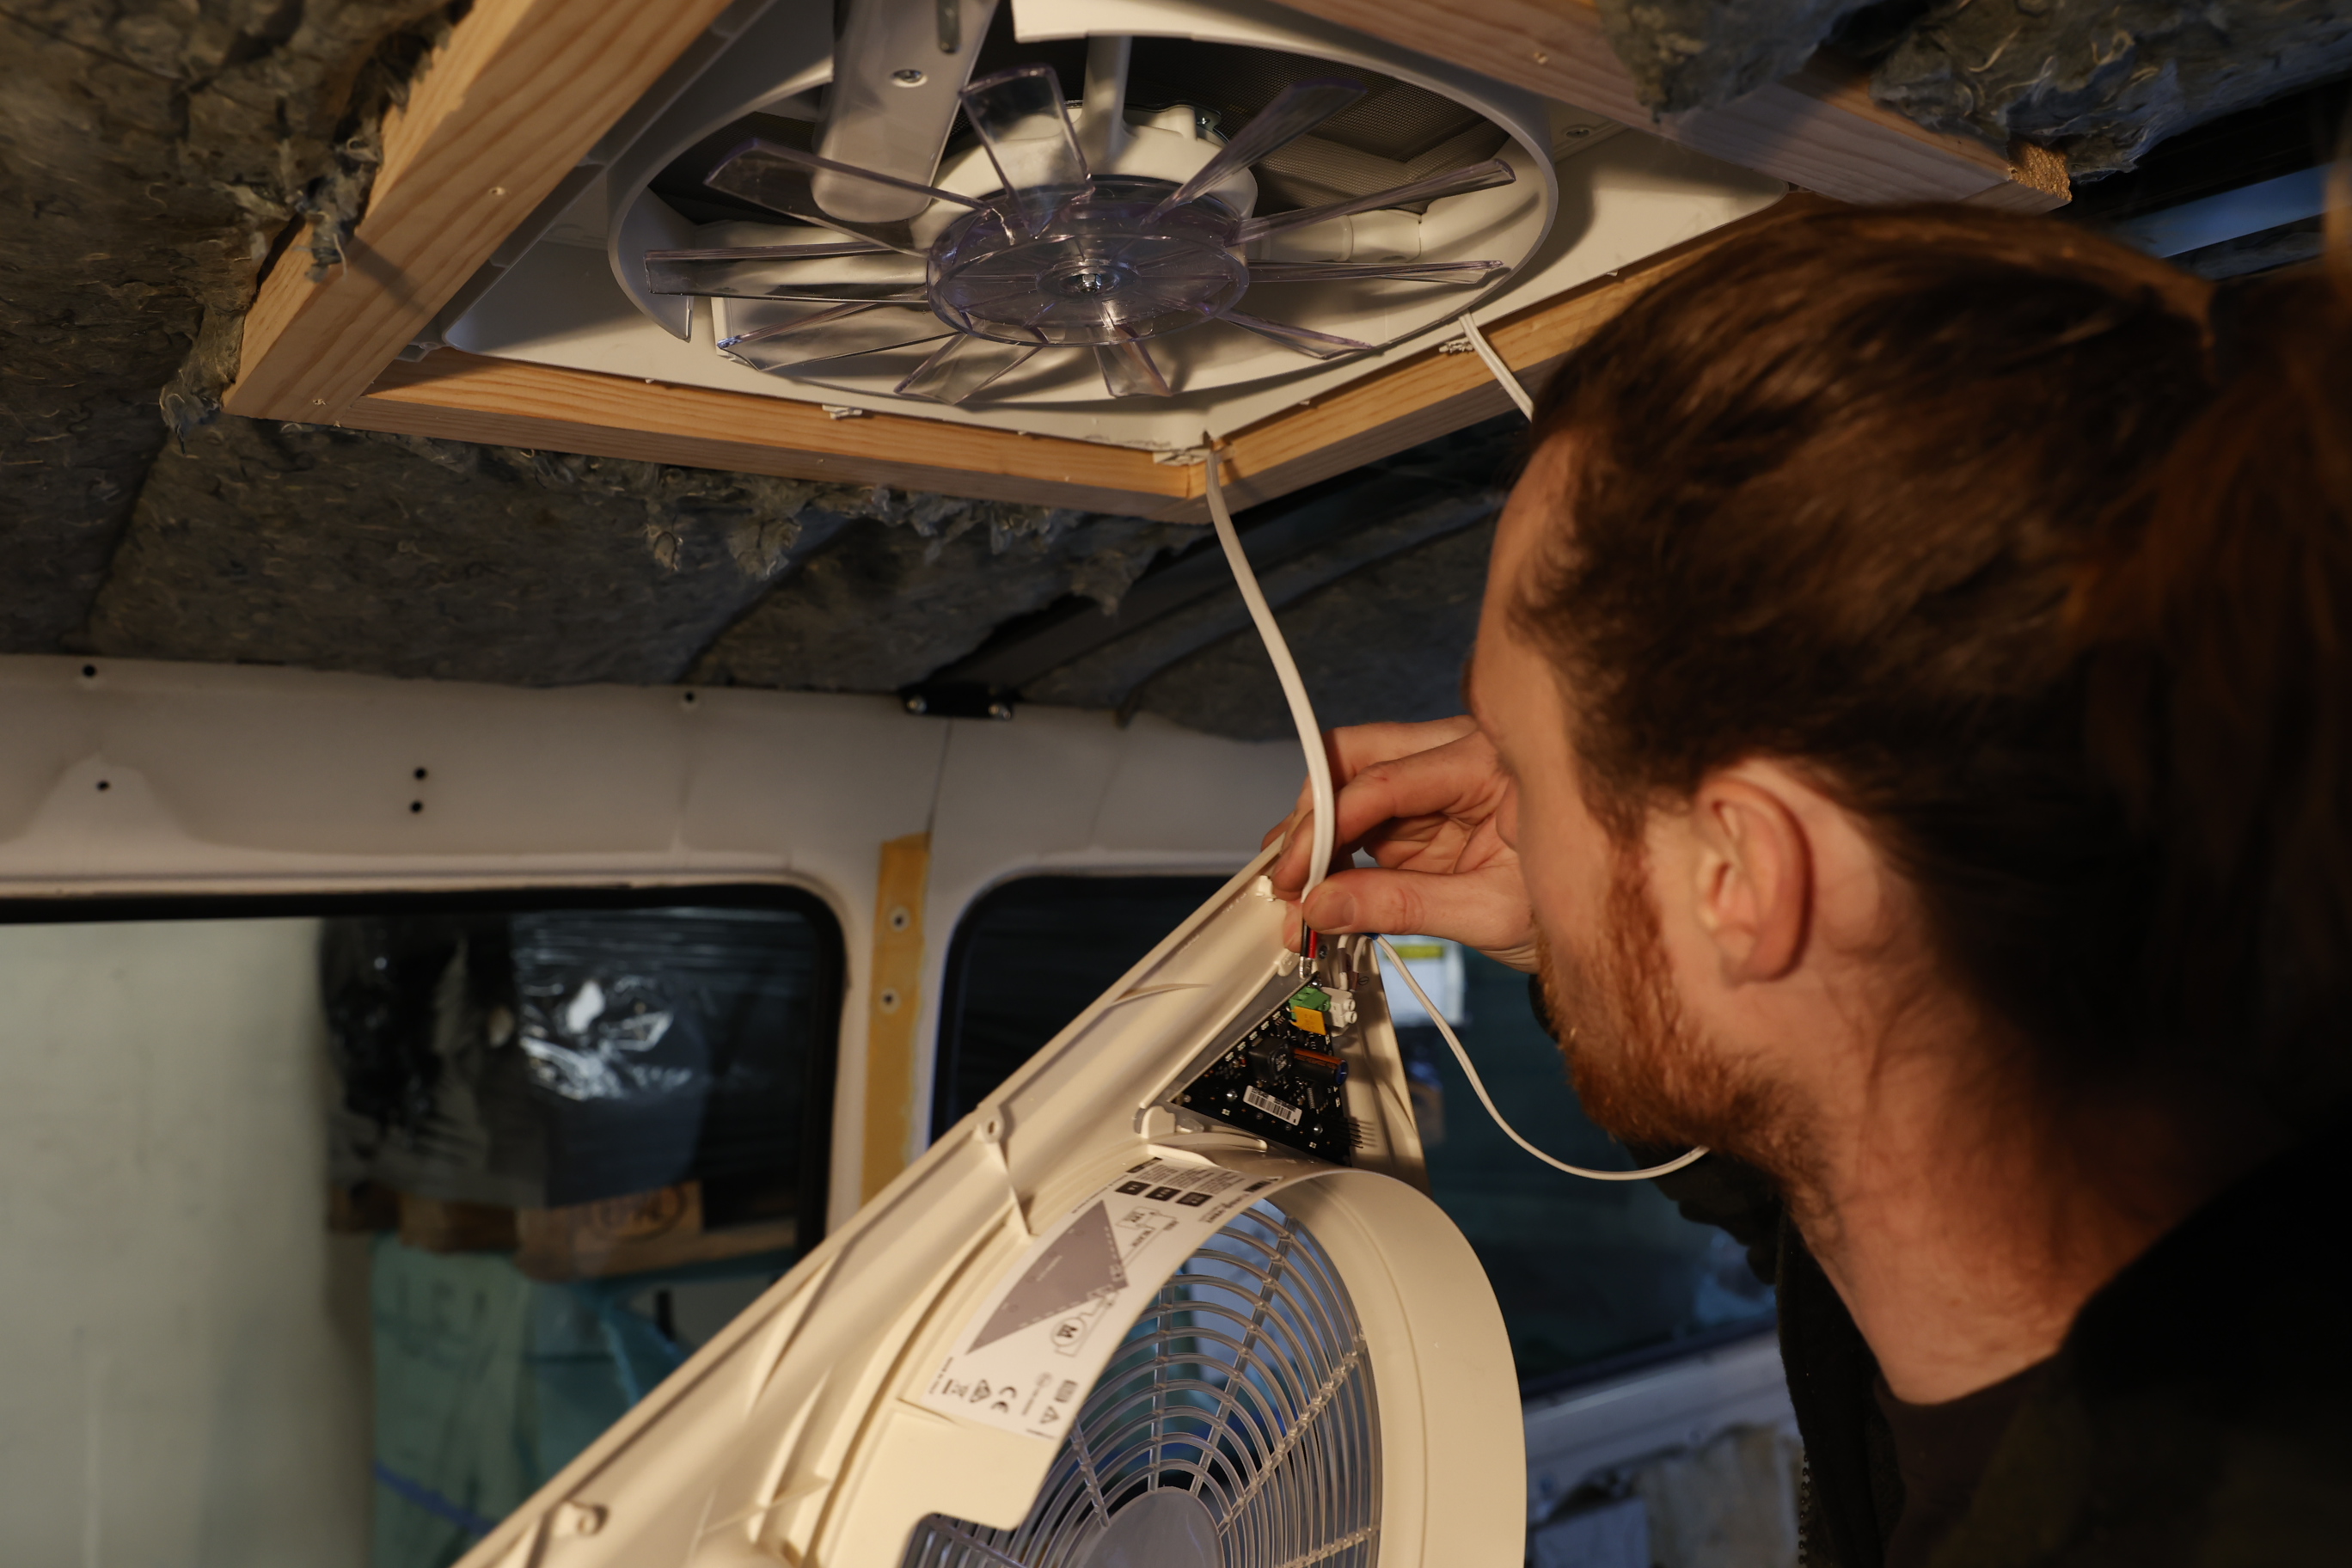
With the electrical connections secure, simply fit the faceplate up into the frame, lining up the handle for the hatch crank. Attach the faceplate with screws, insert the supplied screw caps, and viola!, you’ve successfully completed a Campervan Roof Vent Install!
Summary
As you can see, installing a roof vent isn’t as difficult or daunting as you may first think! In 10 easy steps any DIYer can add much needed ventilation to their campervan, caravan, RV, motorhome, gypsy bus . . . anything you can think of really!
If your vehicle size and budget allows, we recommend installing two roof vents or fans. This will allow one hatch to draw fresh air in, and the other to pull the internal air out, quickly refreshing the interior air and providing superior drying power on those damp mornings.
We provide general information on products, not personal advice. Always seek the help of a relevant tradesperson if you have a technical query

Do you have any questions?
Please, contact our friendly team on 0800 102041 or email: website@burnsco.co.nz