Overview:
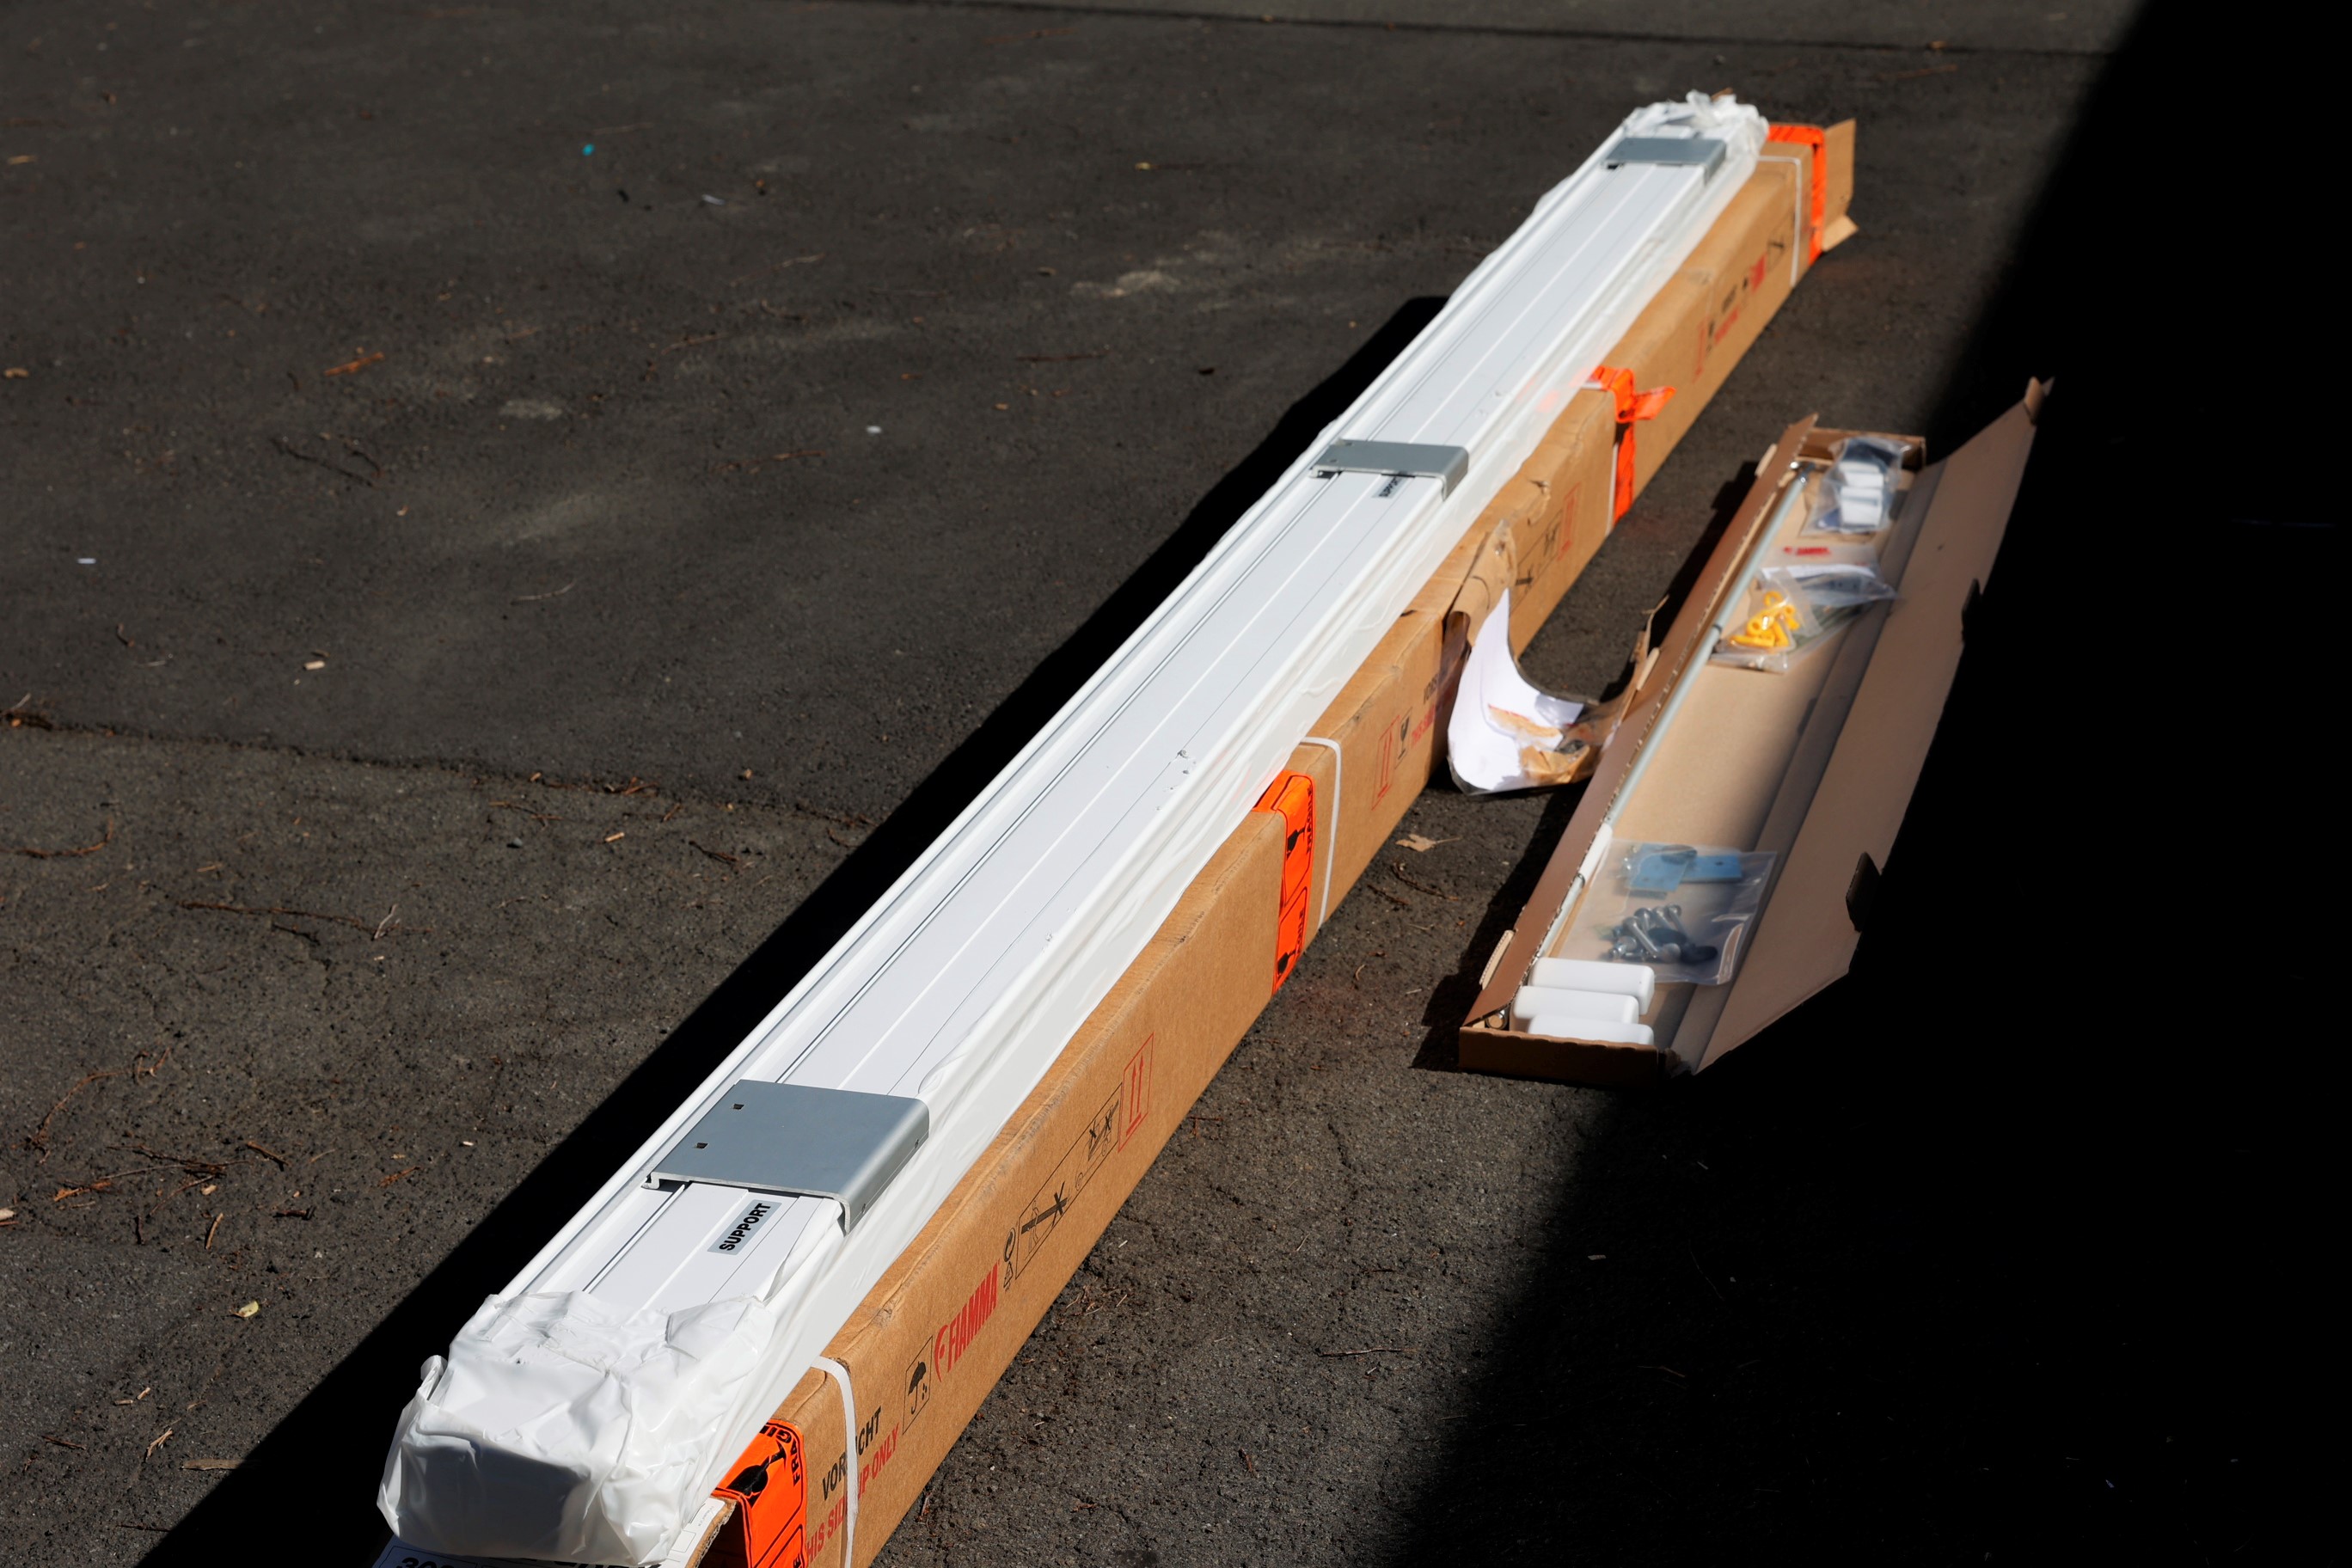
In this article we’re installing a 3 metre long Fiamma F45S wind out awning on a Toyota Hiace with a custom roof rack/deck. These awnings have become the industry standard because of their sturdiness, ease of use and durability. There are only a few simple steps required to mount the awning on the vehicle - although the mounting position in this example is different to most vehicles, the same method applies for attaching the mounts to a caravan or motorhome body. Let’s jump in!
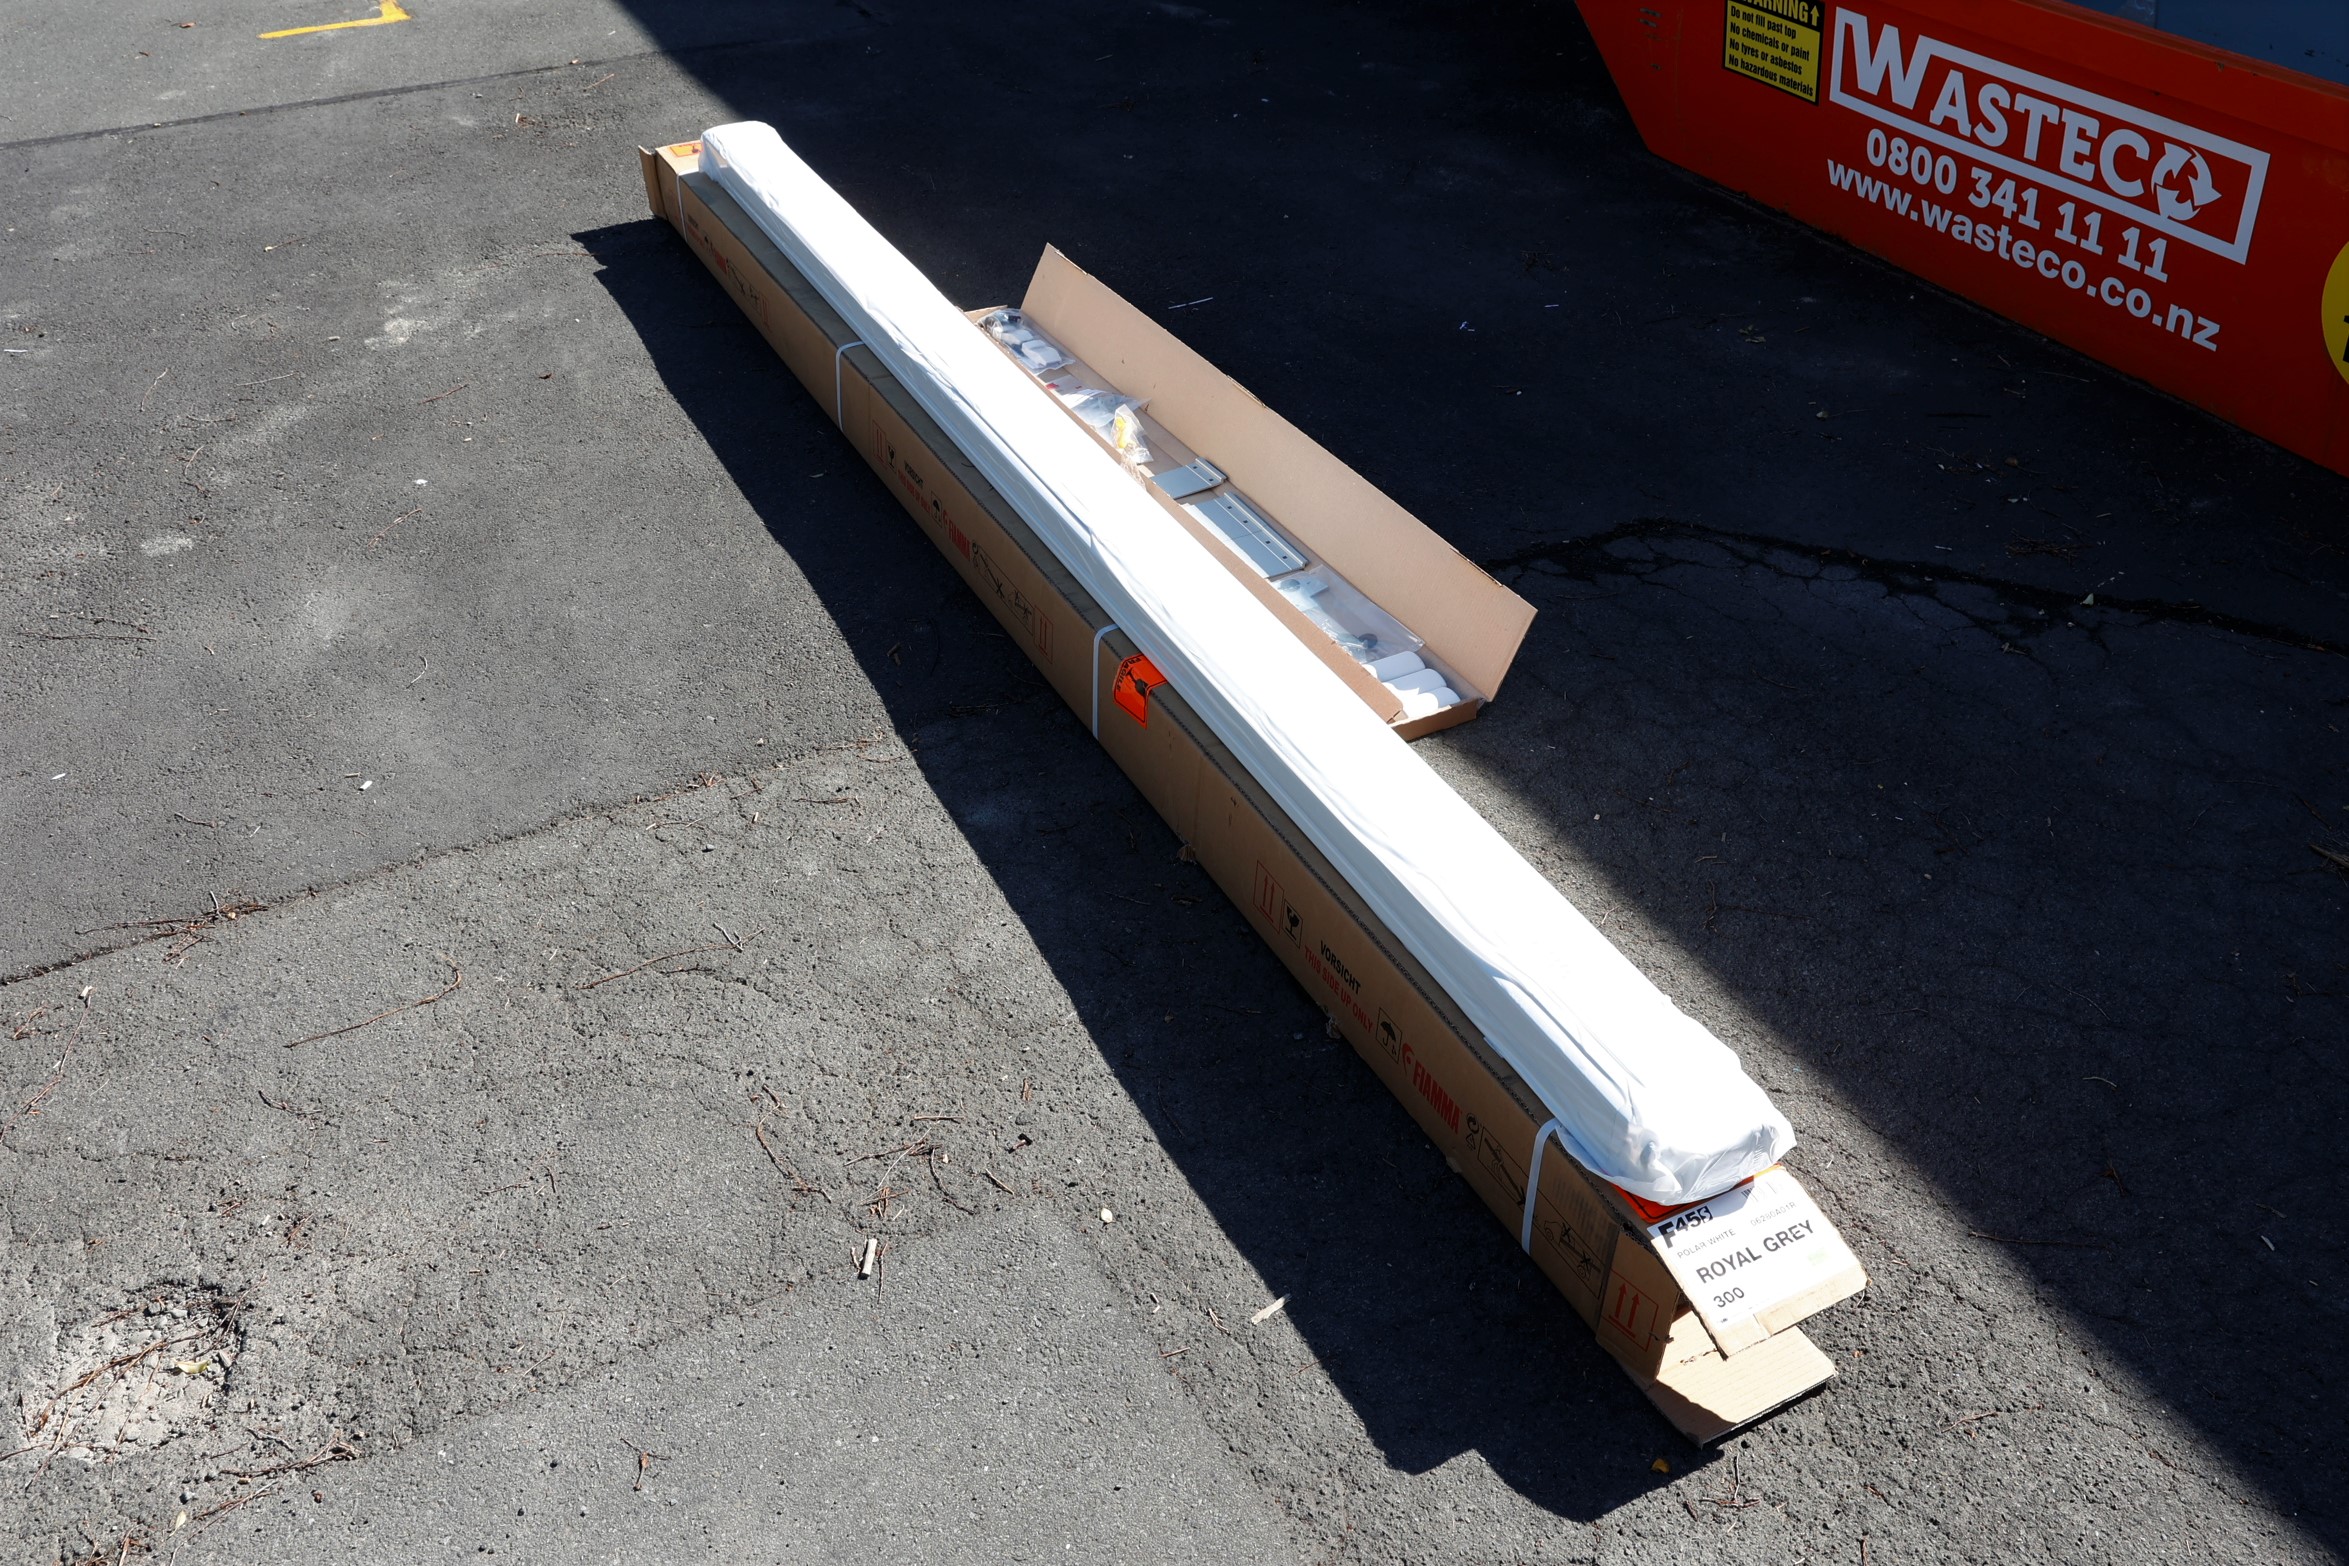
The awning comes with all the necessary mounting brackets and hardware.
You will need:
- Awning and mounting kit
- Drill and drill bits
- Spanners or a crescent
- Tape measure
- Marker or pencil
- Silicone or sealant if installing to vehicle body
- Timber board
There’s not a lot of tools required to mount an awning, a few simple steps and it’ll be up on the camper!
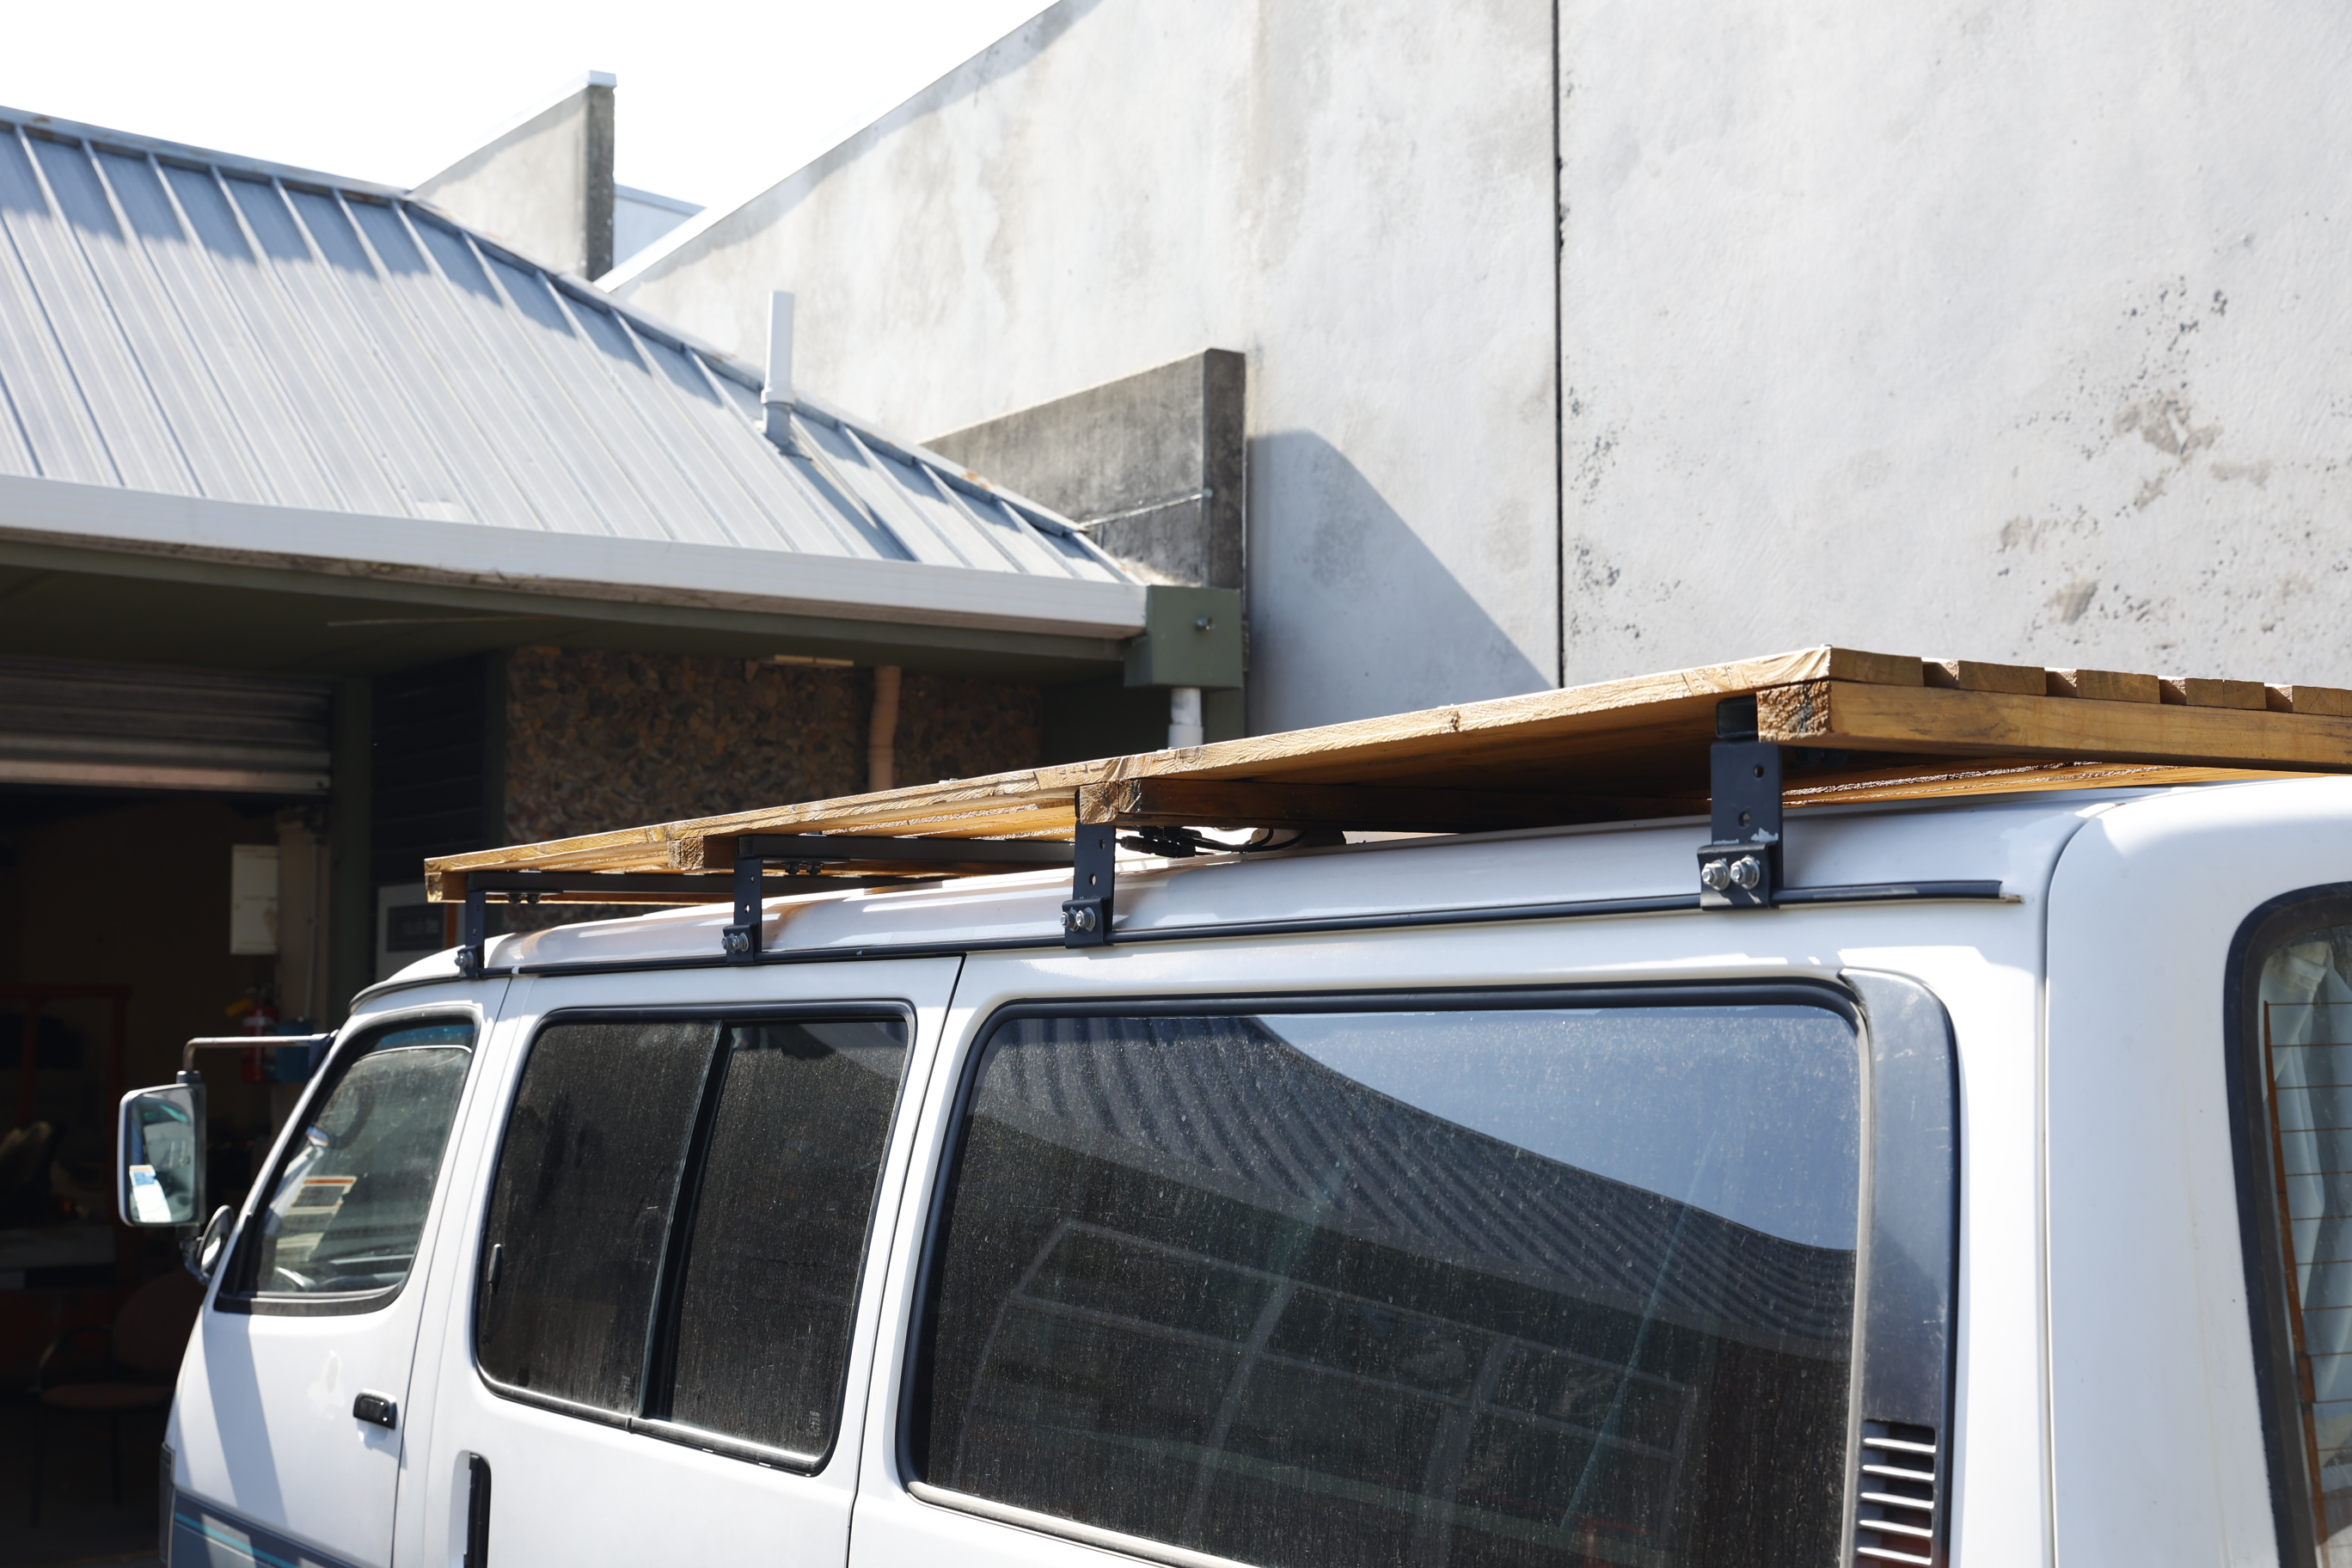
As you can see from the above image, our custom roof rack and deck doesn’t have a flat solid ‘wall’ to mount against. We’ll be using a treated timber board that the mounts will attach to before screwing the board to the roof deck. If mounting directly to the side of a caravan or camper, you’ll need access to the inner side of the wall if you want the mounting bolts hidden. If this isn’t possible you’ll have to drill right through to the inside of the vehicle - be careful of wires, pipes and structural supports hidden in the wall!
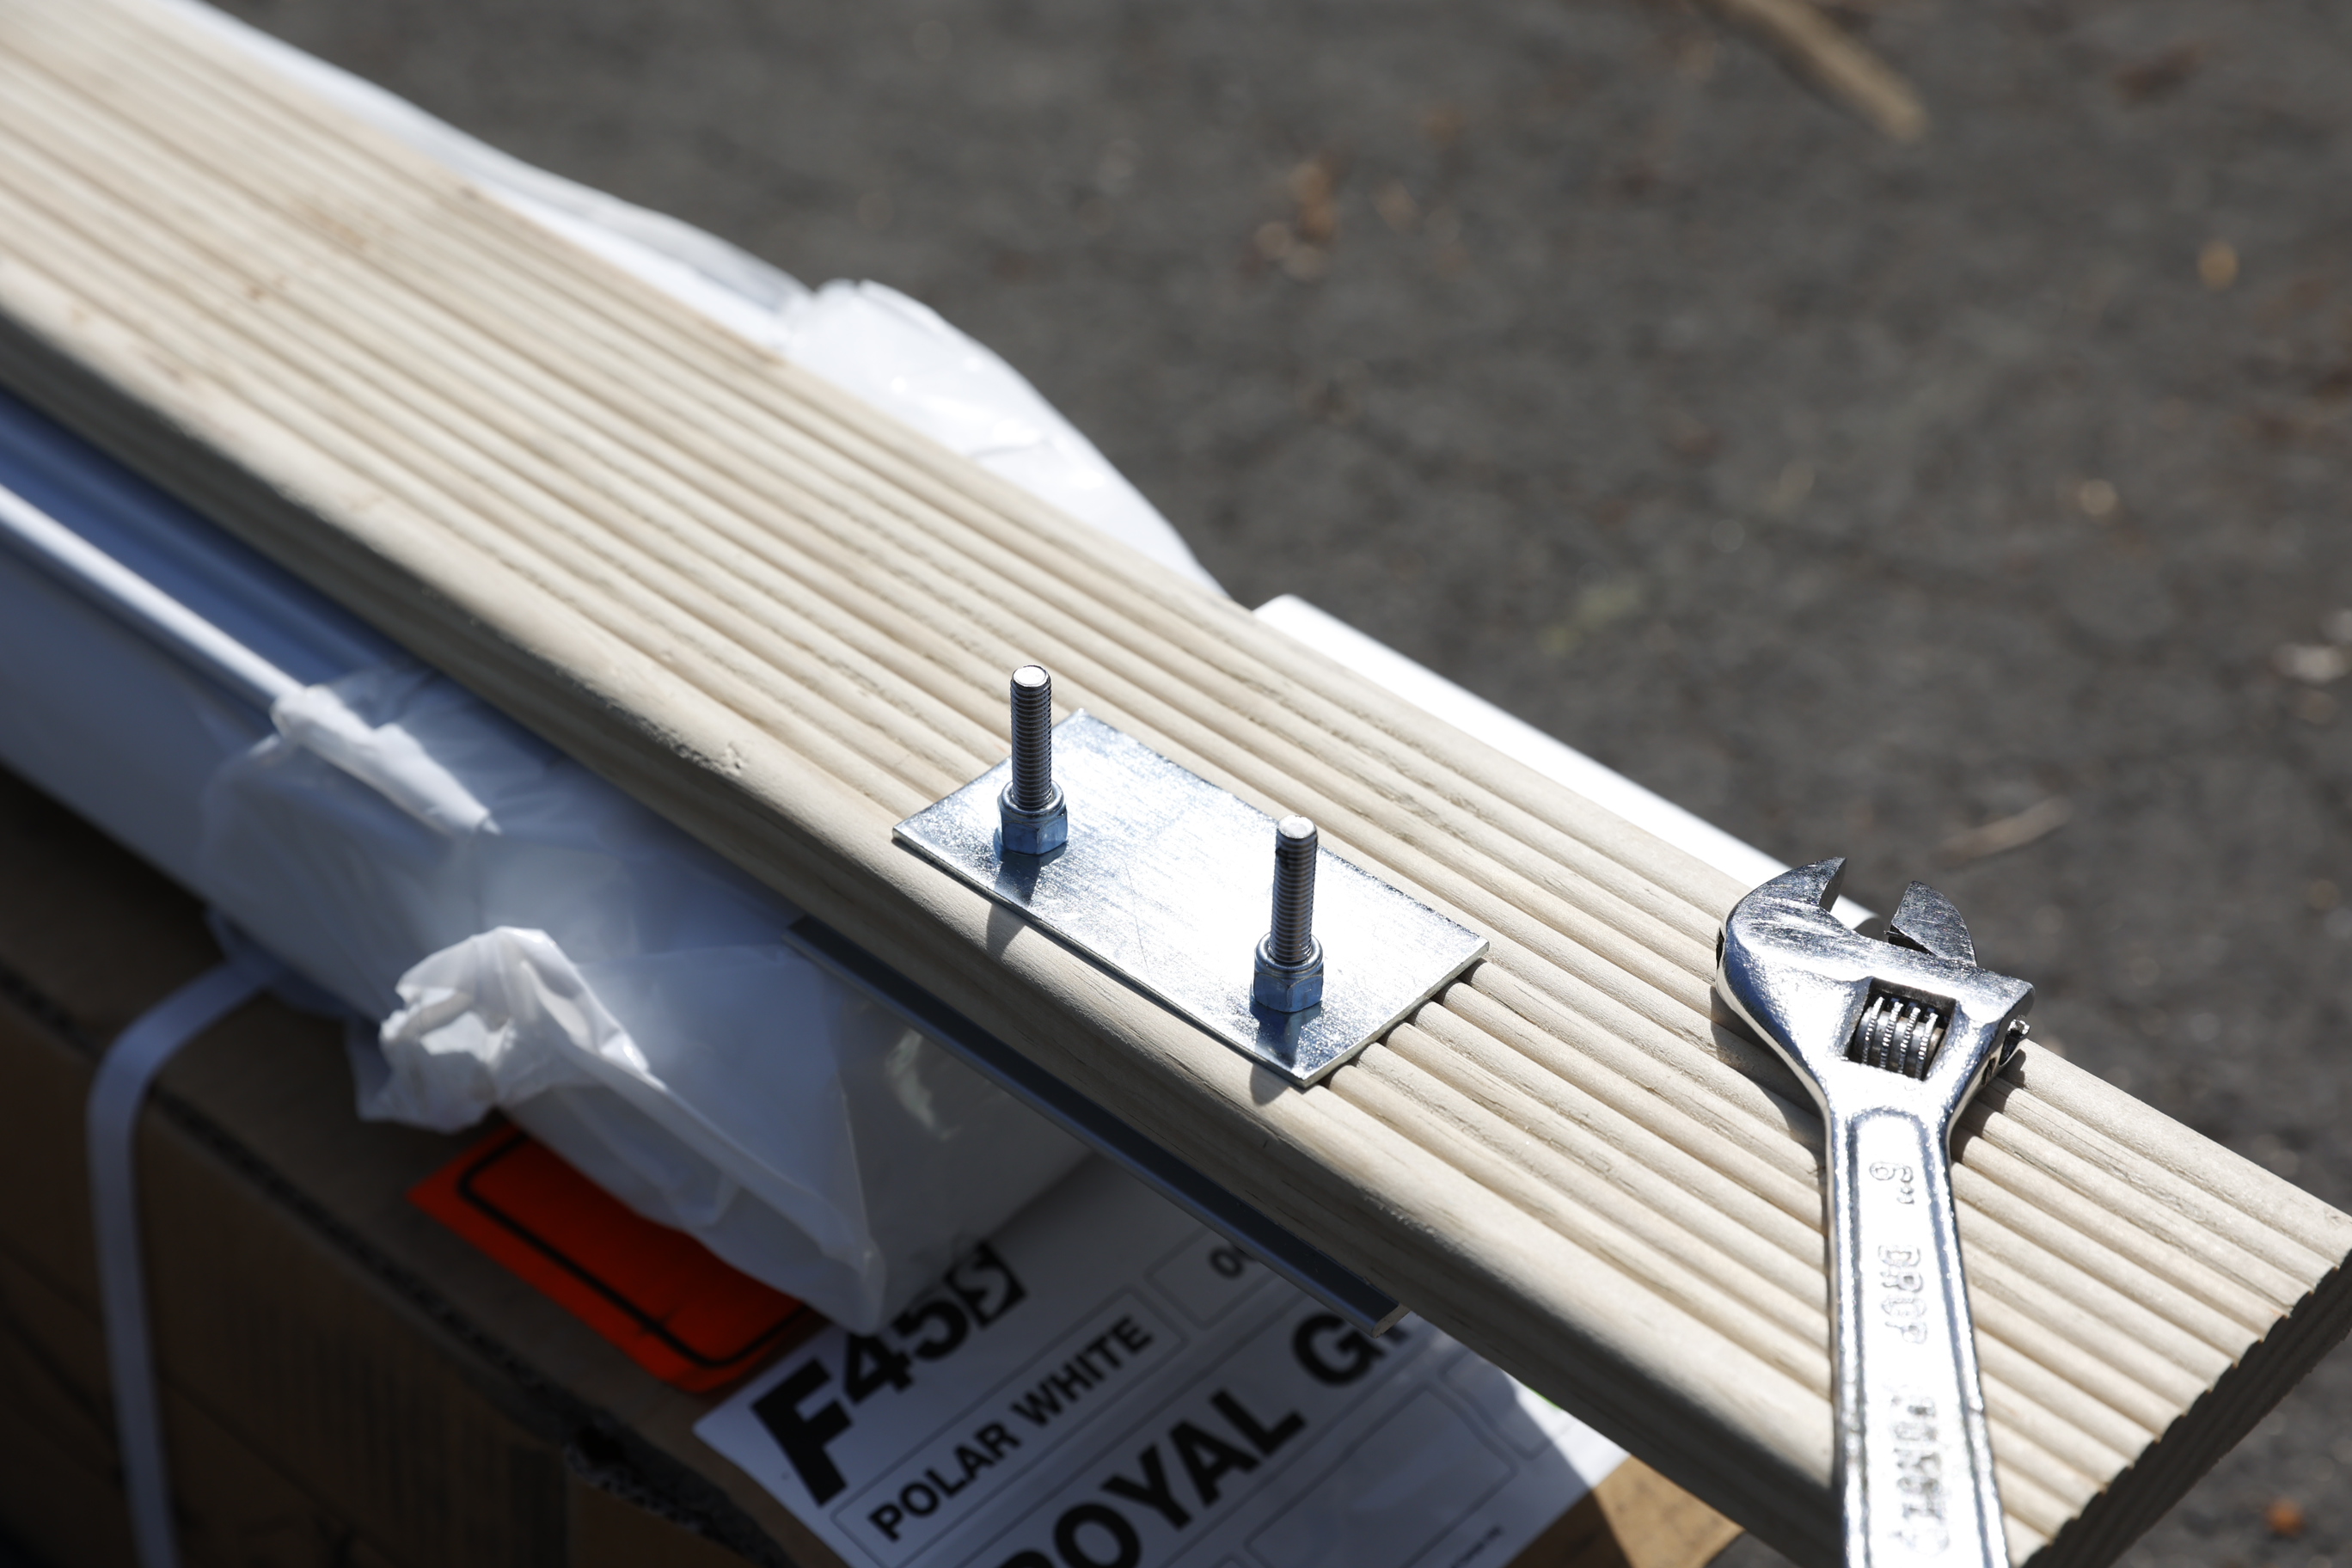
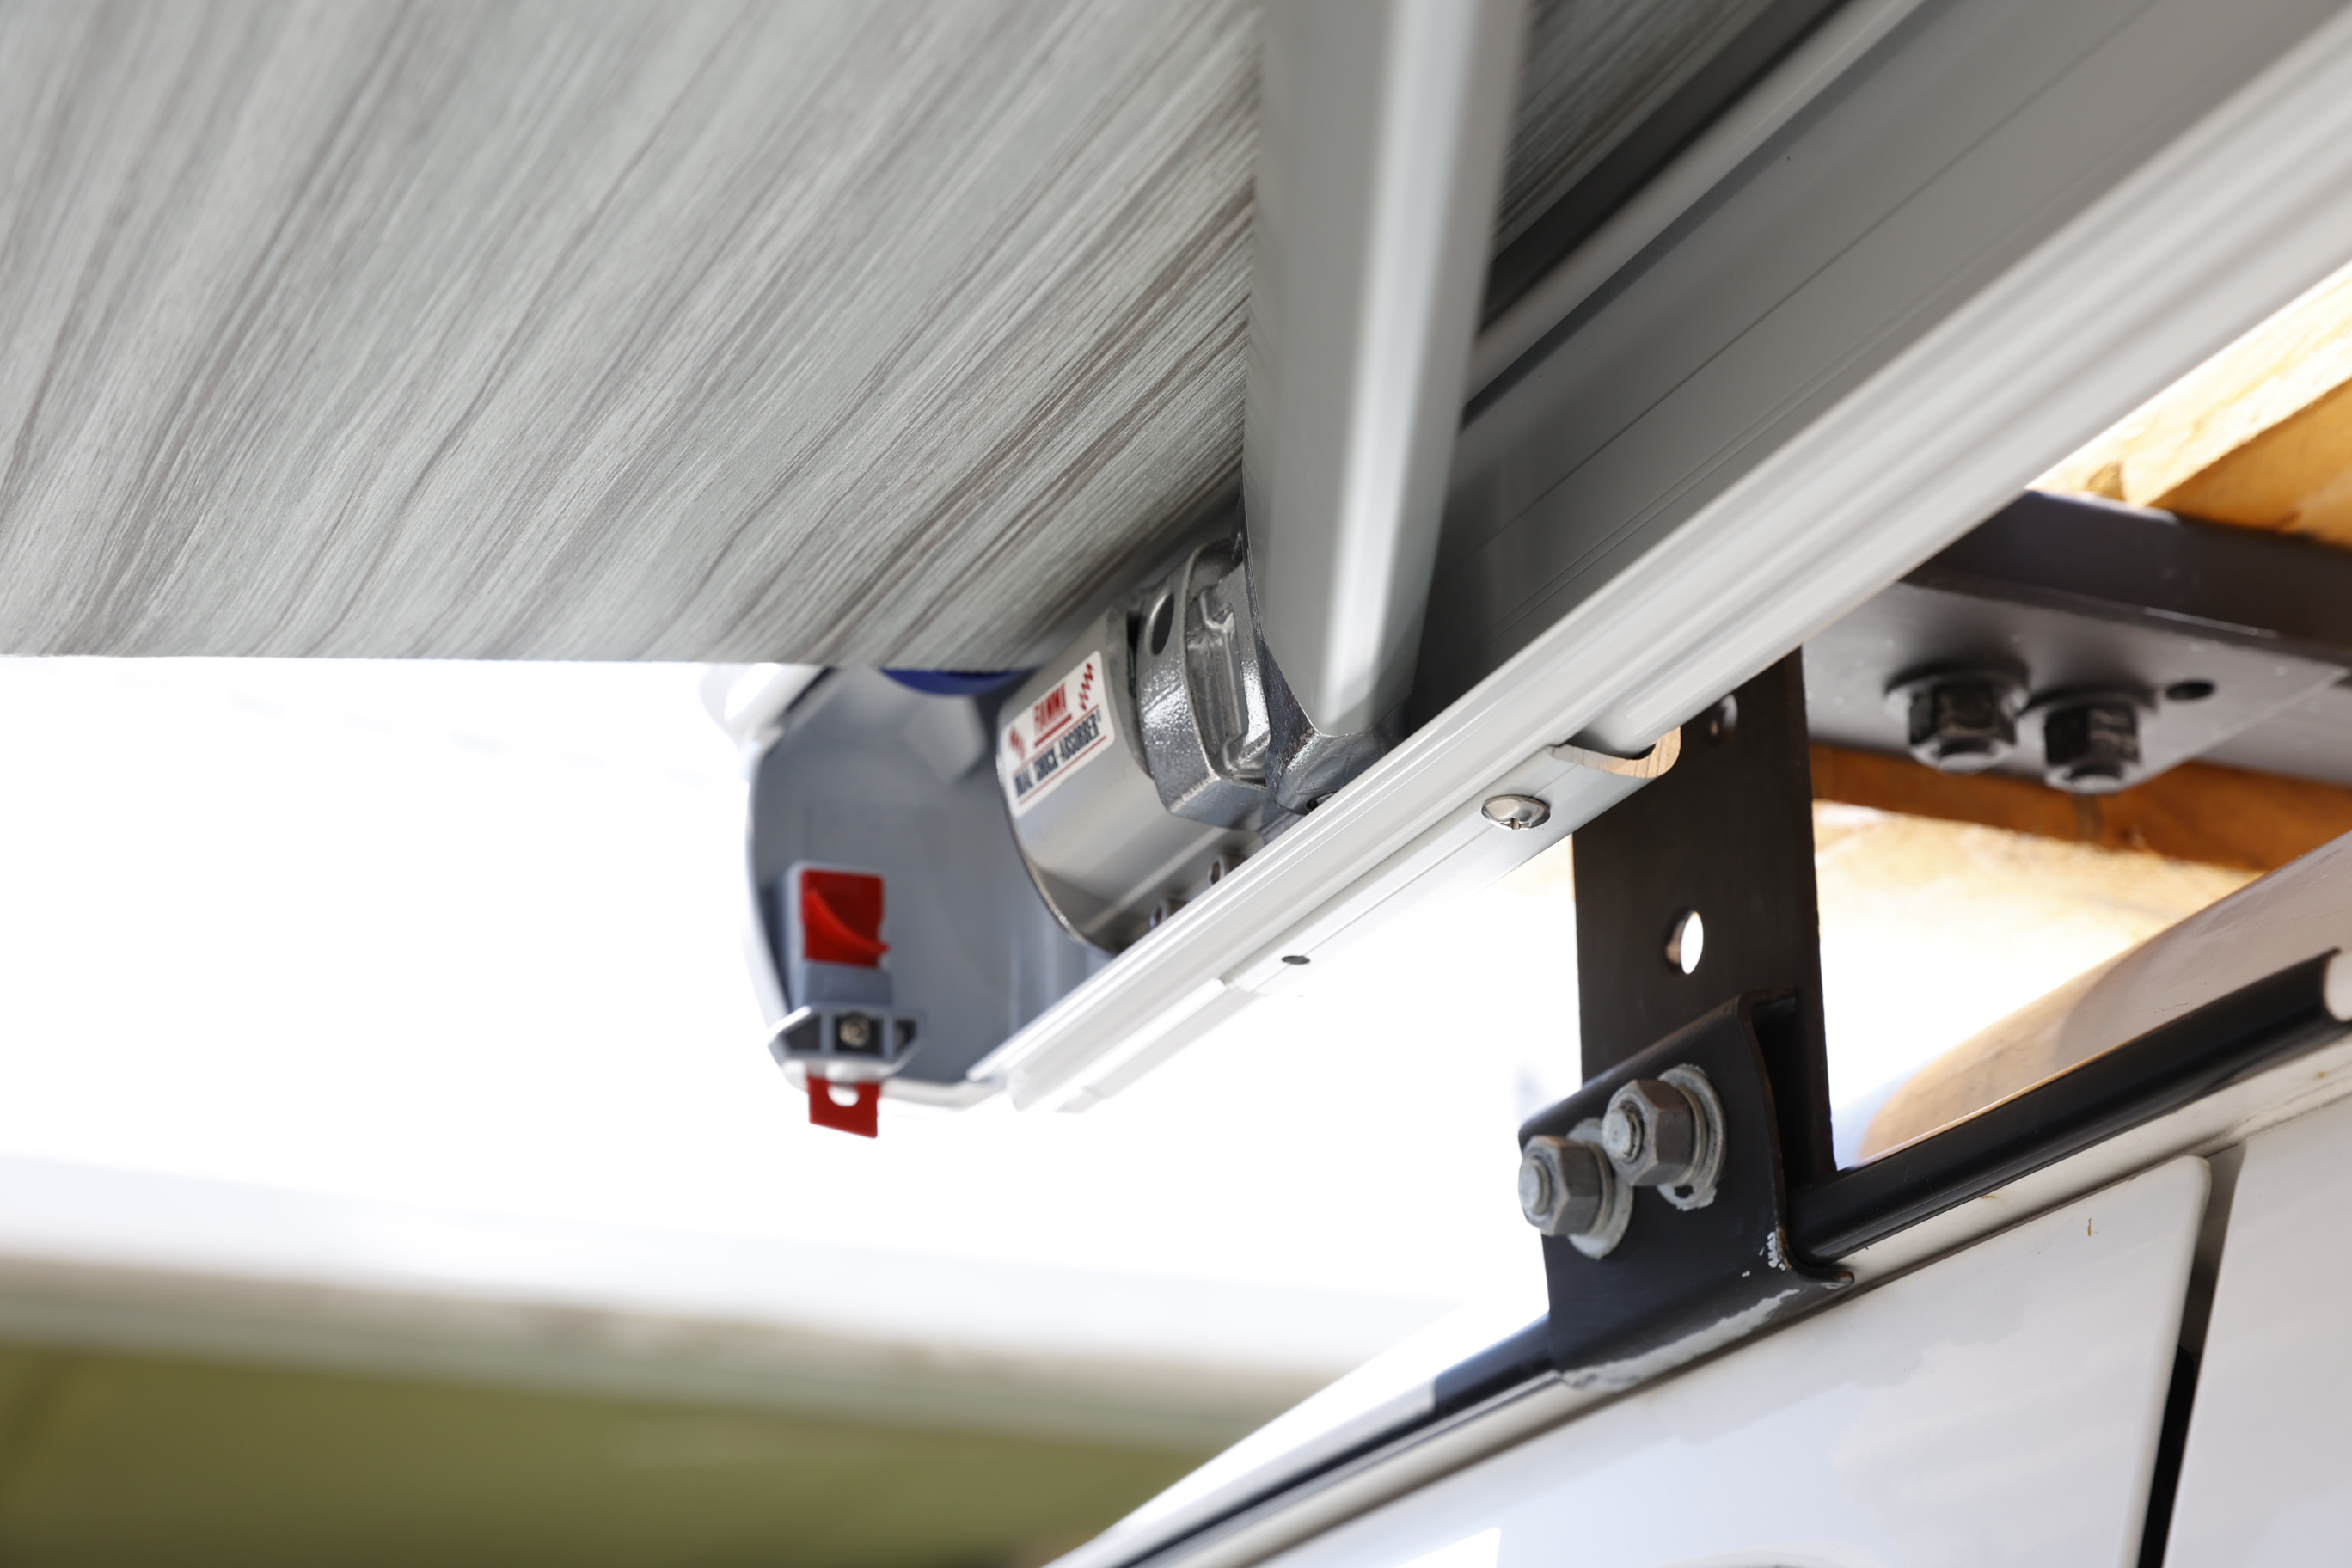
There are 3 mounting brackets supplied that need to be located at certain points along the body of the awning - the outer brackets add strength to where the awnings supports are hinged, the inner bracket keeps the body straight and secure. To figure out the location of the mounts on your vehicle, find where you’d like the centrepoint and measure the awning to find the outer mount locations. In our case, we simply sat the board on the awning and transferred the mount locations across.
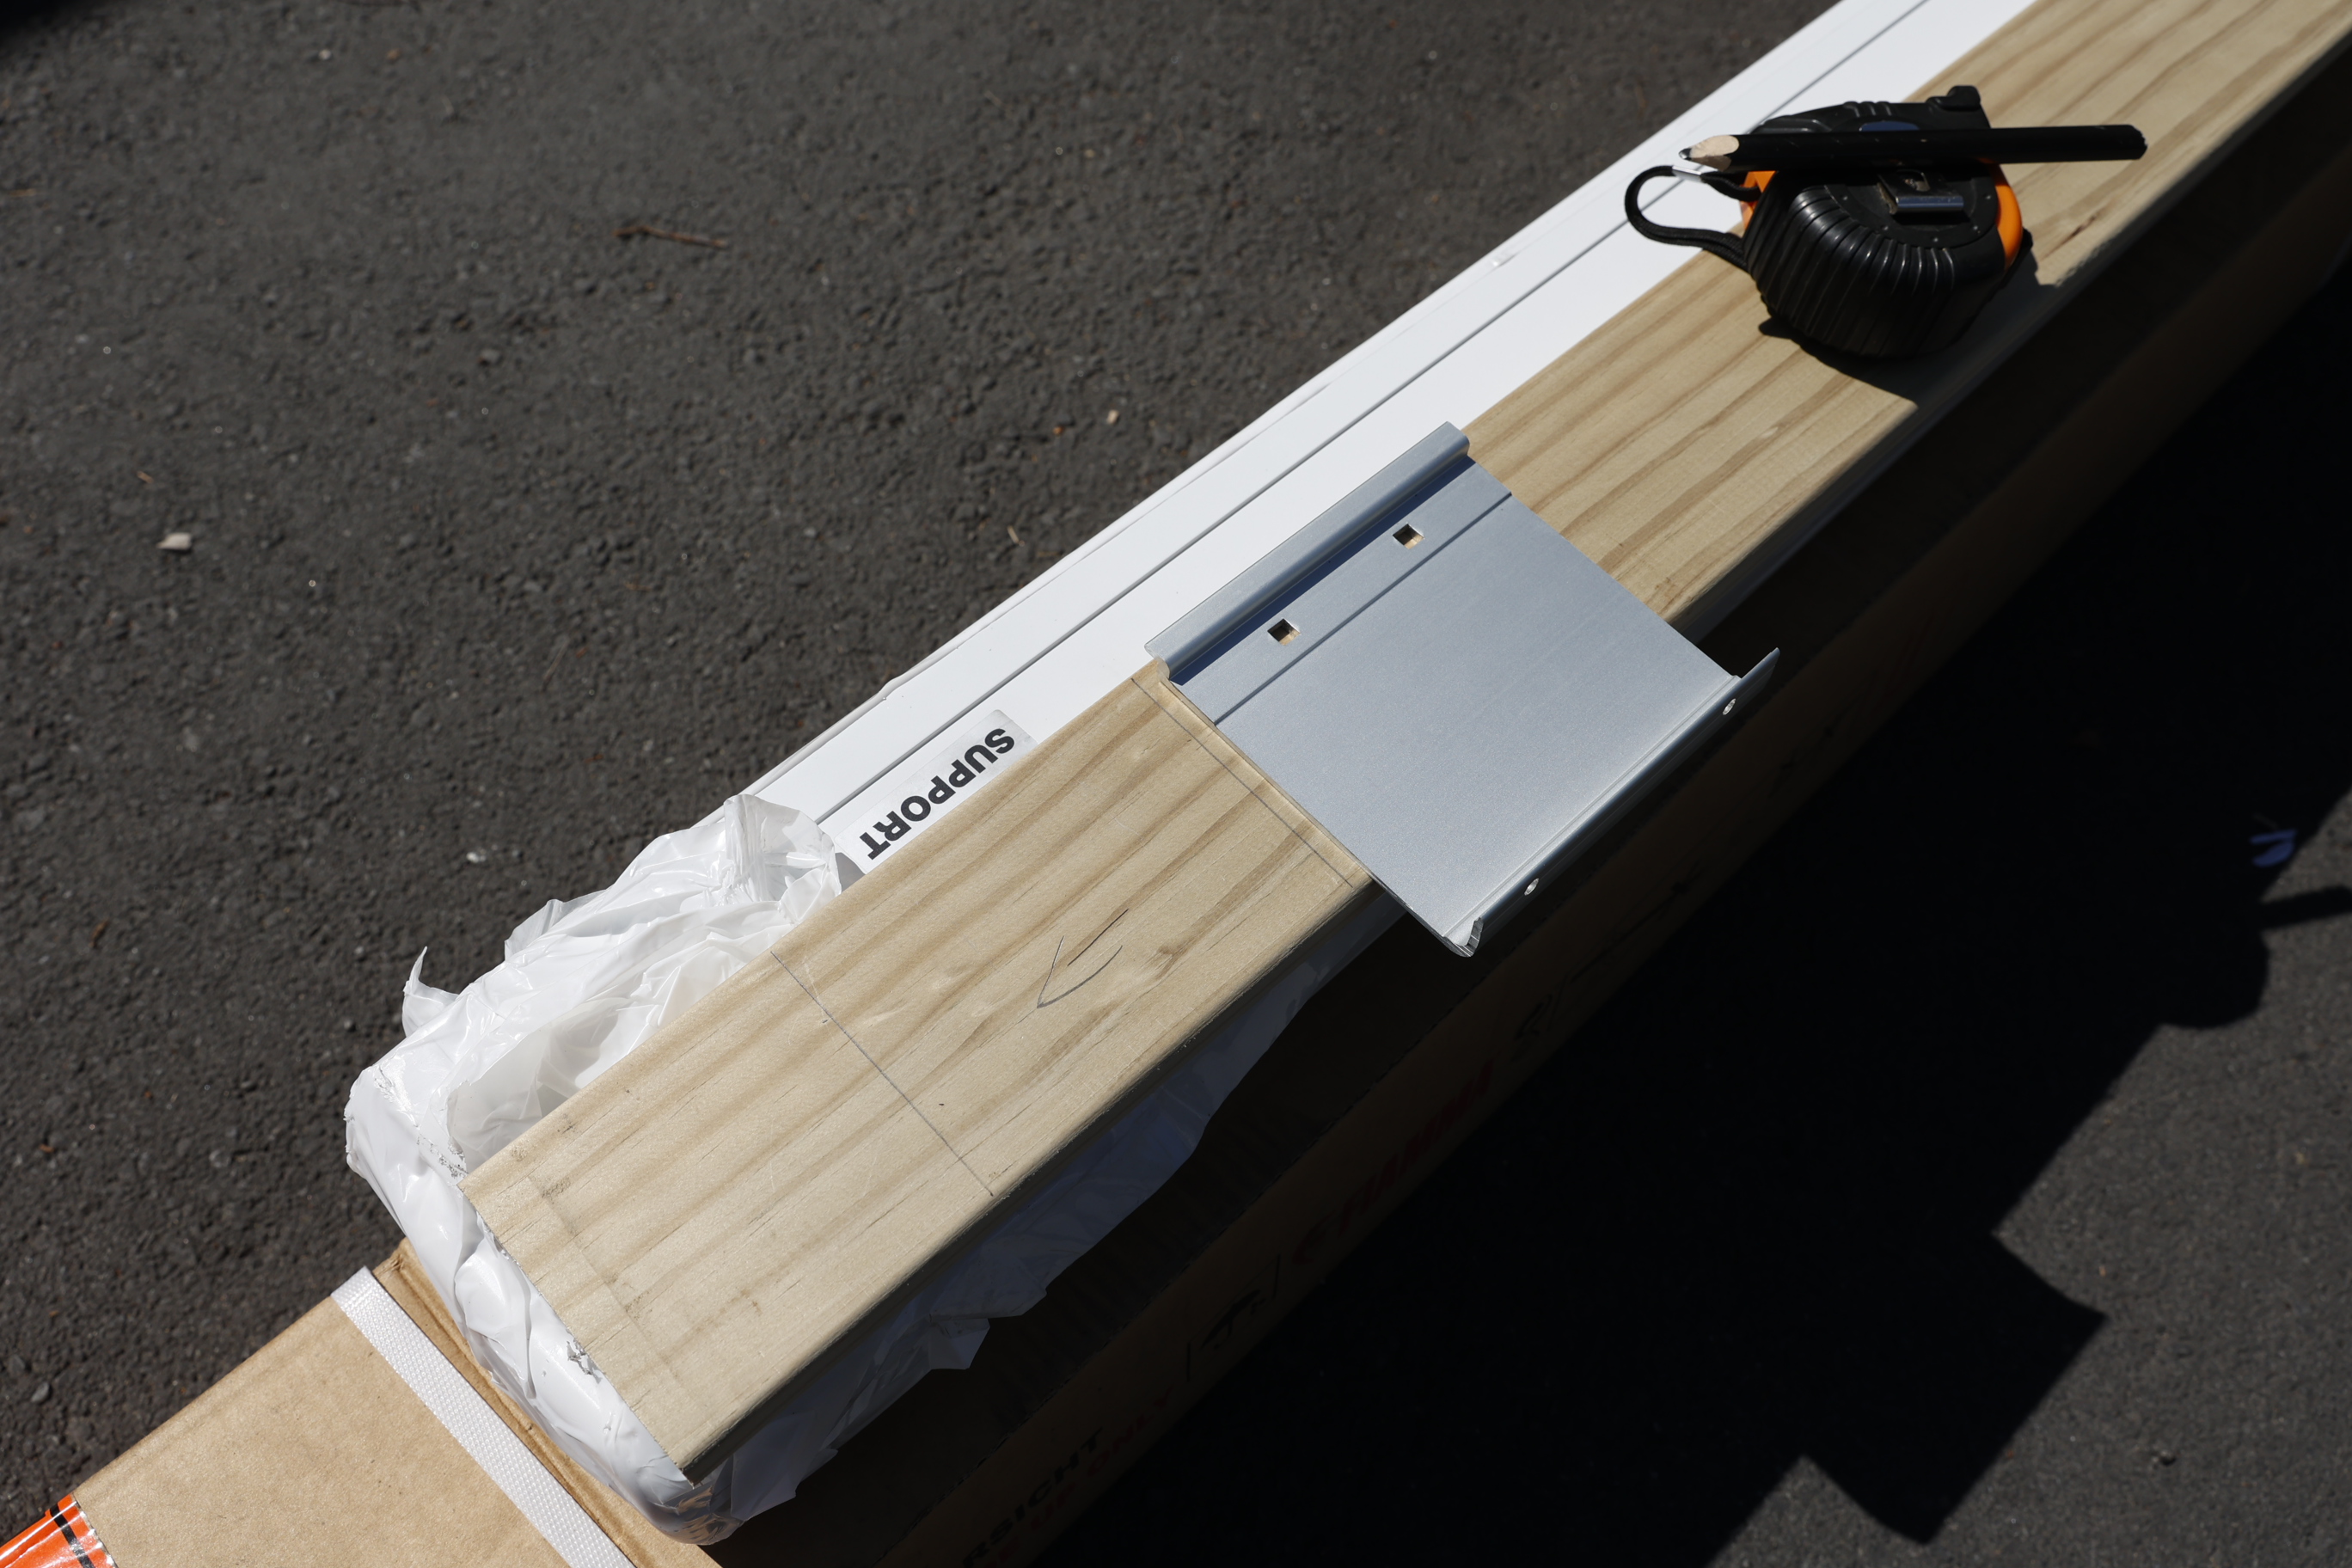
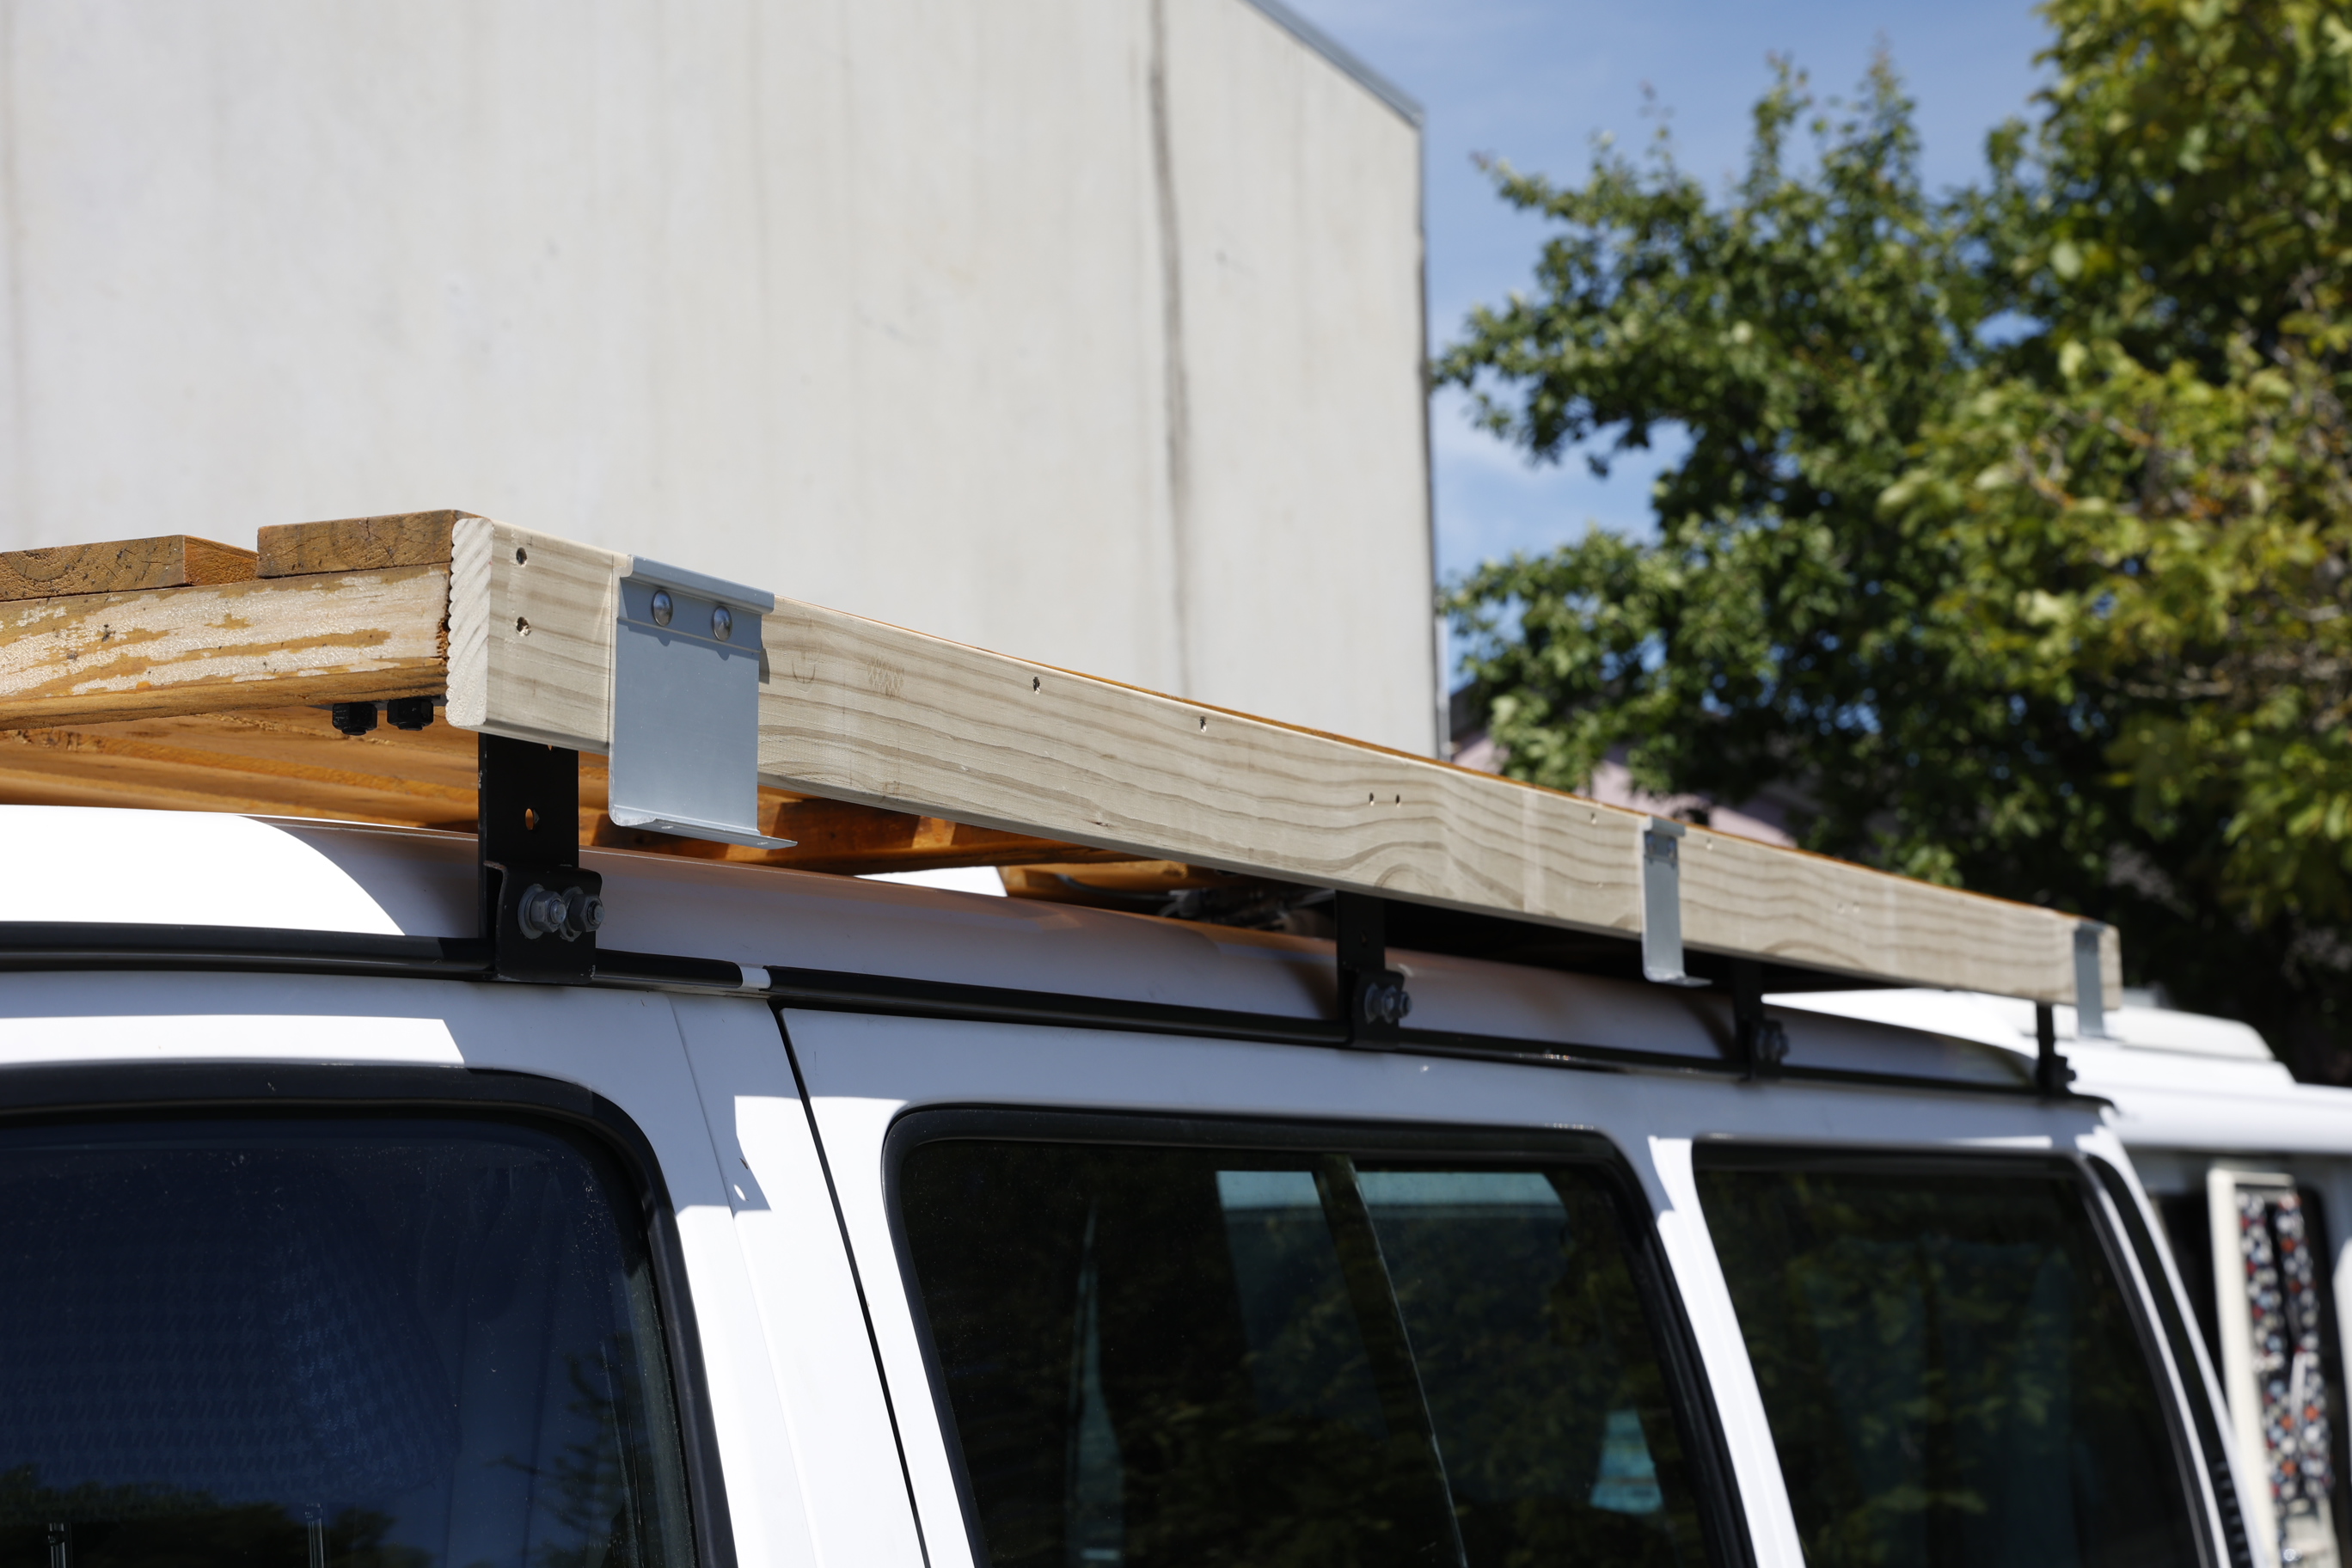
The arrow points to the front of the vehicle as a reminder of which way up the board should go.
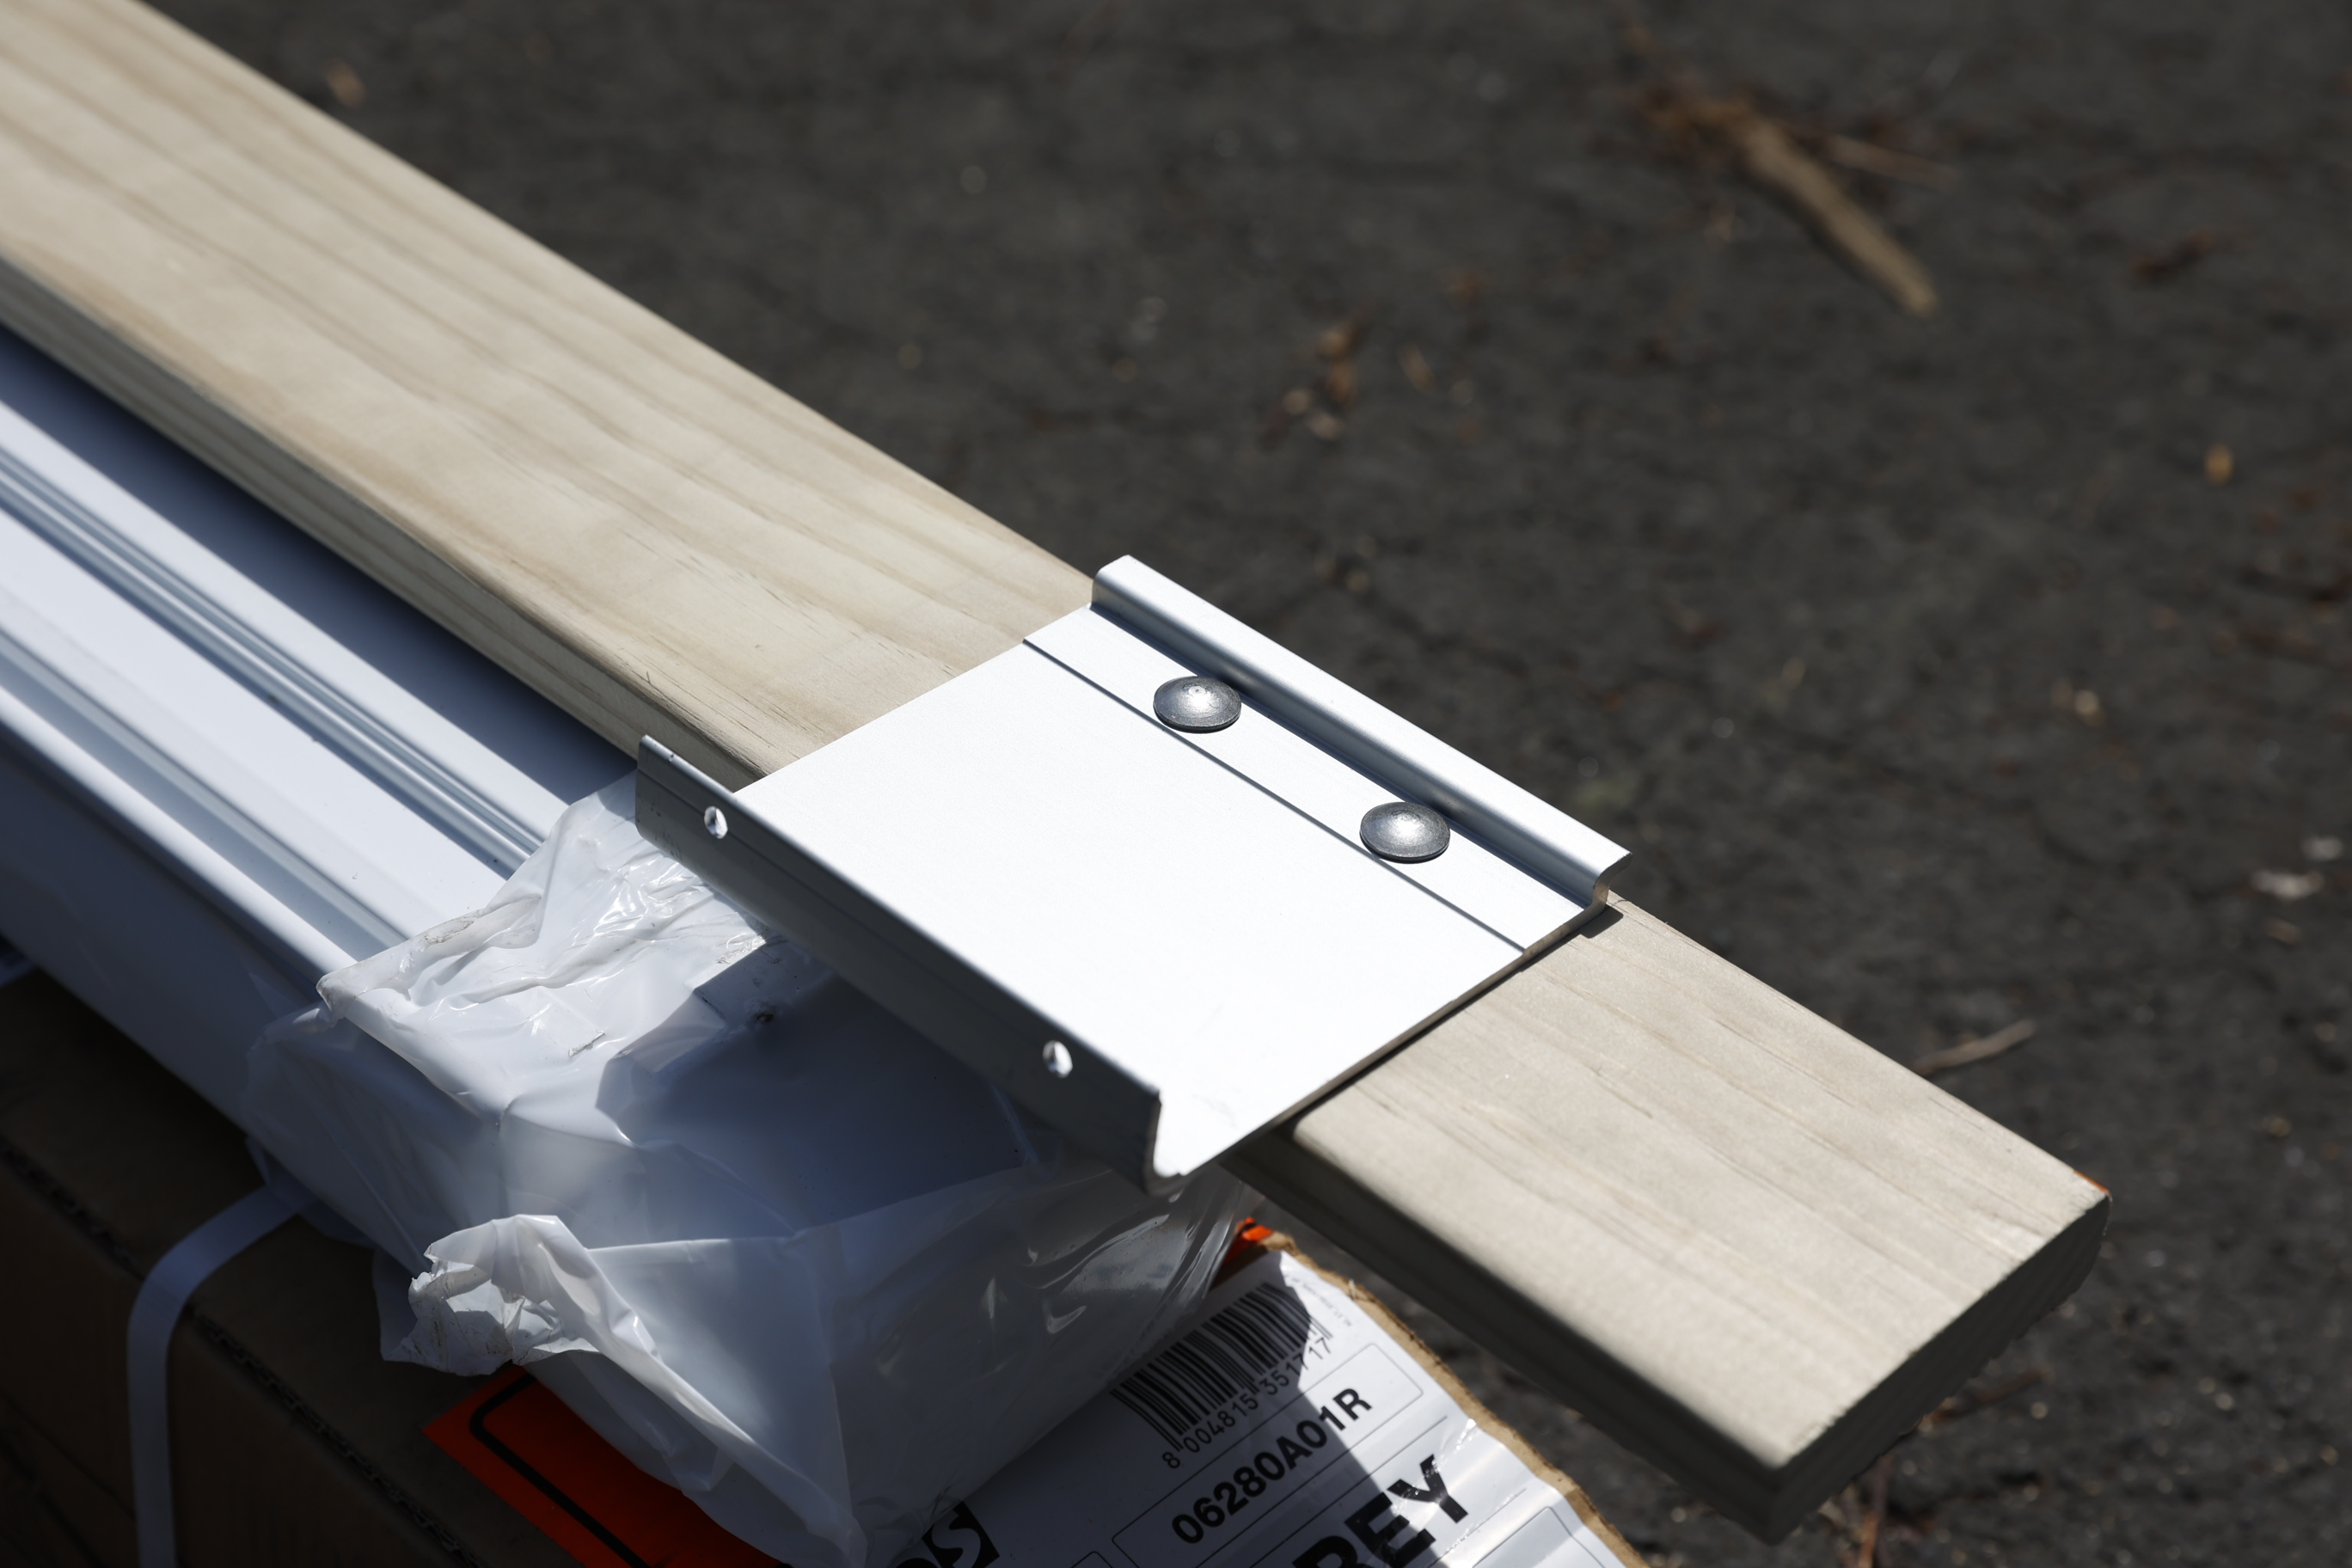
Trace the location of the bolts and drill an appropriate size hole. With this done it’s simply a matter of inserting the bolts through the mount and board (or campervan wall), attaching the metal plate to the back, and securing it all down tightly with nuts. The metal plate helps spread the pressure applied to the bolts, preventing them from being pulled out under the weight of the awning.
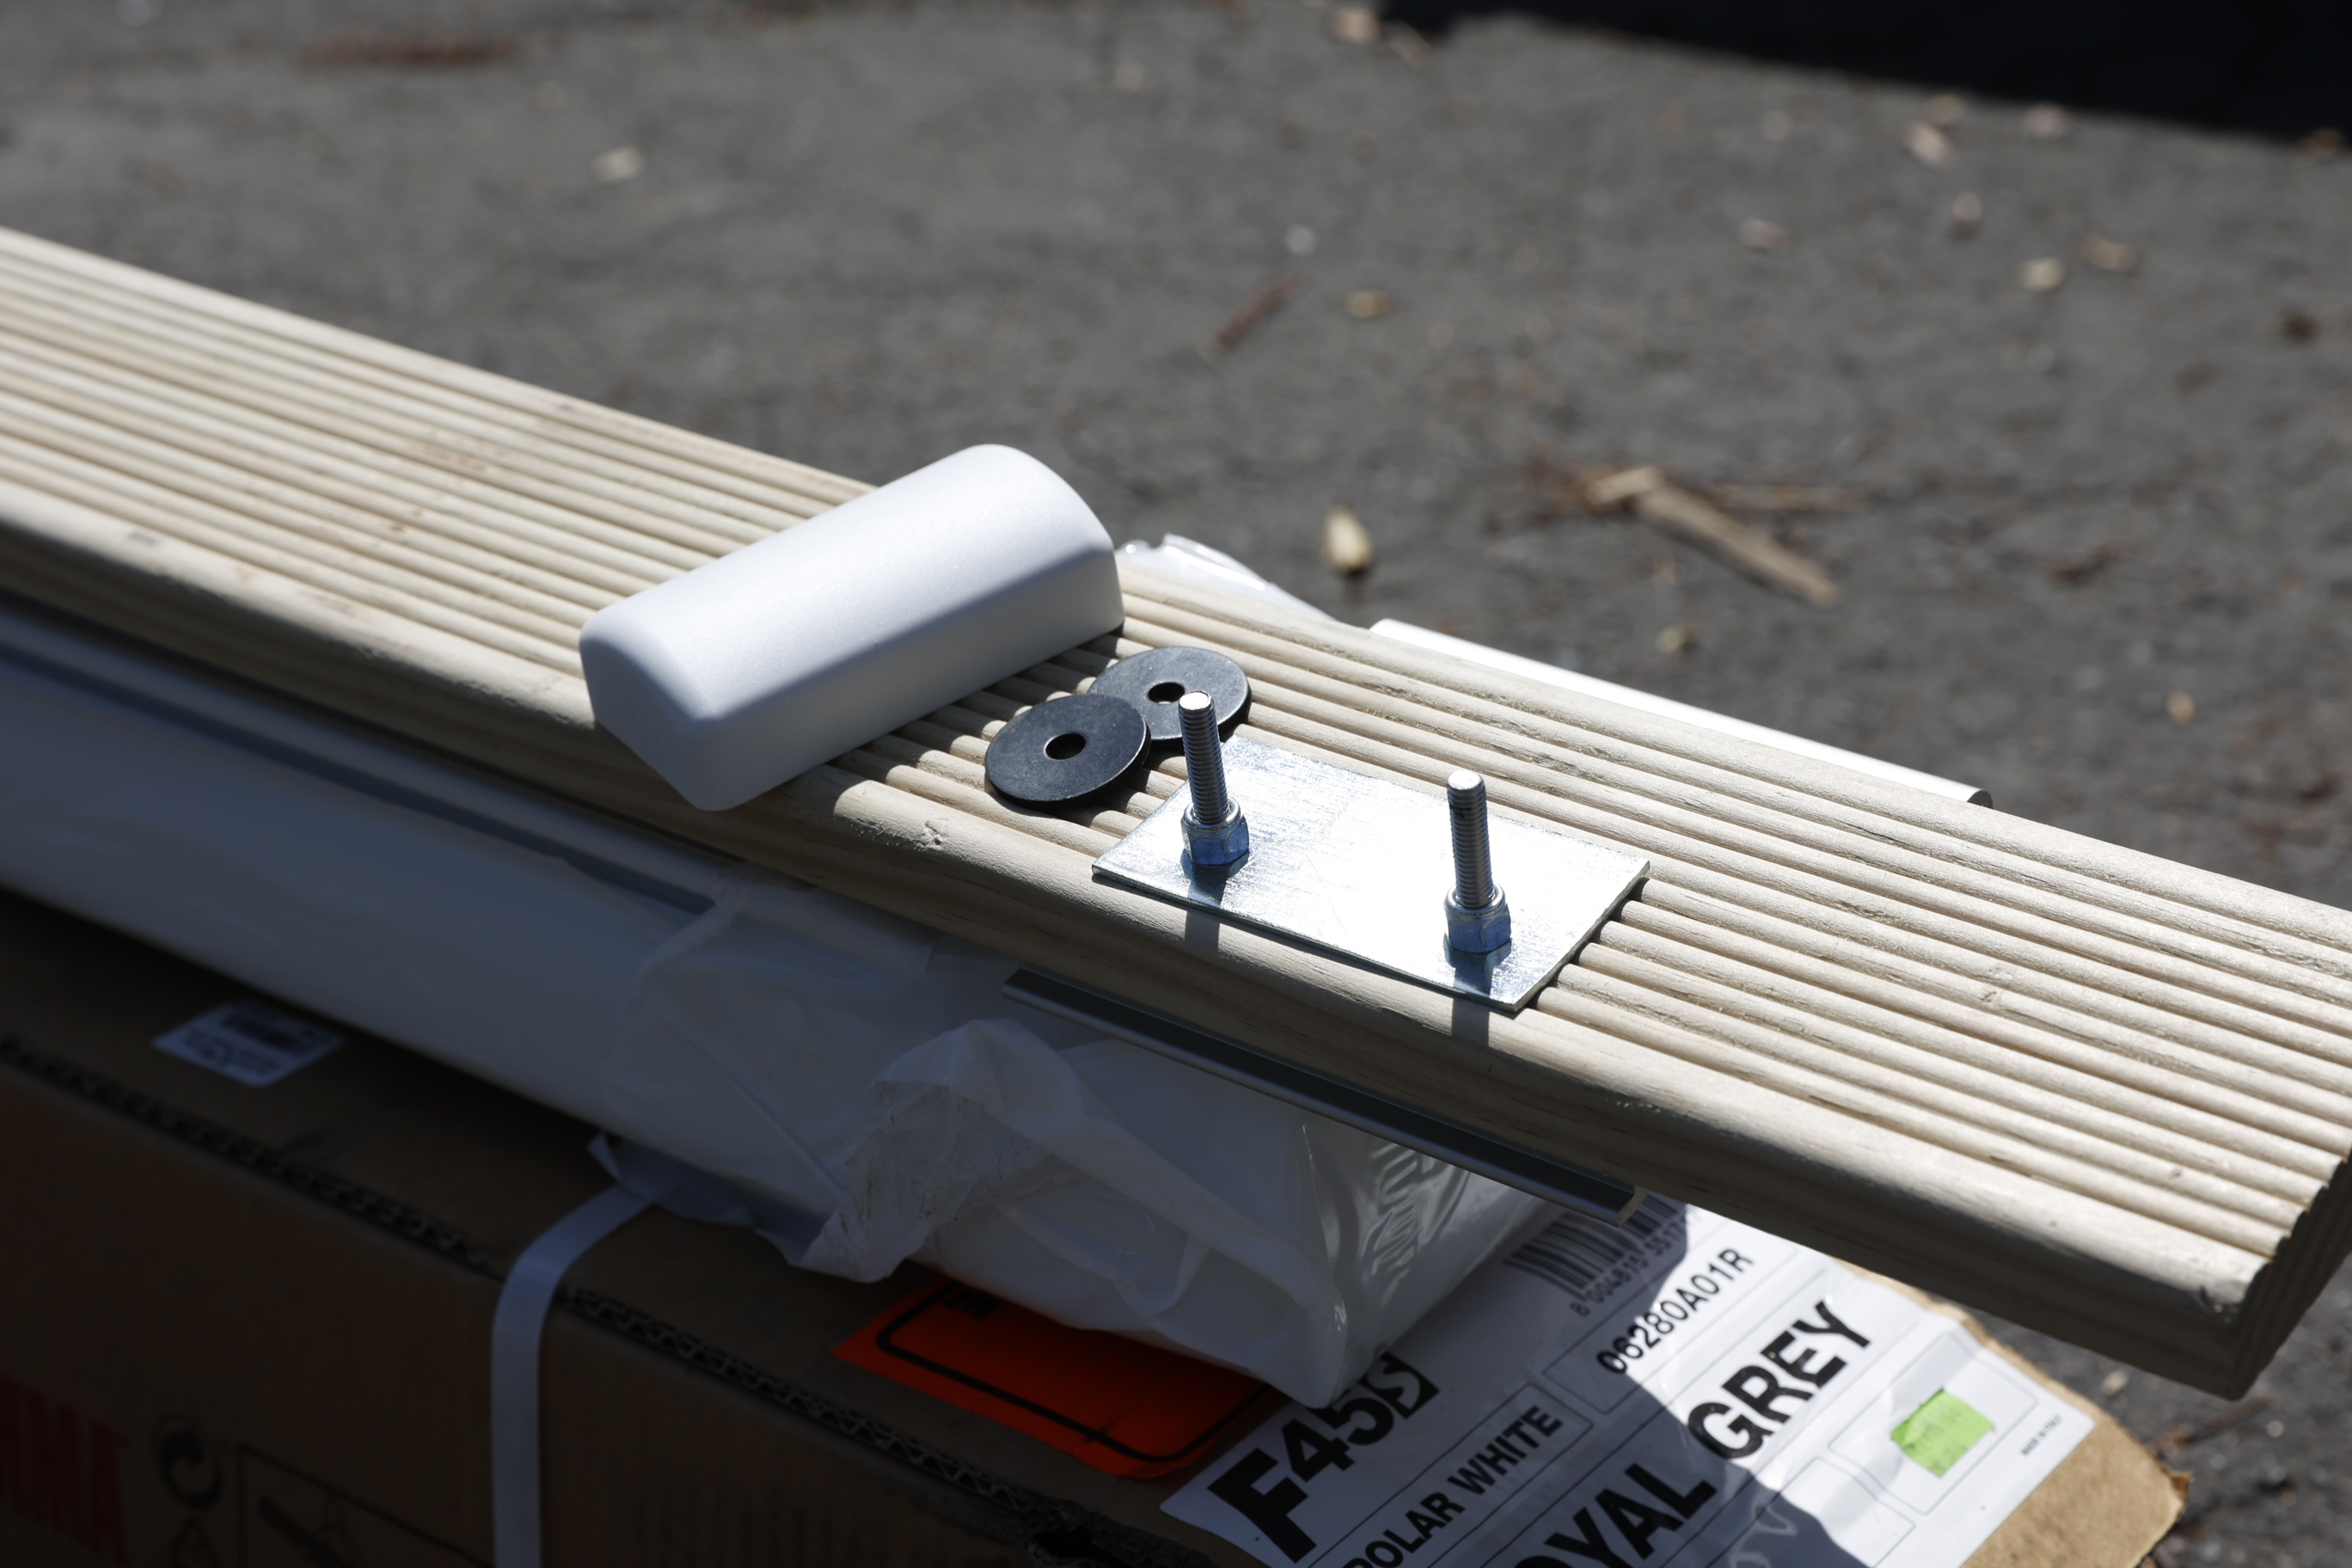
For those drilling right through to the inside of the vehicle, this awning comes with a cover to hide the bolts, as well as rubber grommets to help keep out the water. Note: Apply silicone around the holes, grommets and bolts to prevent water from entering the vehicle.
To attach the boad to the timber pallets on the roof we used a small drill bit to drill a pilot hole, and long decking screws to secure it in place. With the brackets up on the vehicle, that’s half the job done!

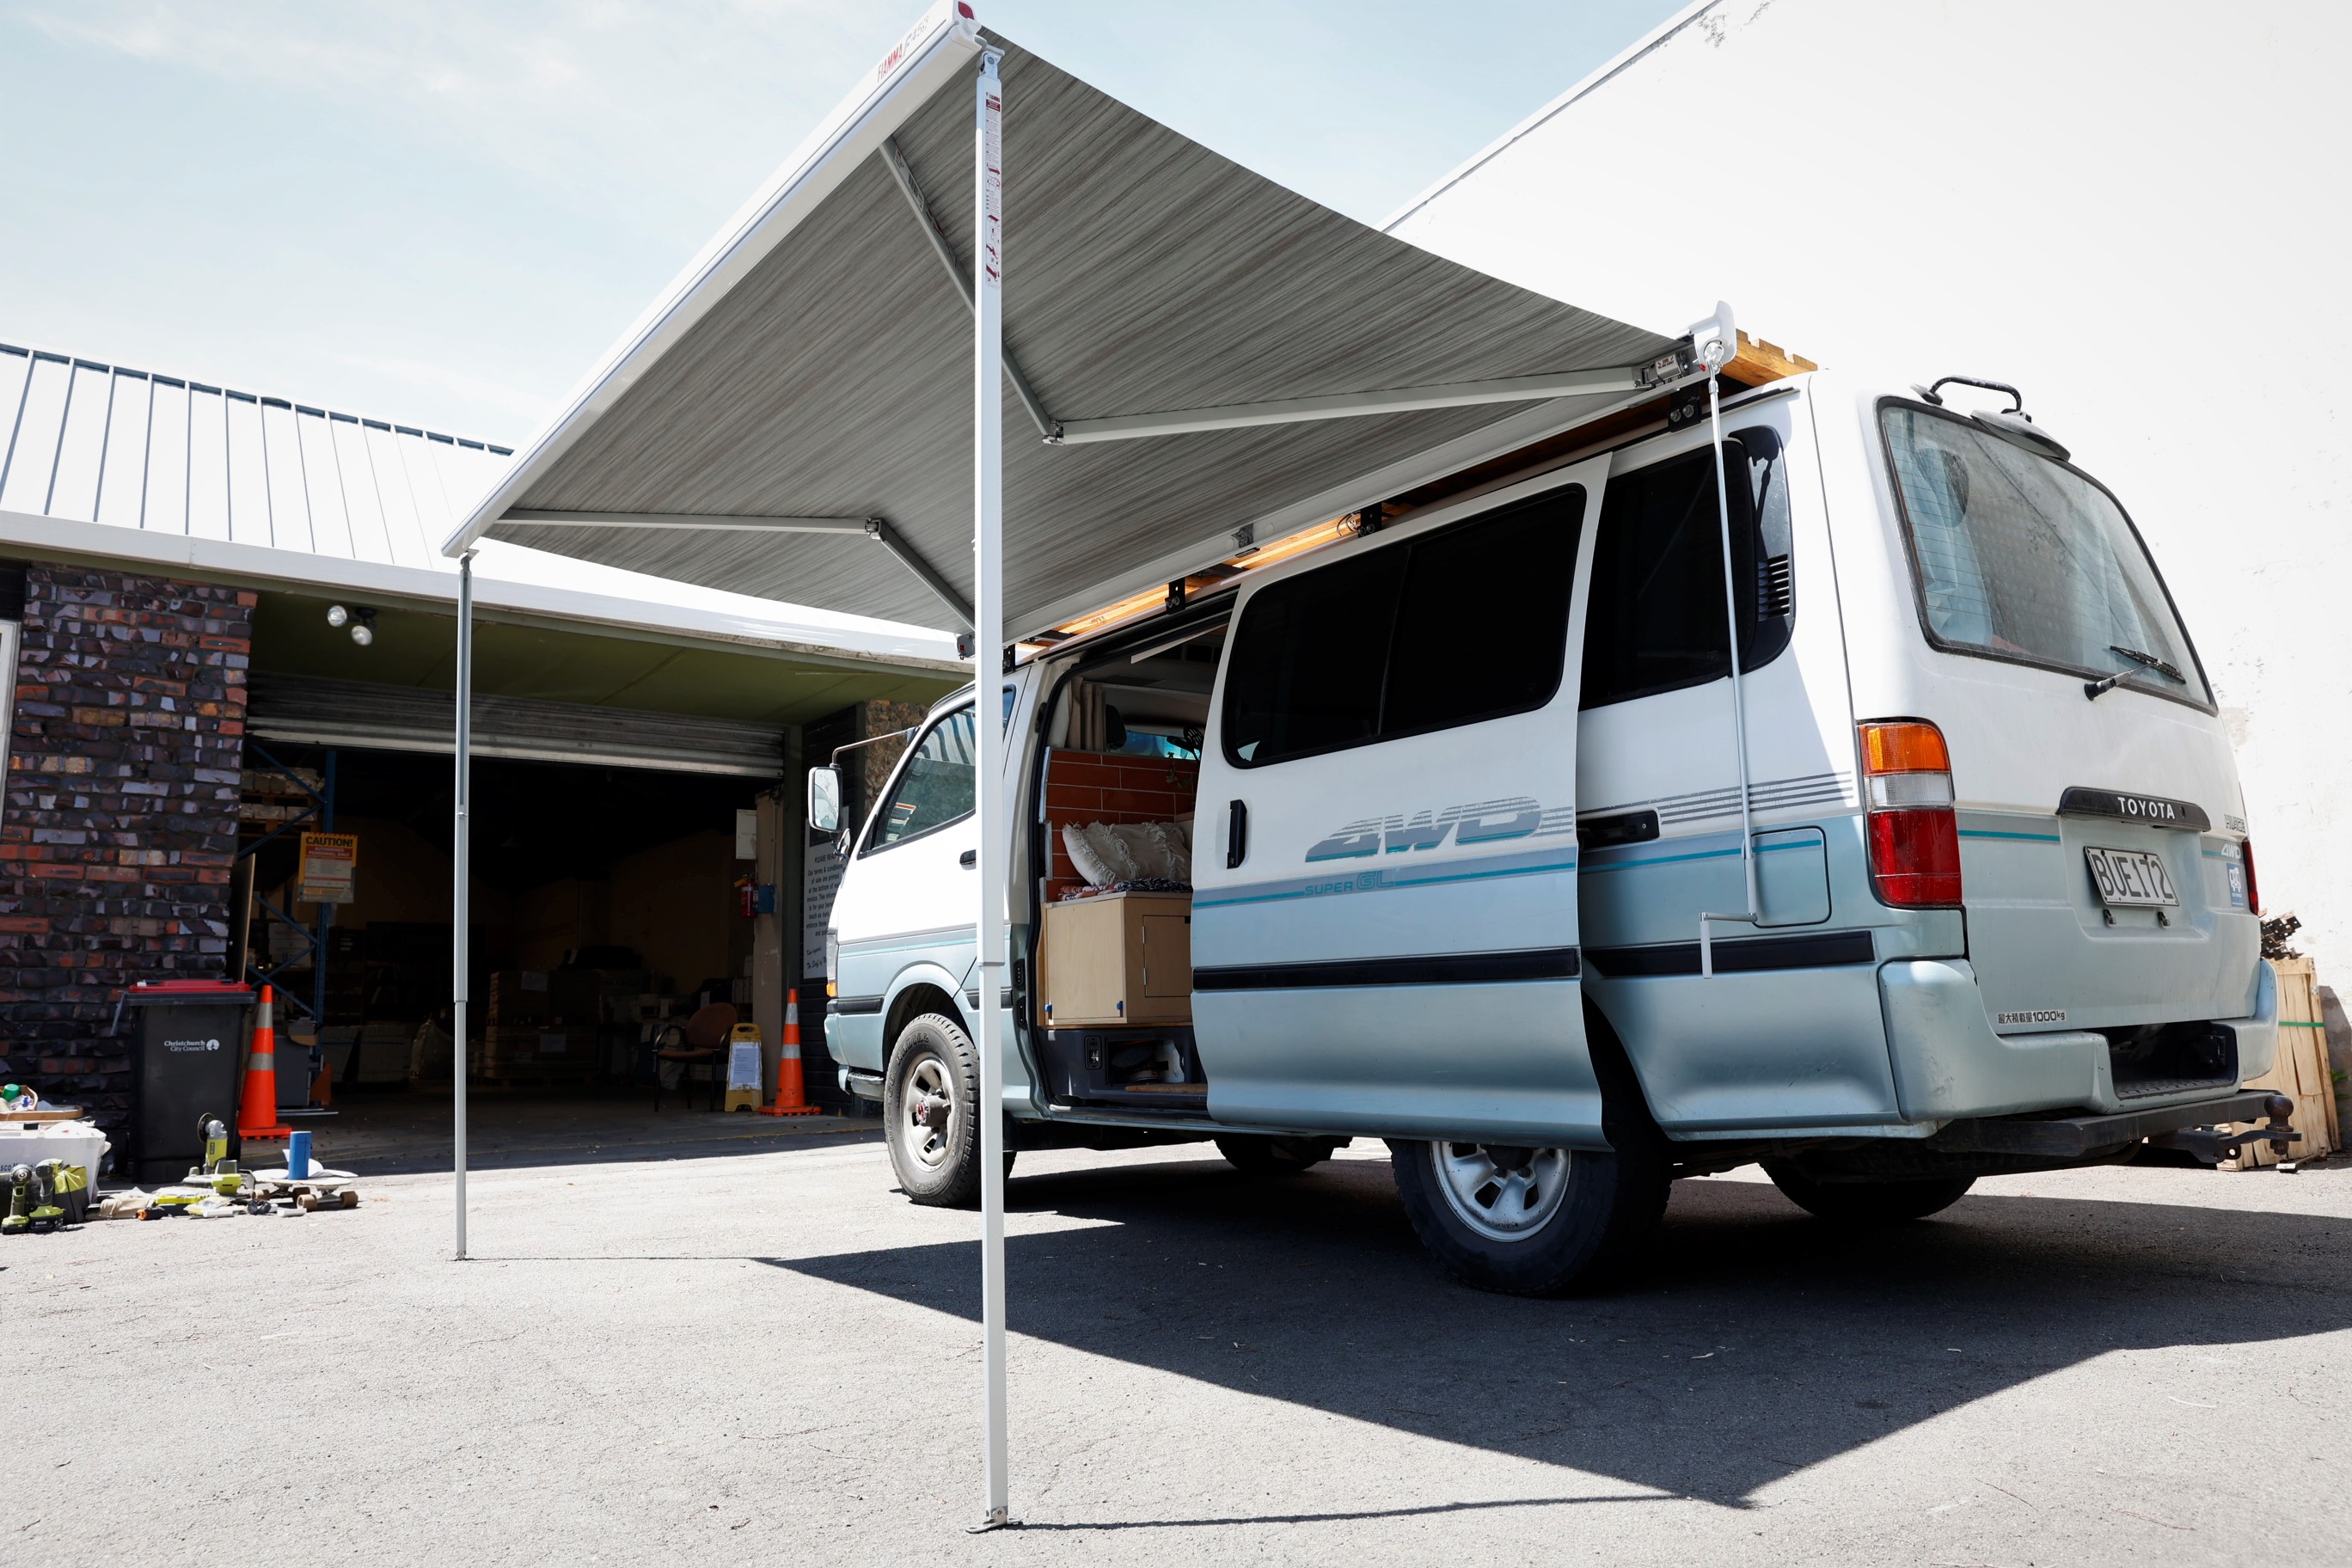
Step 2: Attaching the Awning Body
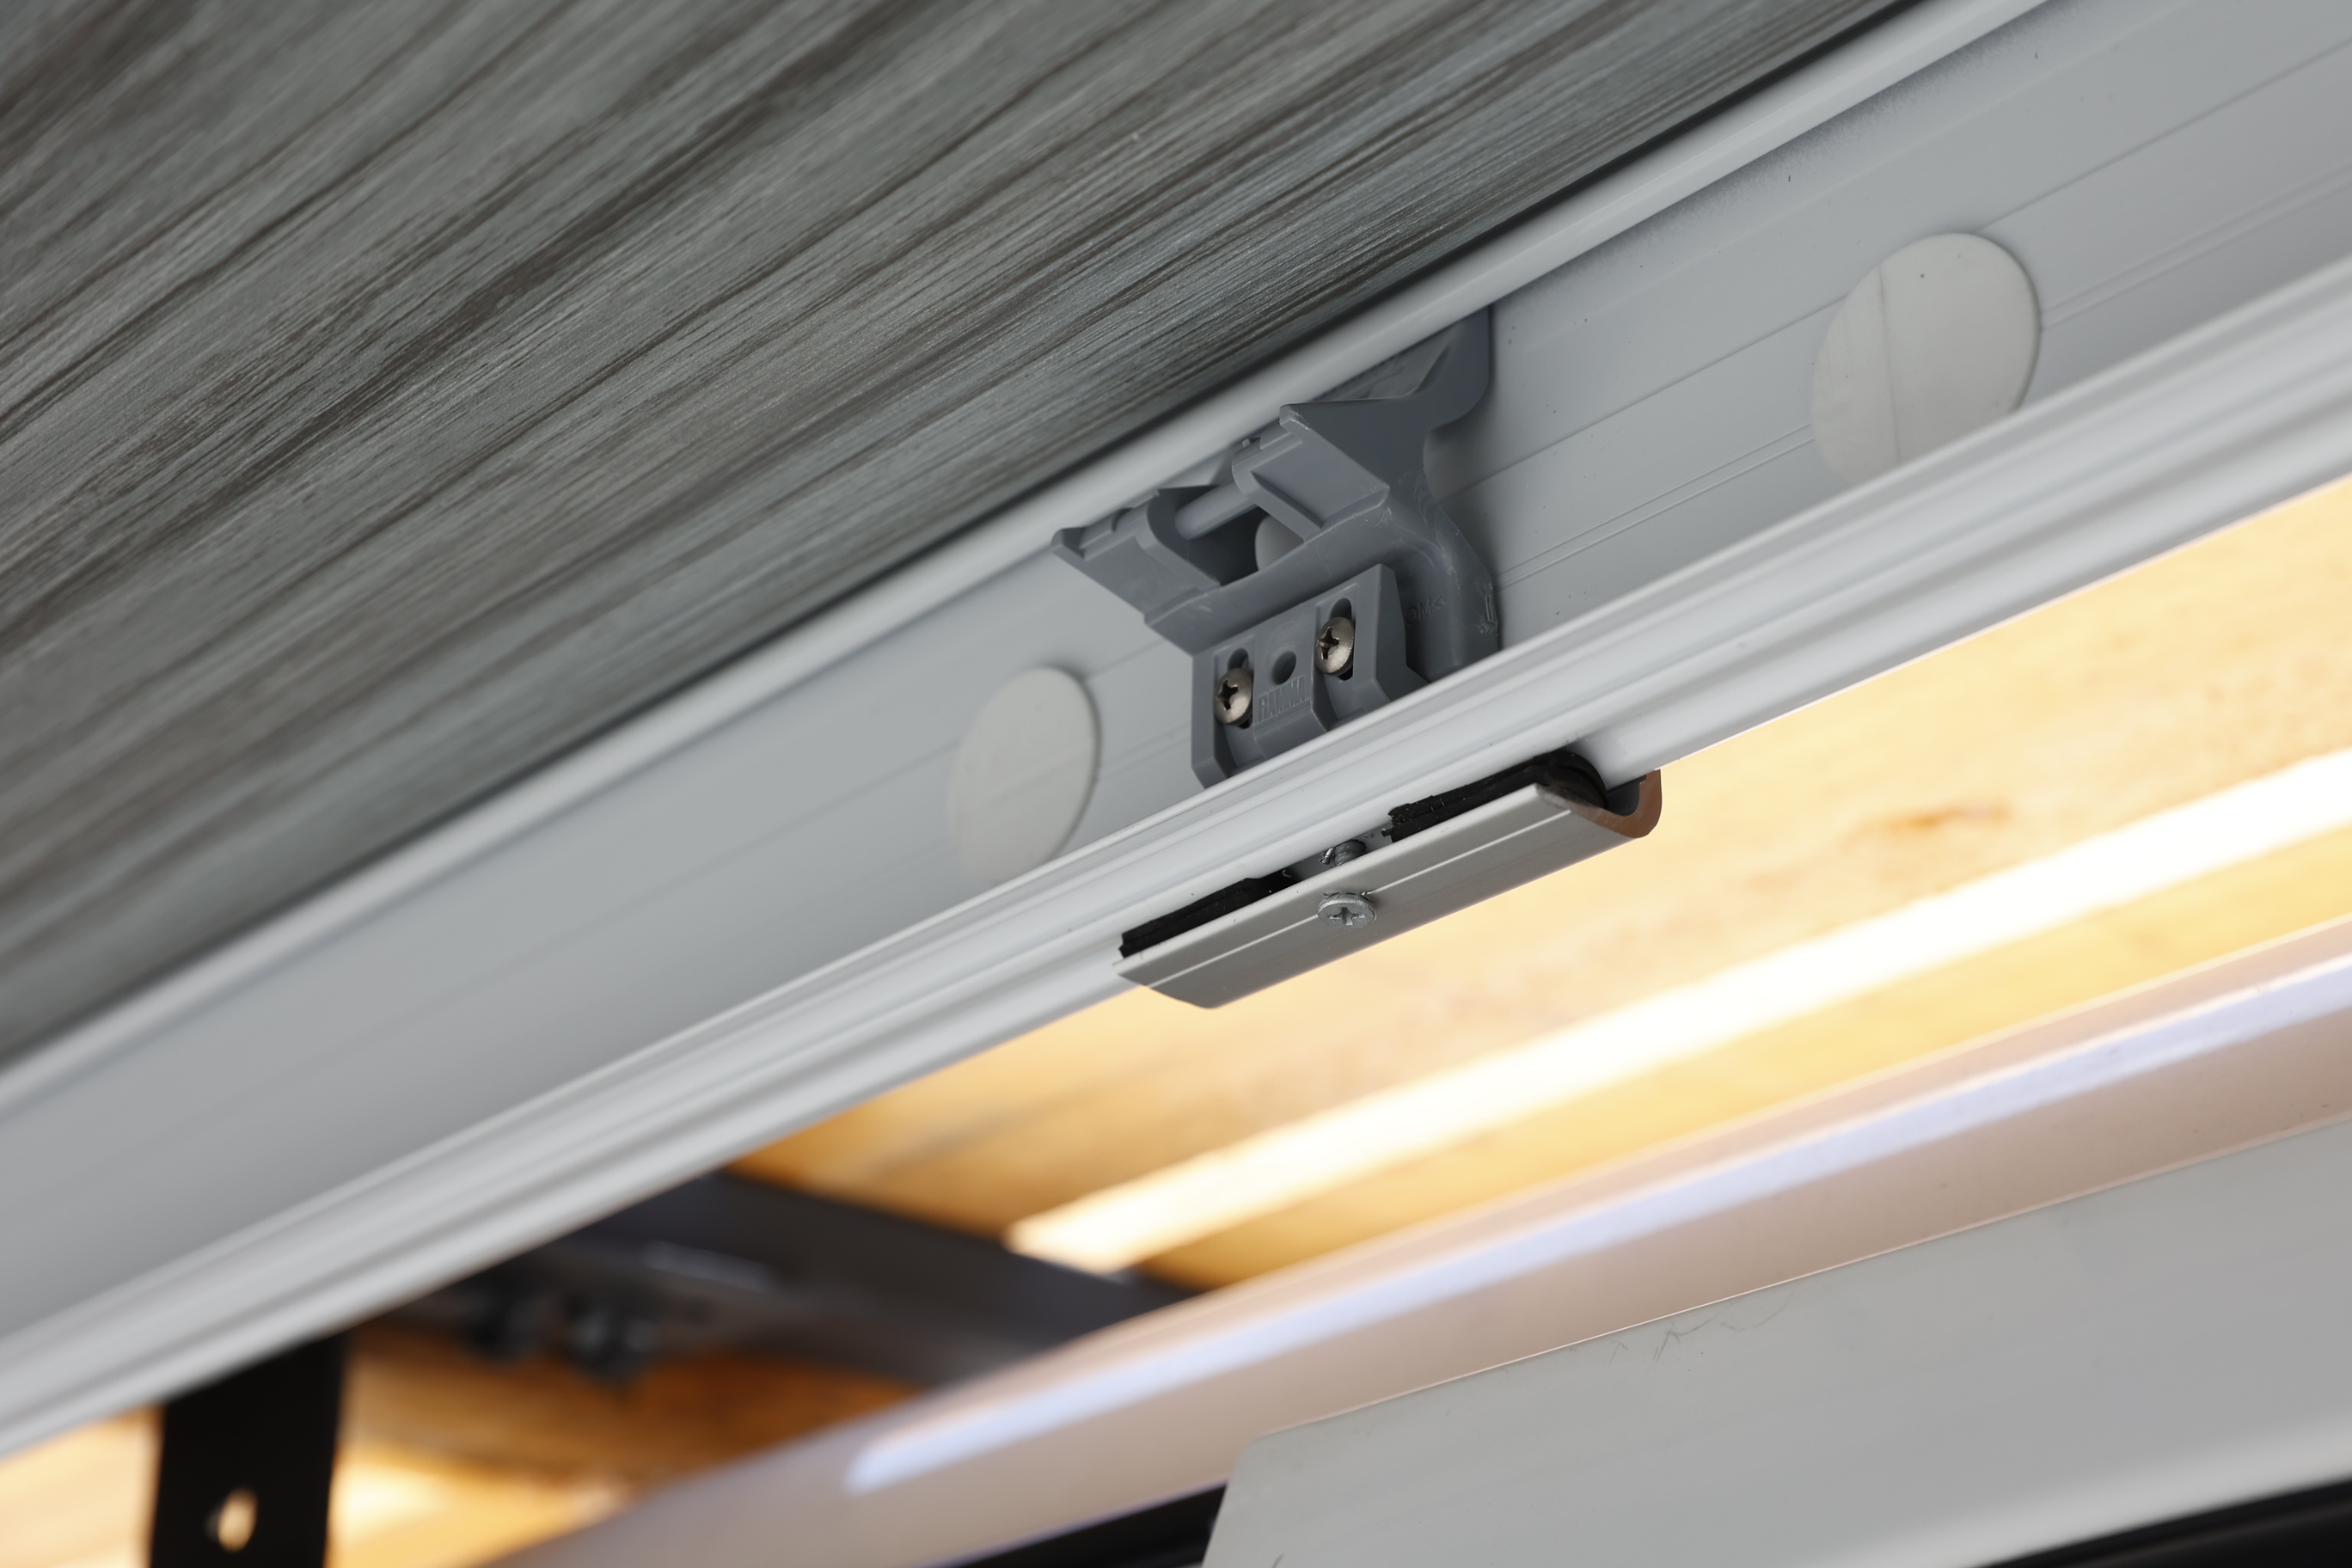
The simple design of the brackets means that attaching the awning is extremely simple! Grooves on the back of the awning body sit over the top lip of the bracket and the bottom of the awning case sits on the lower lip of the bracket - once the awning is in this position it just needs a few small bolts to hold in securely.
Using the removable handle, wind out the awning slightly to gain access to the area under the support arms. Using the holes in the bottom of the brackets, drill out a hole through the awnings case just larger than the supplied bolts - wind the awning out further if the arm is in the way. Securing bolts through these holes is the last step to securely mounting the awning to the vehicle!
The centre bracket was attached to the timber slightly too low - some rubber strips were used to fill the gap and keep the awning straight.
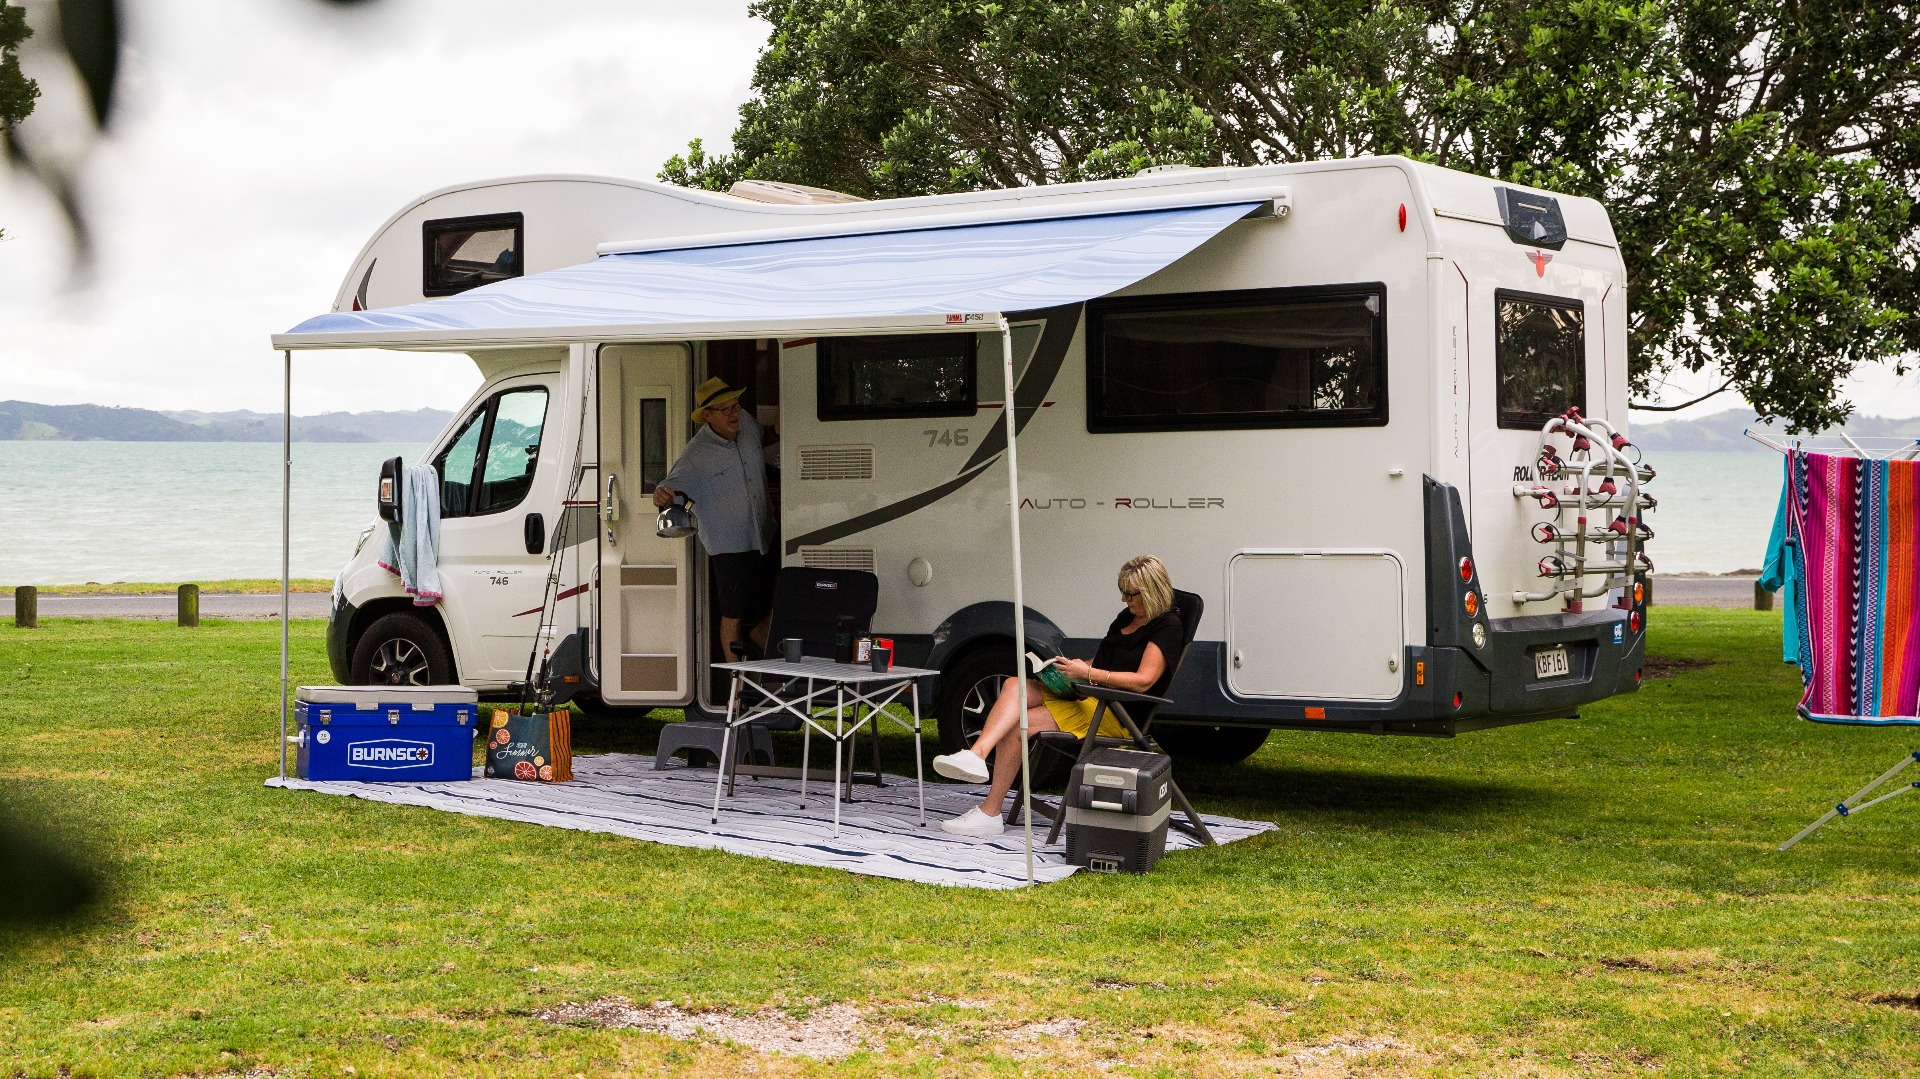
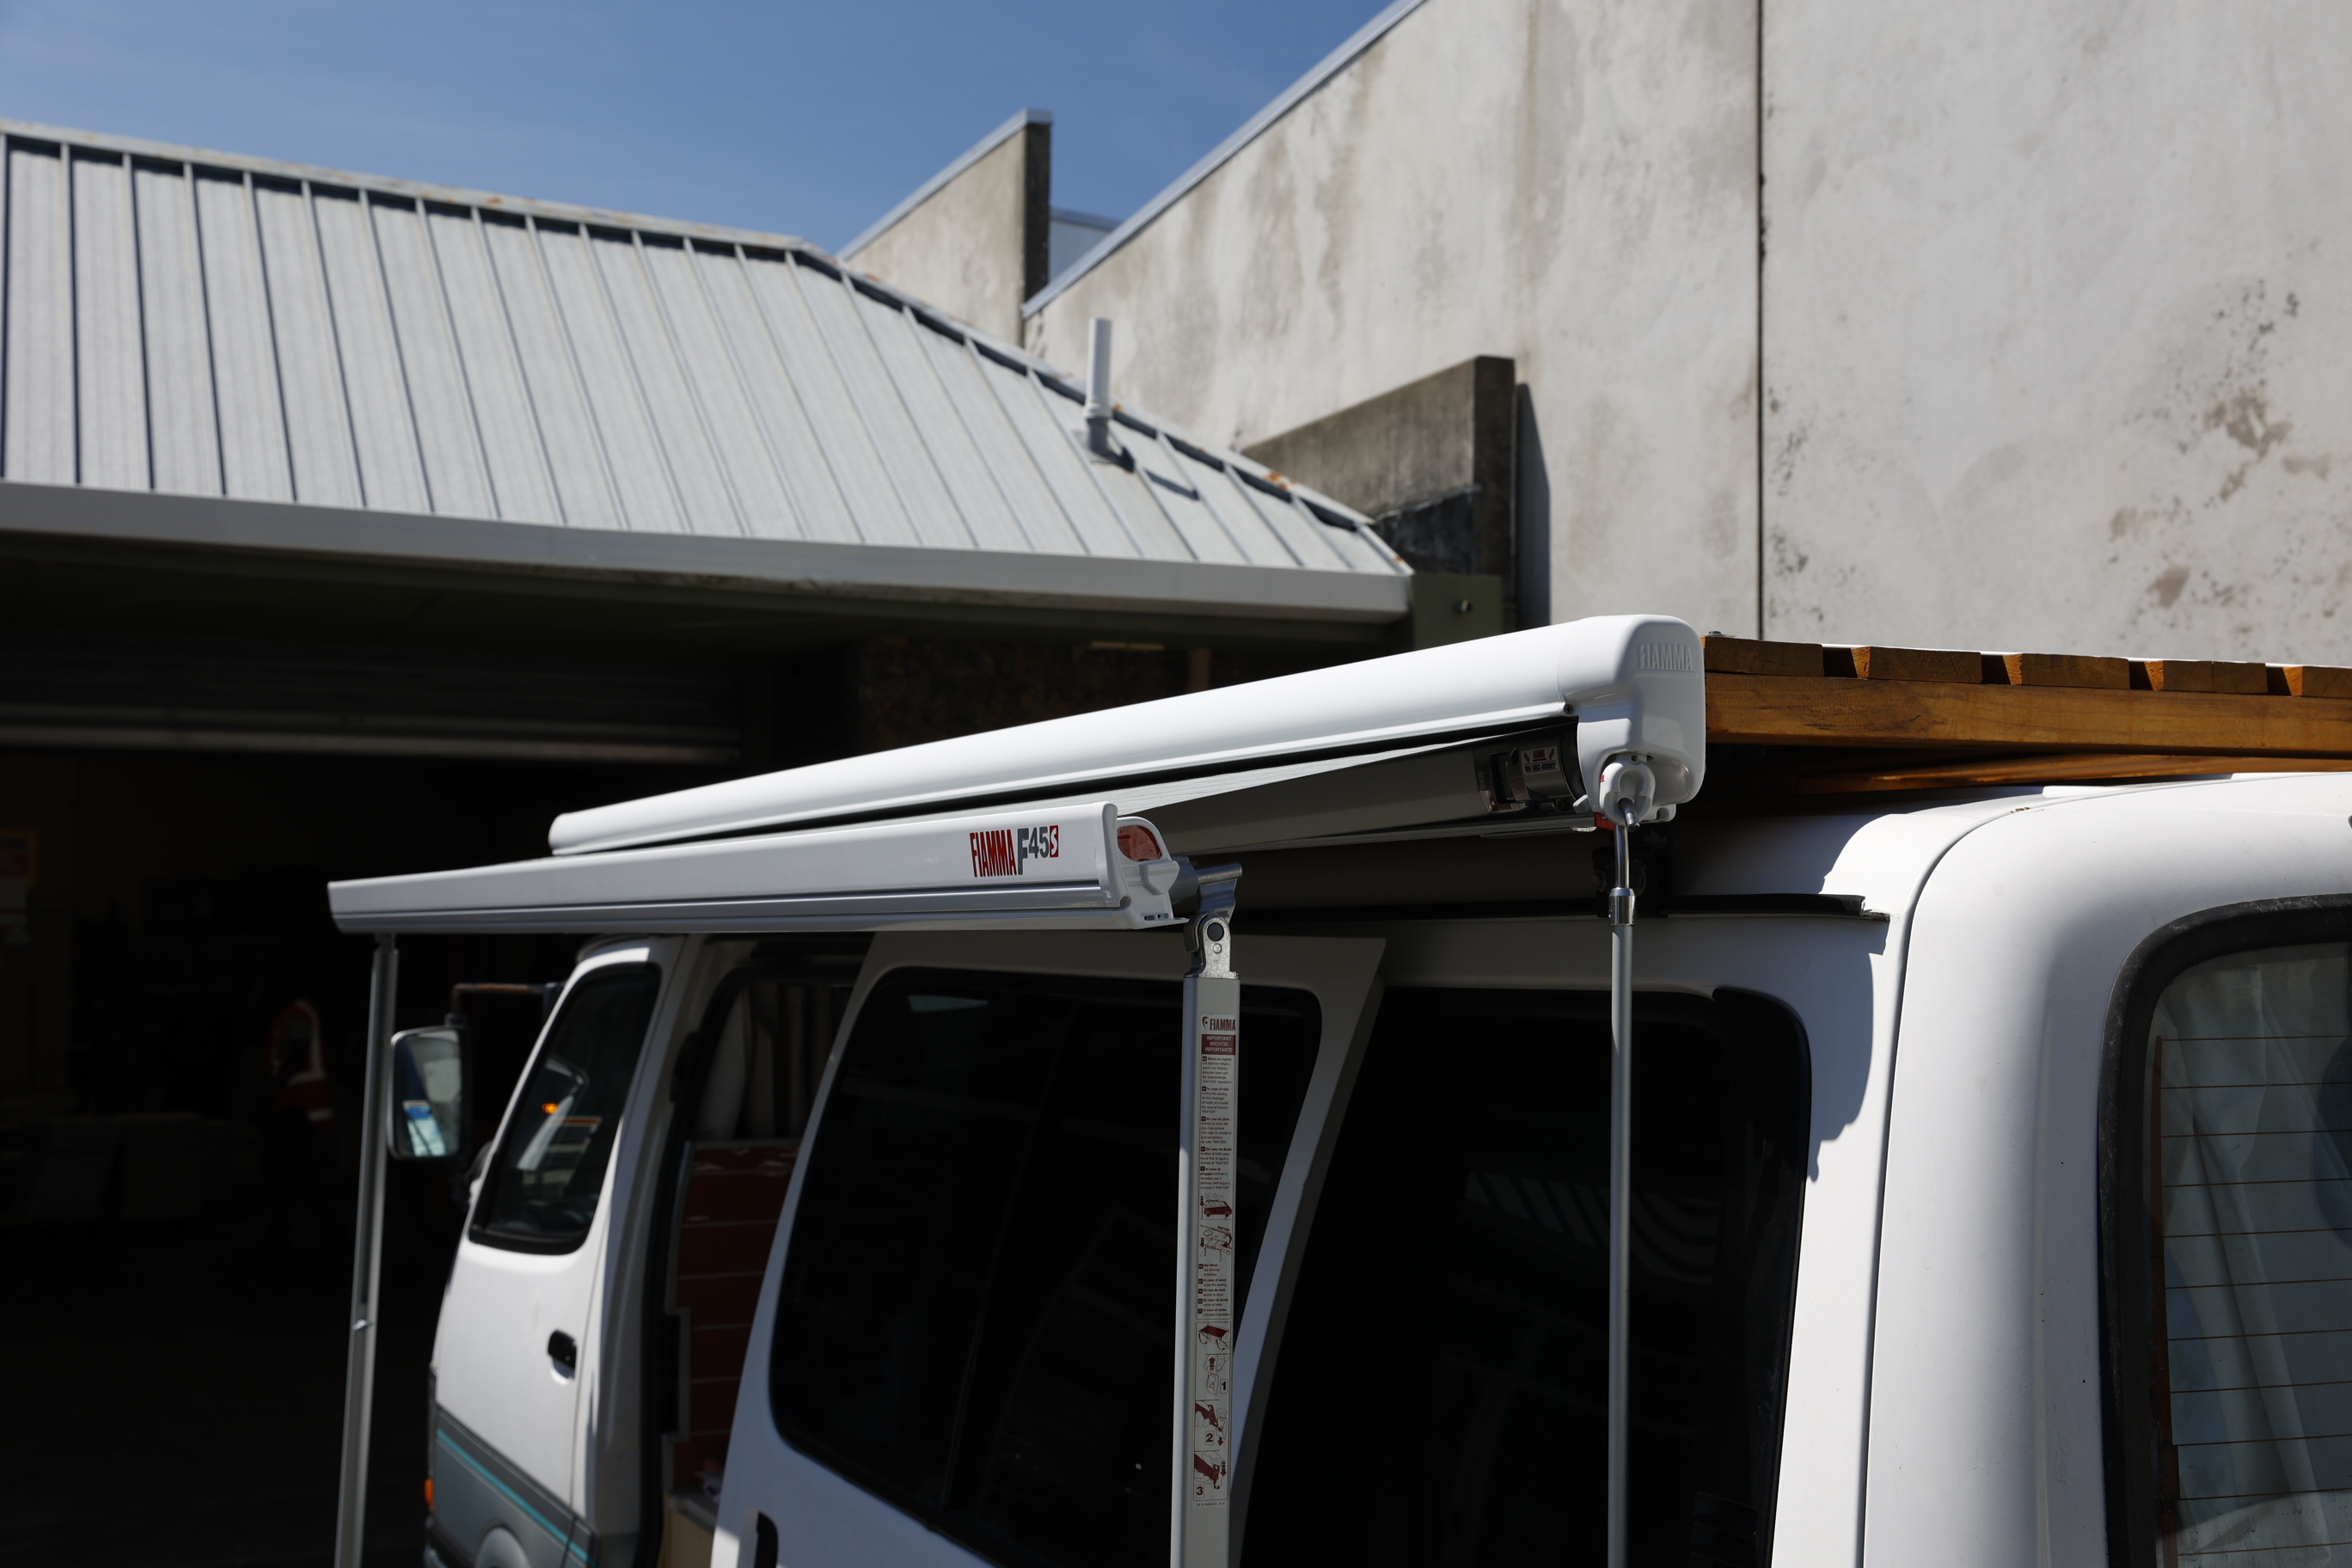
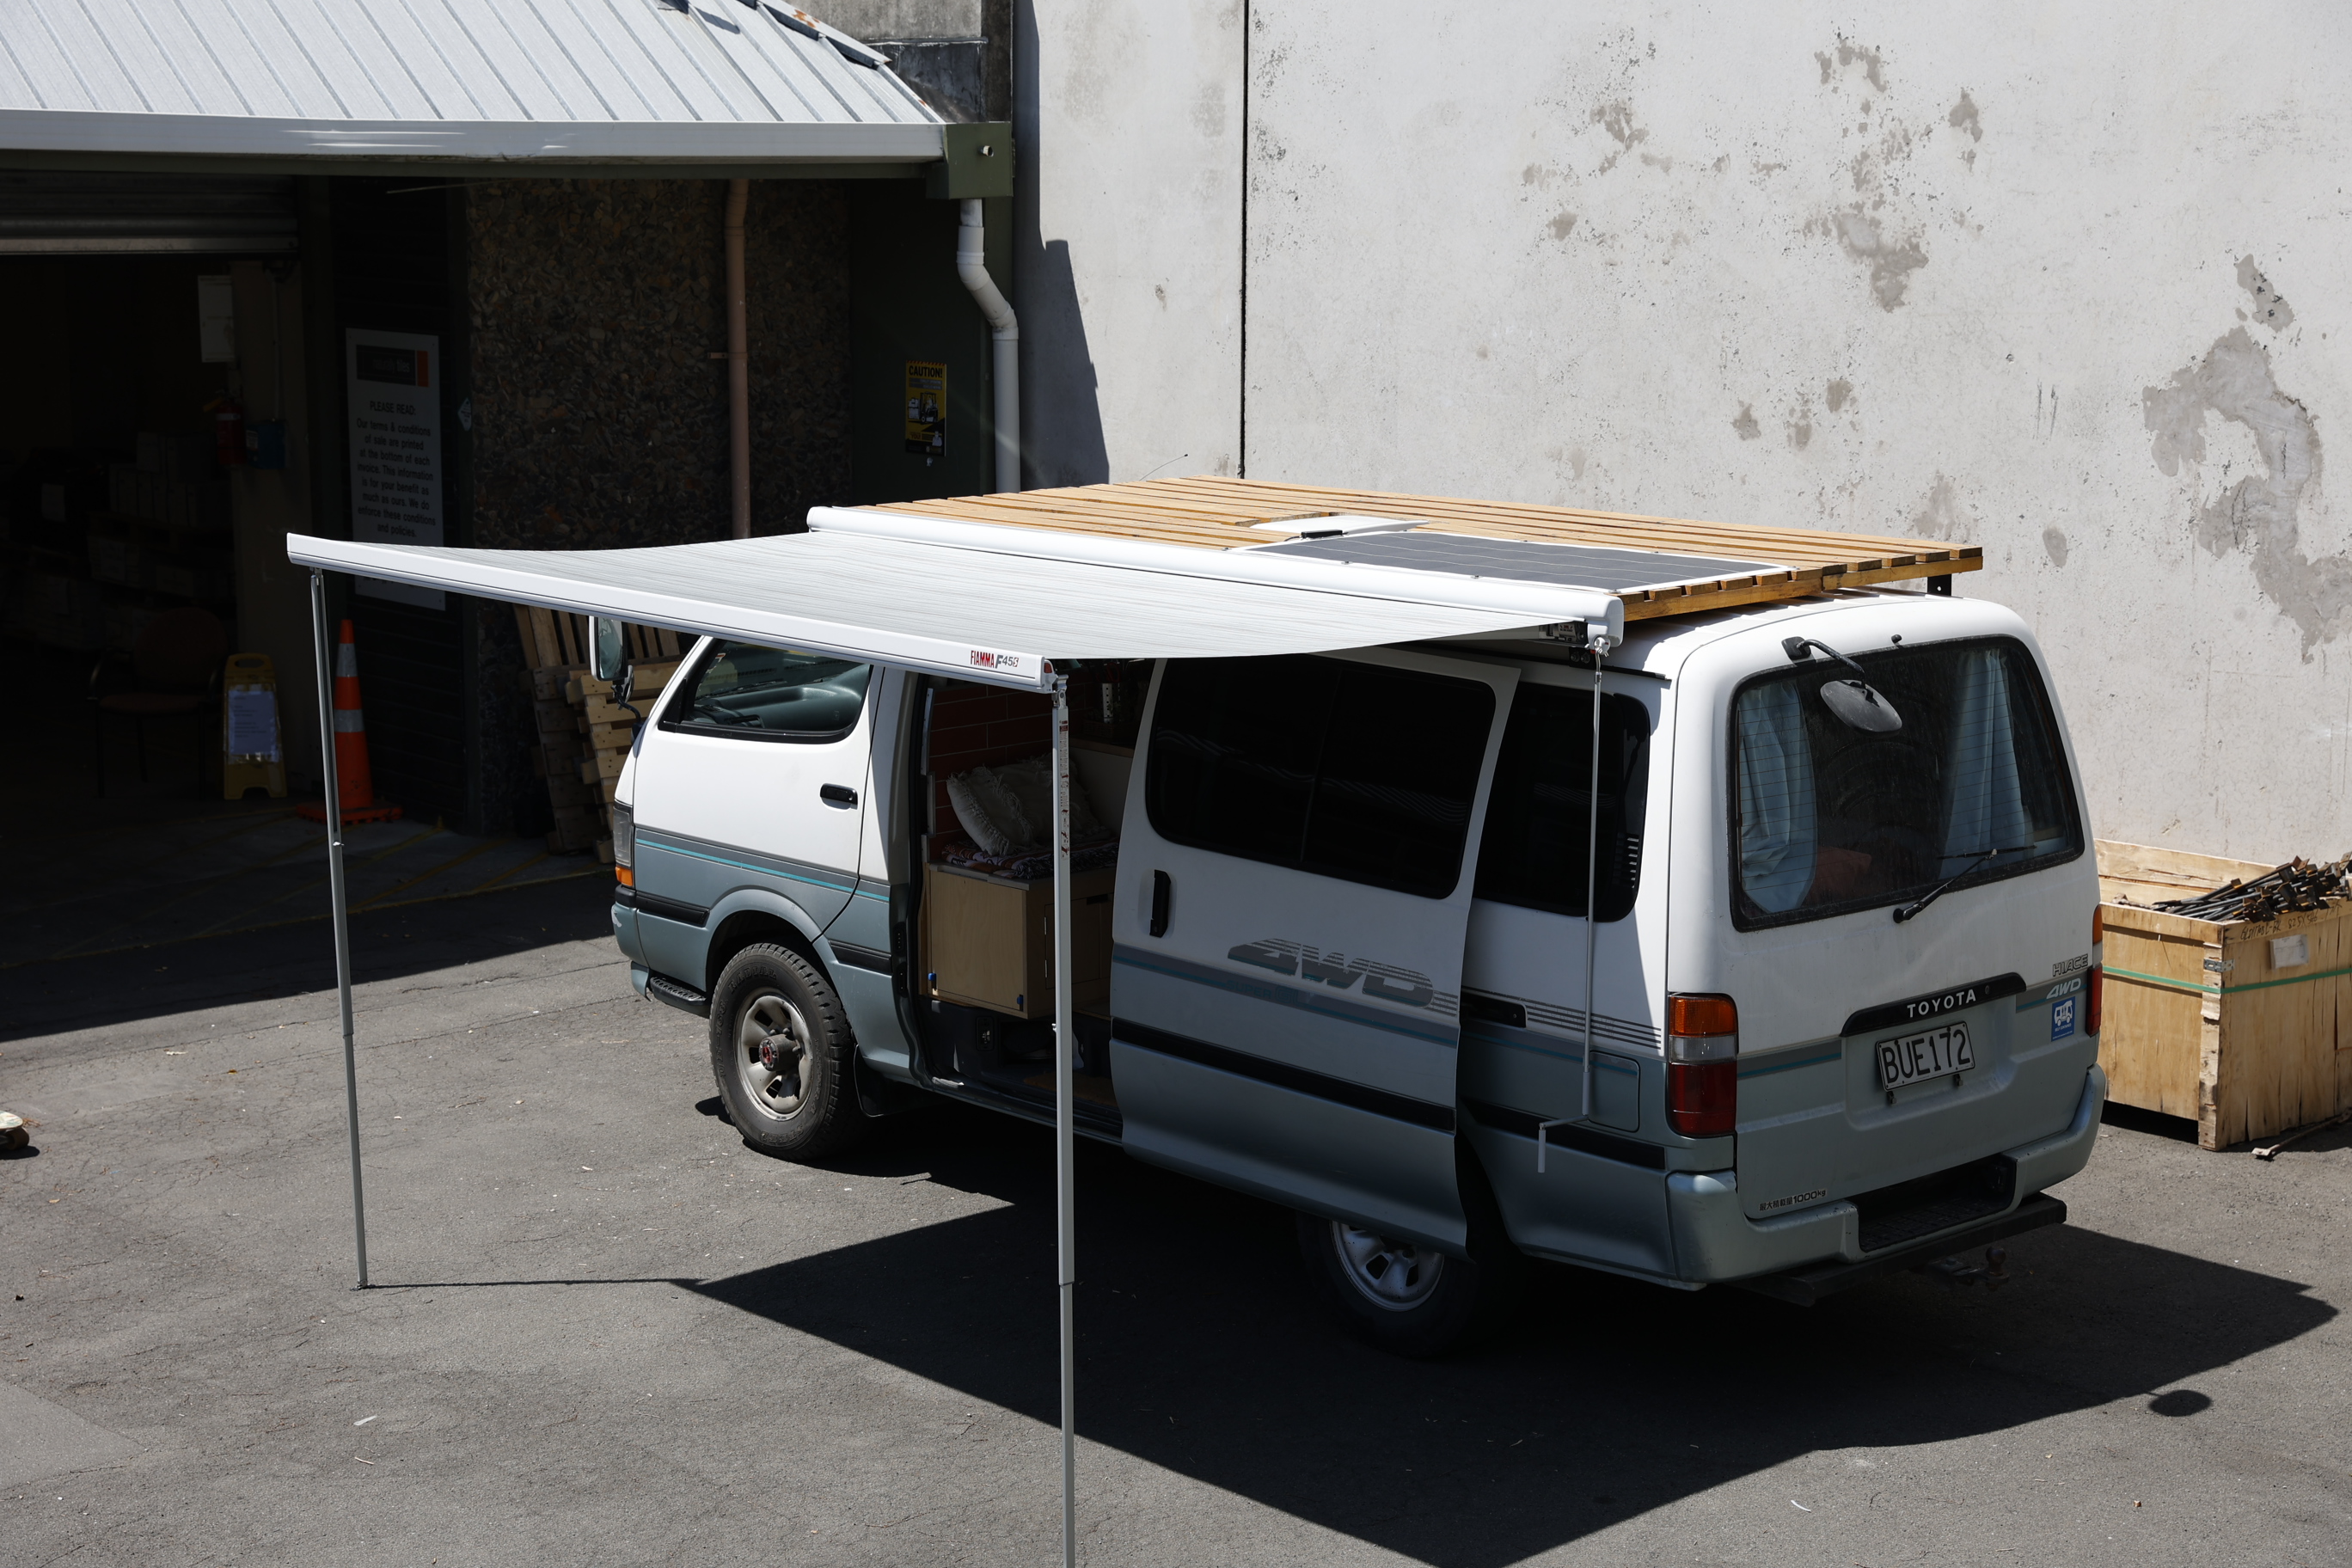
Step 3: Wind Out and Enjoy!
With the body of the awning properly secured, you can go ahead and wind the canvas out fully. You’ll need to reposition and adjust the height of the legs as it goes out, but this is easily done with a quality awning like this. If it’s a lovely calm day, you don’t need to worry about anything else - the awning is perfectly fine being out with the legs just sitting on the ground.
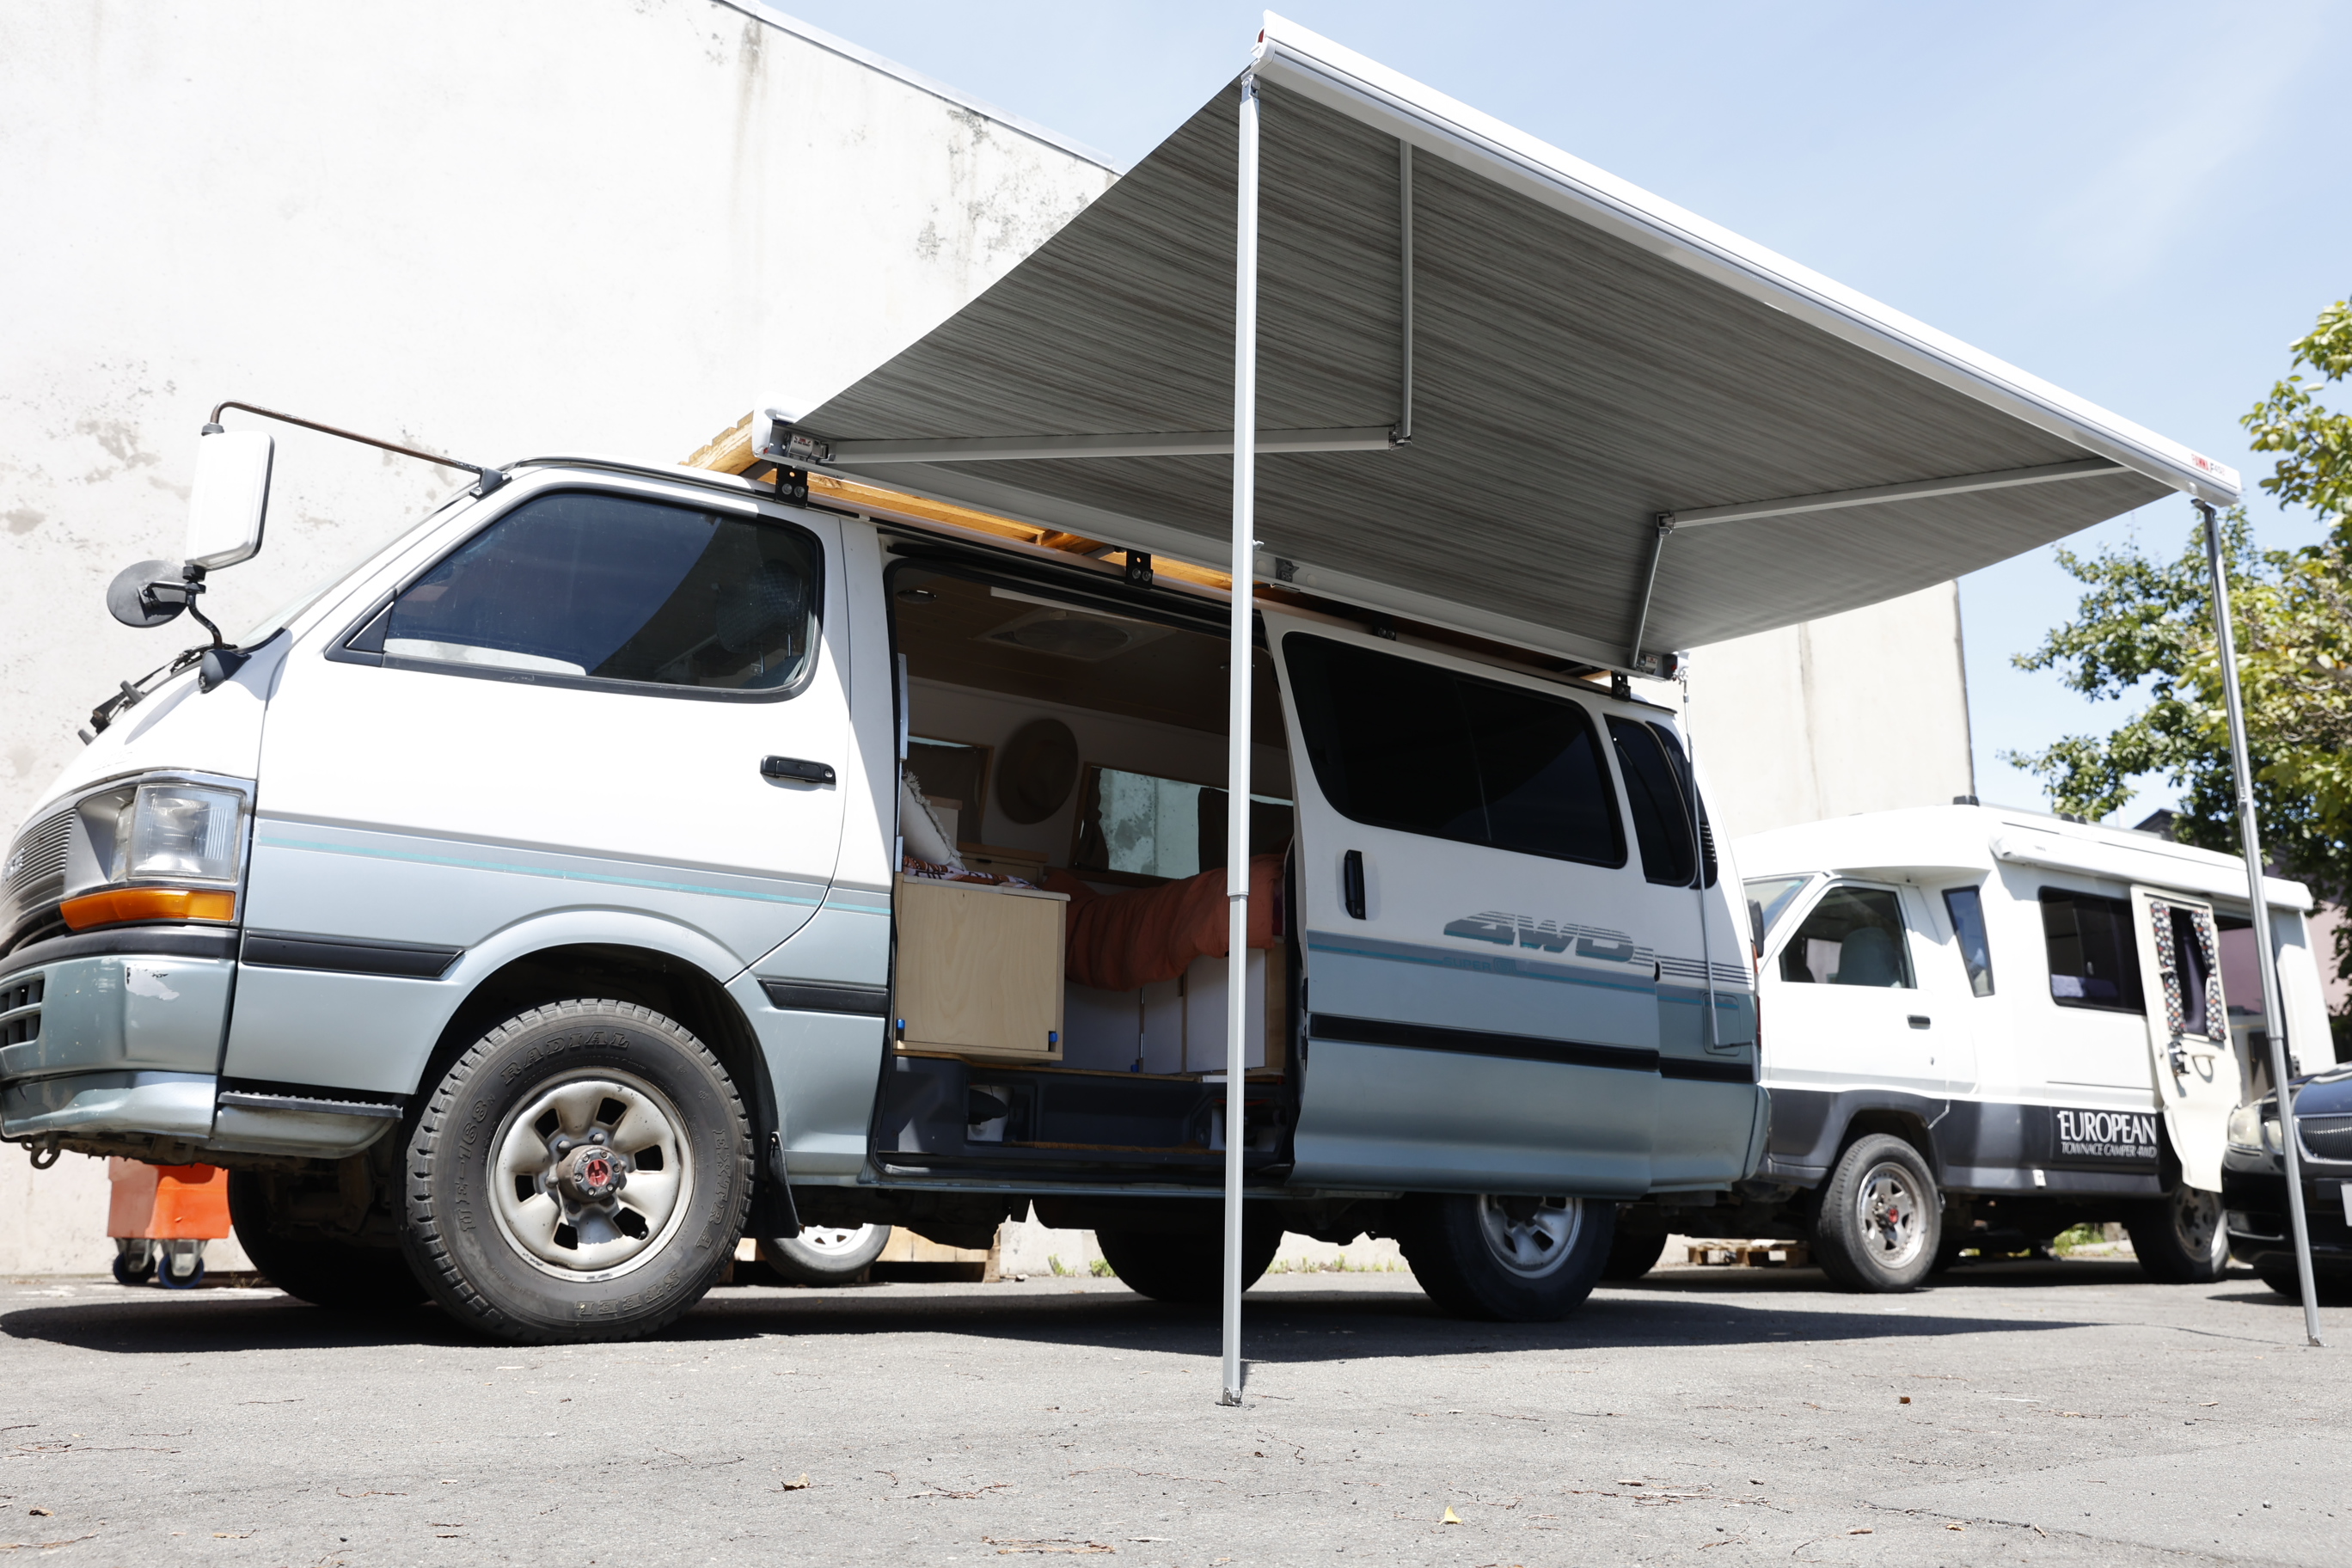
For added safety and if the ground you’re parked on allows, use the supplied pegs to secure the feet and lock in the awning legs.
Step 4 (Optional): Vehicle Leg Brackets
The Fiamma awning is supplied with additional brackets that are used to secure the legs to the body of the vehicle. With the brackets attached to the van, a clip lifts up allowing the feet to slide inside the bracket. Replacing the clip locks the feet in provides a strong mounting point regardless of the ground you park on - great for stony, sandy or parkingloty campsites!


We were only test fitting the mount in the above images, it appears the best place to attach it would be the lower edge of the body where the feet will sit in easier and put less pressure on the mount.
Summary:
It really is that simple to attach a quality awning to your camper, caravan or motorhome! With many different awning types, each with versatile mounting options, you’re bound to find the right one for you. After reading this article you should feel confident to purchase and install your own awning, taking your adventure vehicle to the next level!